My Bargain Boho Lamp Makeover
My Bargain Boho Lamp Makeover
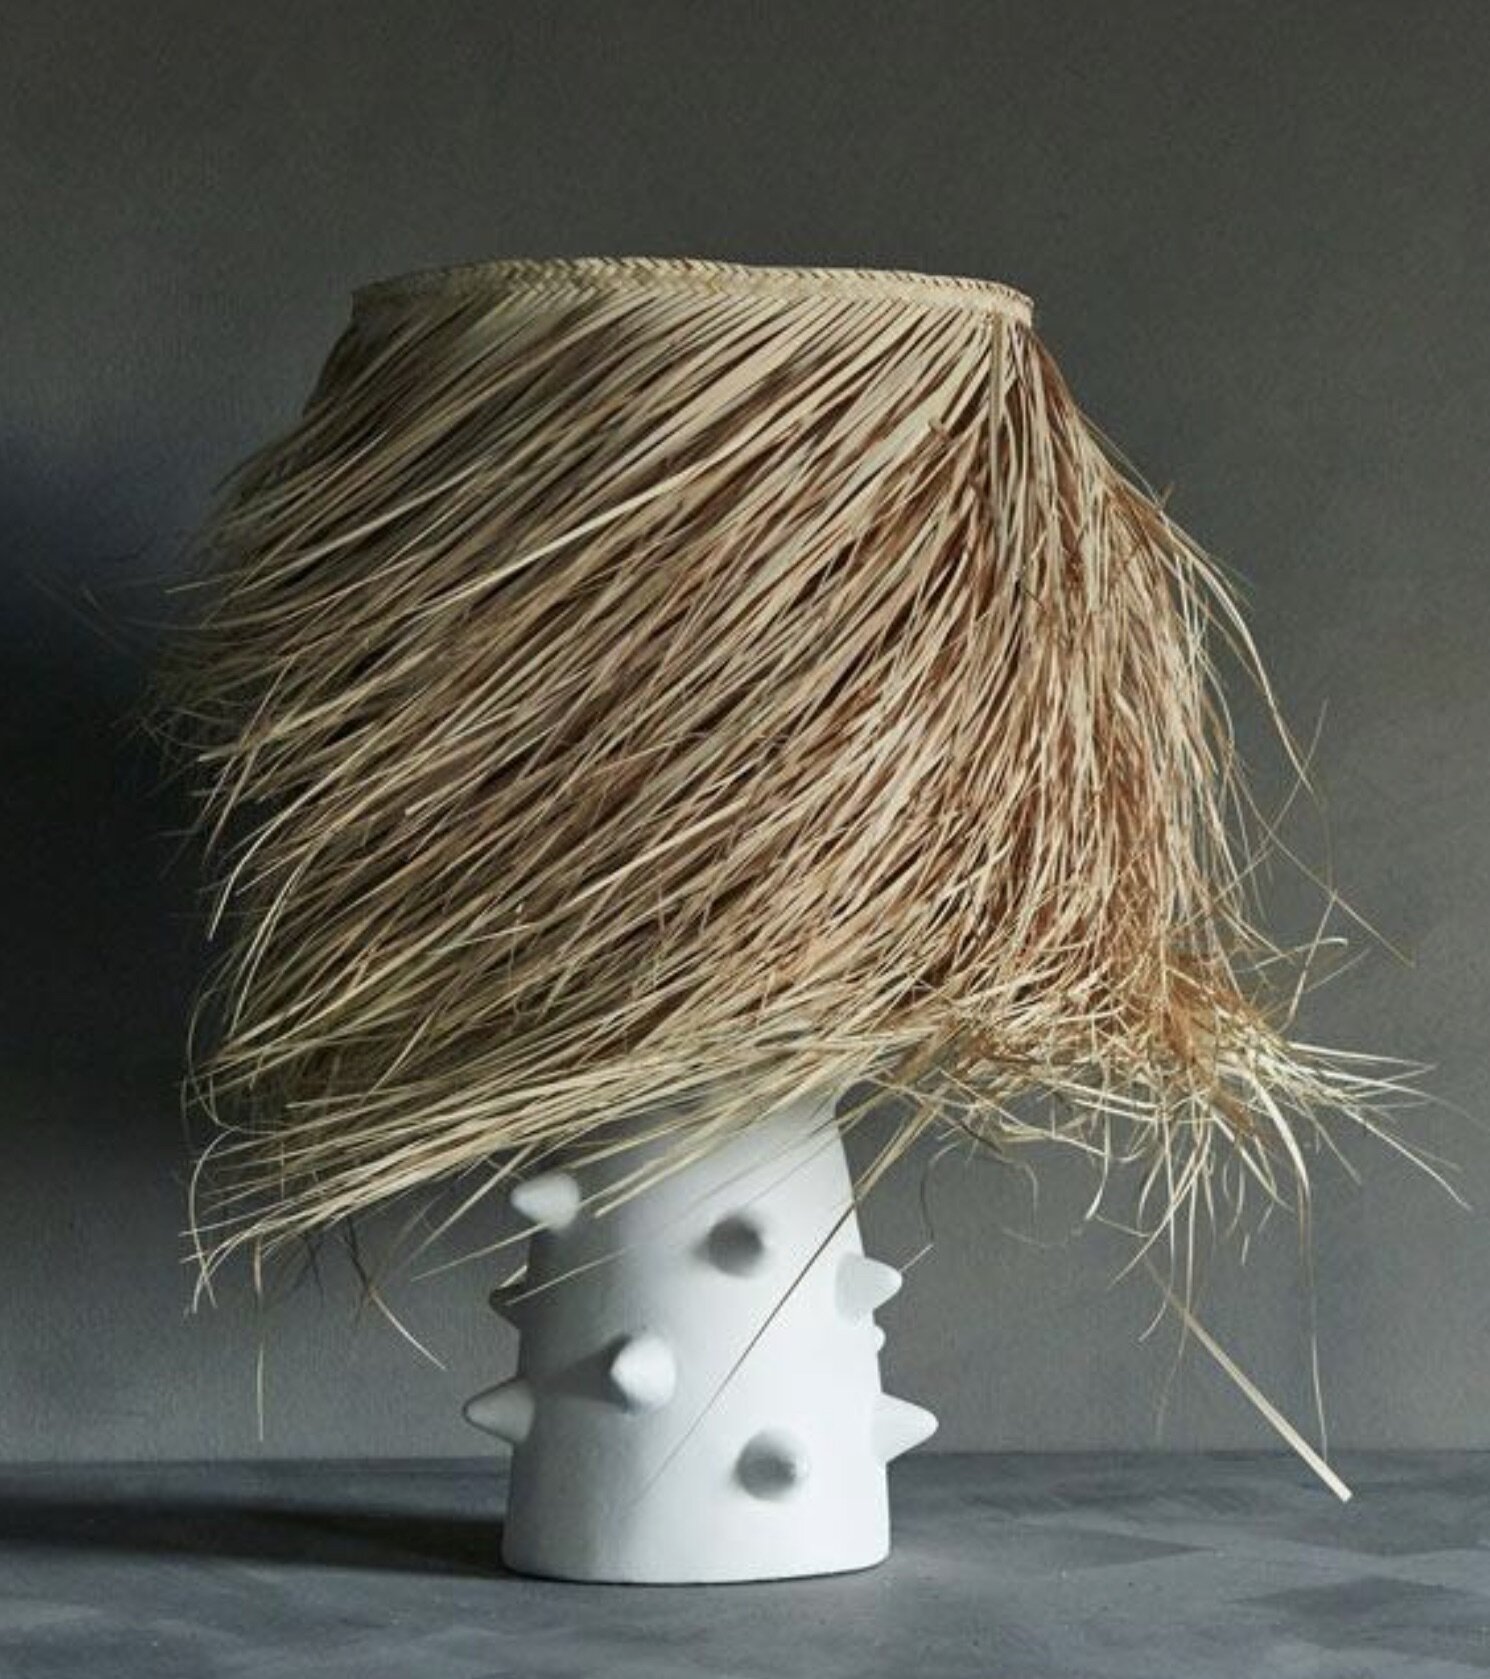
I love beautiful lighting but why oh why are all the lamps I want just SO expensive?! I’ve lusted after the Abigail Ahern Shaggy Palm lamp for years but at £430 for the medium size it was way out of my budget. So I thought I’ll have go at making my own version, as you do.
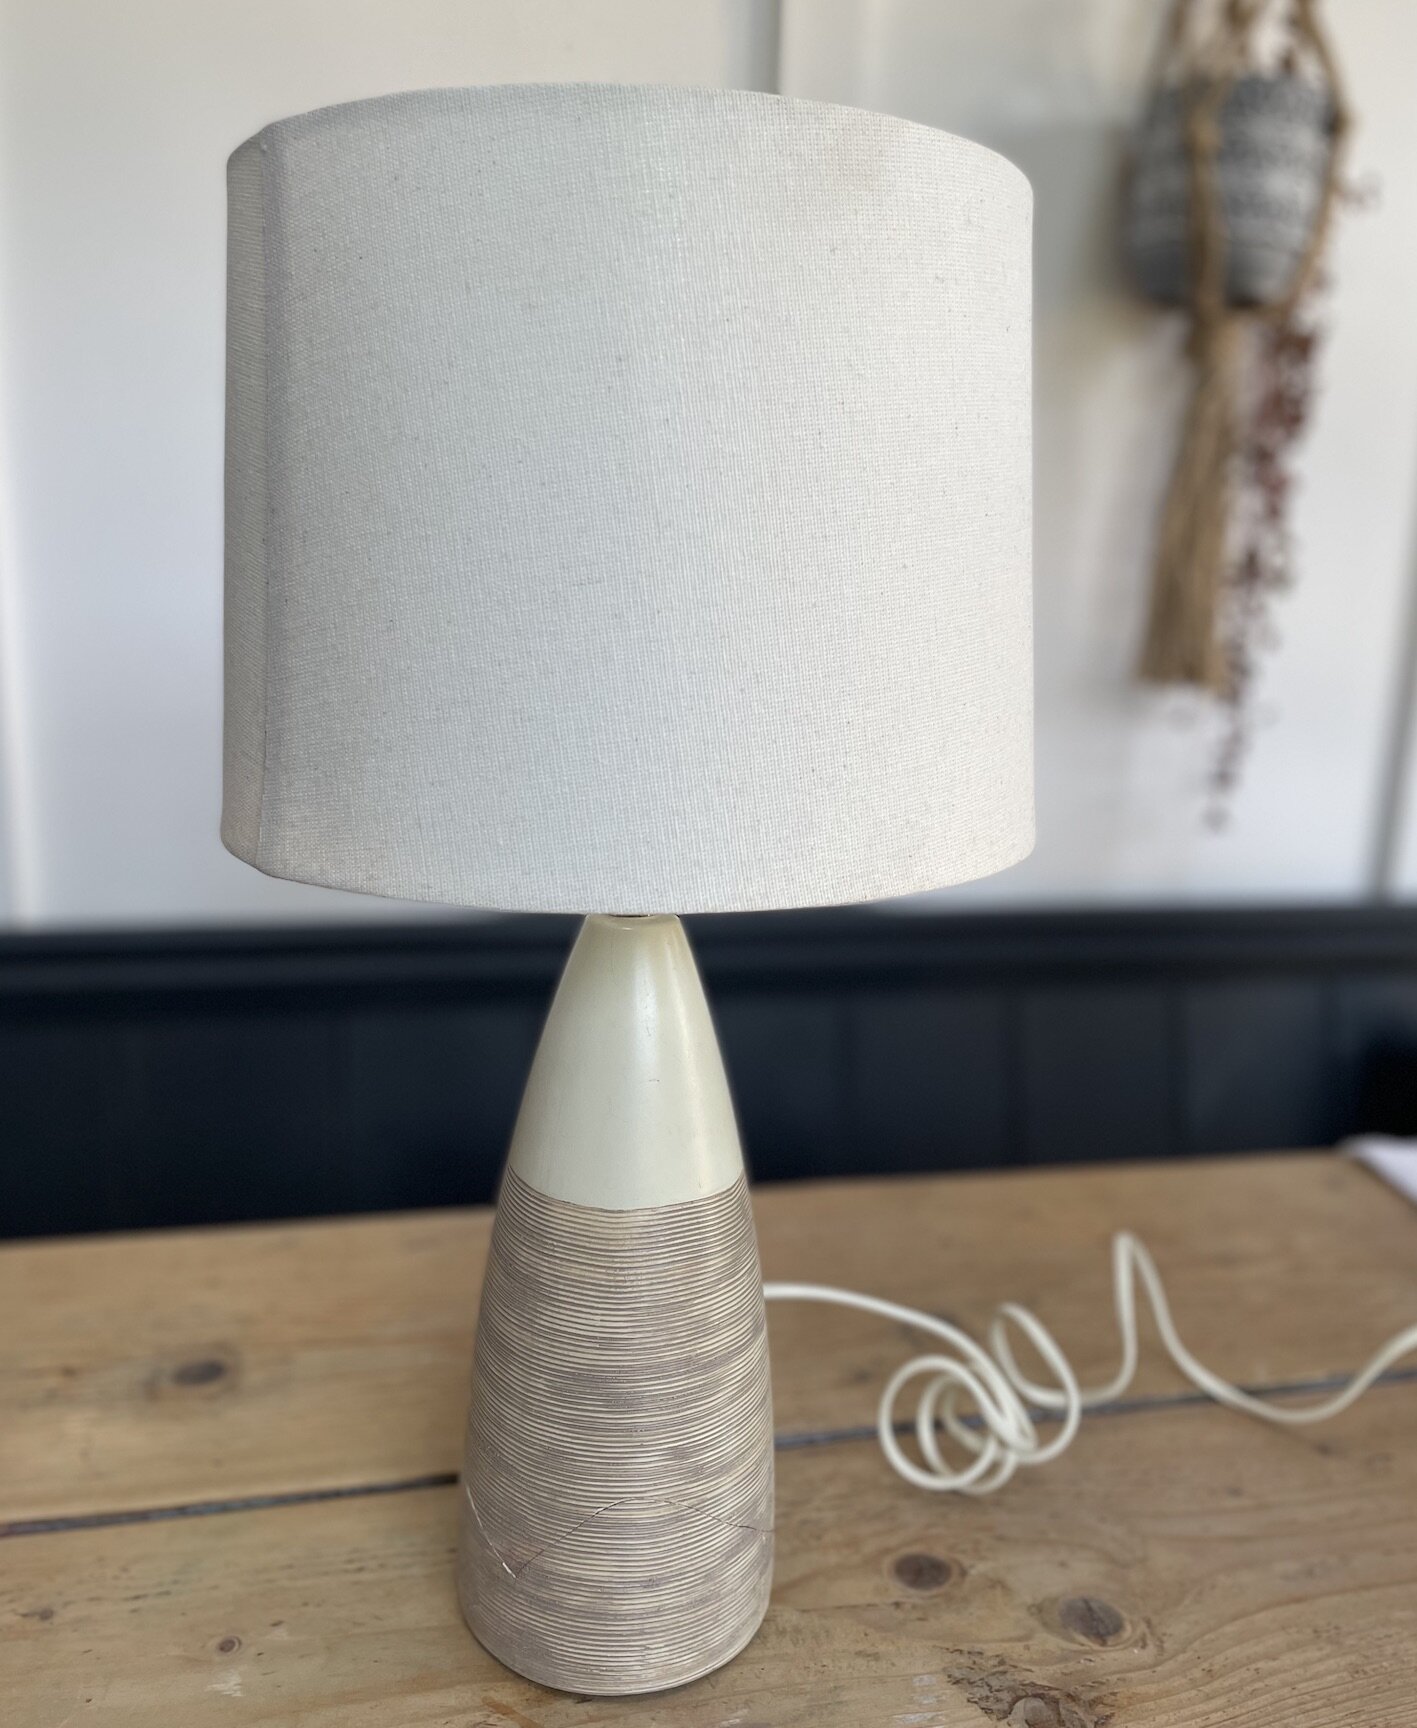
First of all to source the basic materials. I found a suitable shaped used and very dated lamp on Ebay at the bargain price of a pound. Facebook Marketplace and your local charity shops would all be good hunting grounds for household items you can give a makeover to.
Now to find the palm fronds, this proved a little trickier. I couldn’t find the exact same ones as on the original lamp so sustituted them by using a wall hanging I had that I’d never found a space for, you can buy it here. And I also bought some dried palm fronds from Little Deer. I used 8 fronds so bought 2 bunches. With hindsight I could have used more of the wall hanging and just bought the one bunch as these were quite pricy at £29 a bunch, BUT still cheaper than the original lamp!

So once you’ve got your lamp to transform and your palm fronds here are the rest of the materials you’ll need -
Primer
Emulsion paint in the colour of your choice
Air Dry Clay - I used Das which you can get here
A glue gun and glue sticks
Bicarbonate of Soda
A length of jute braid
PVA glue
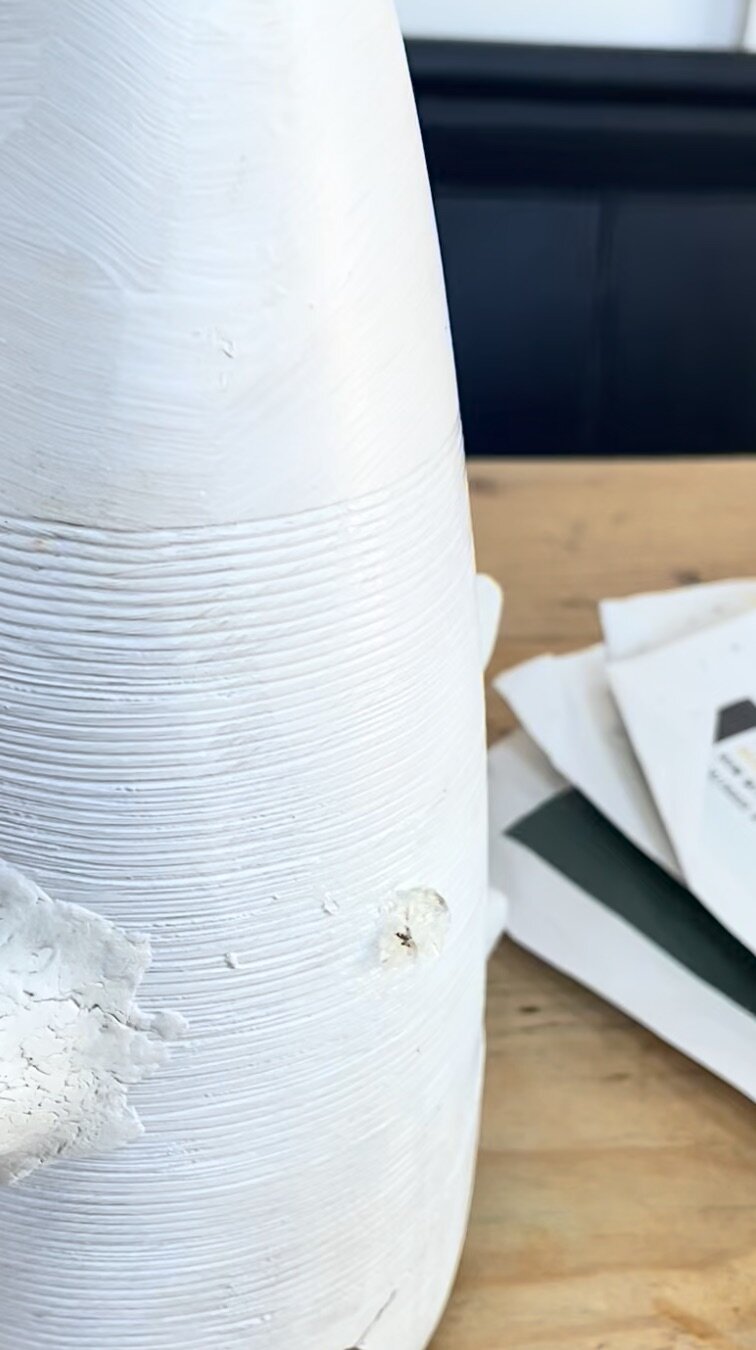
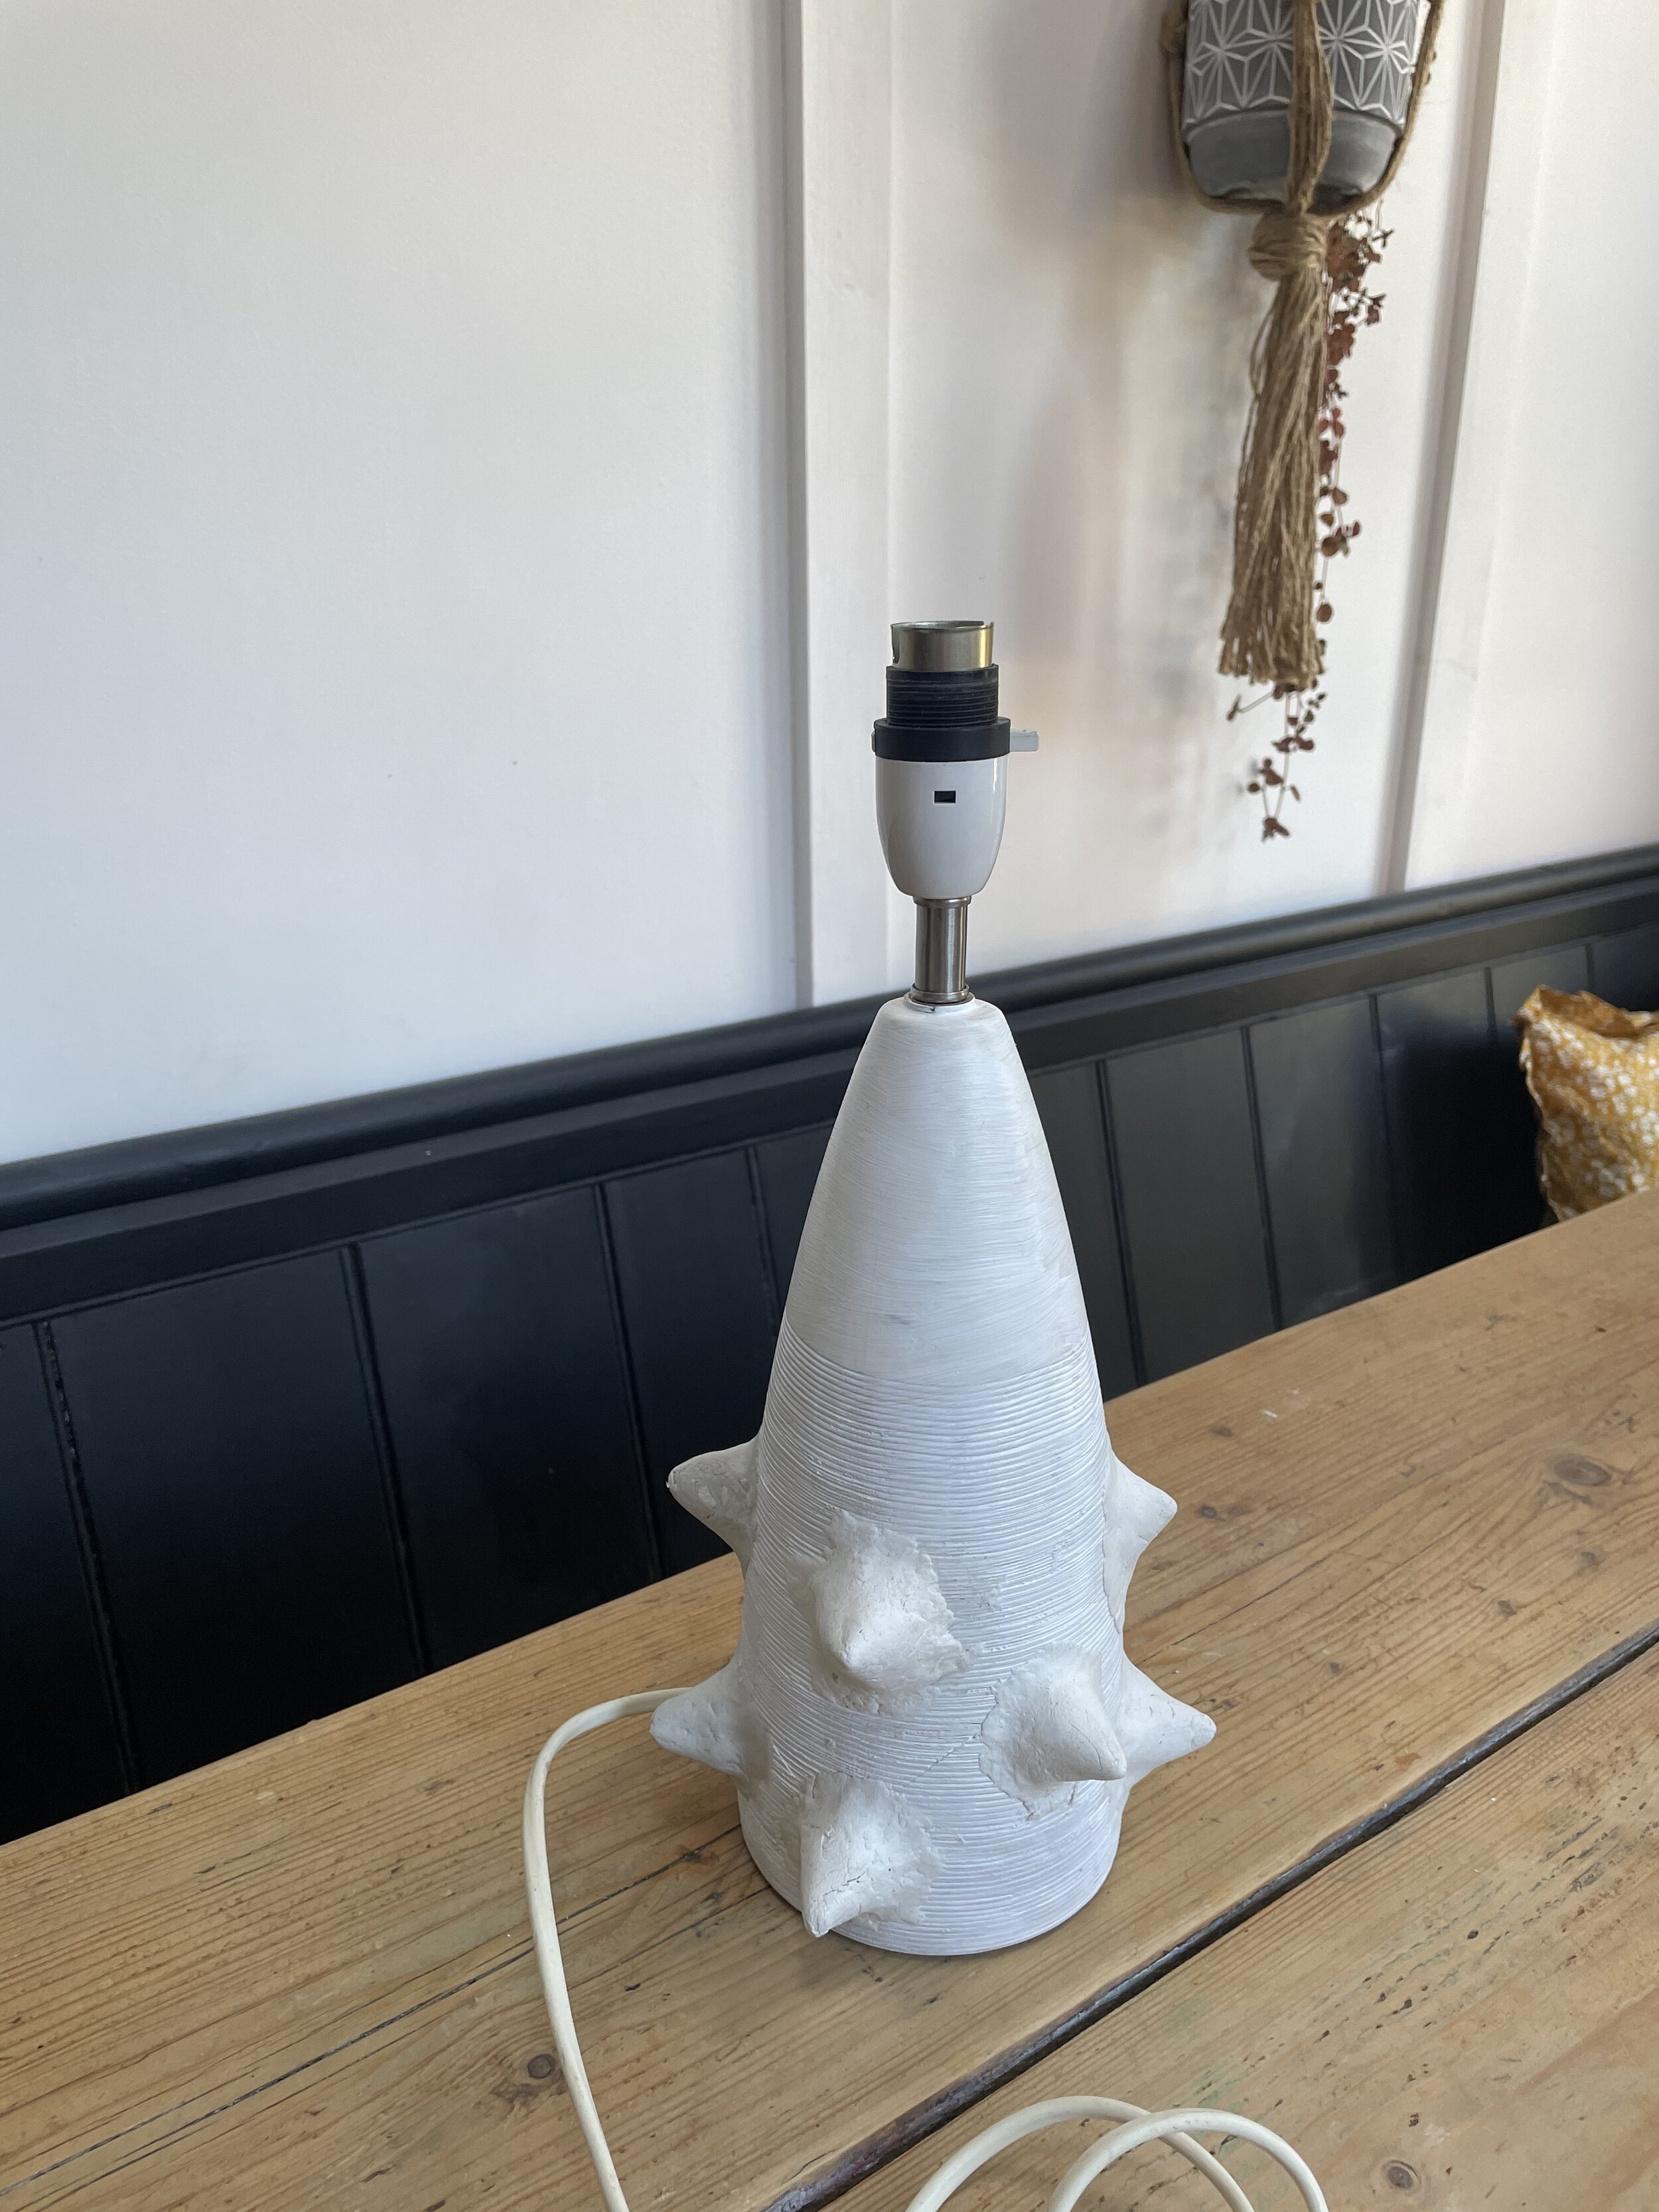
First step you’ll need to apply a primer to your lamp base, this will prepare the surface to attach the clay nodules and then the paint after.
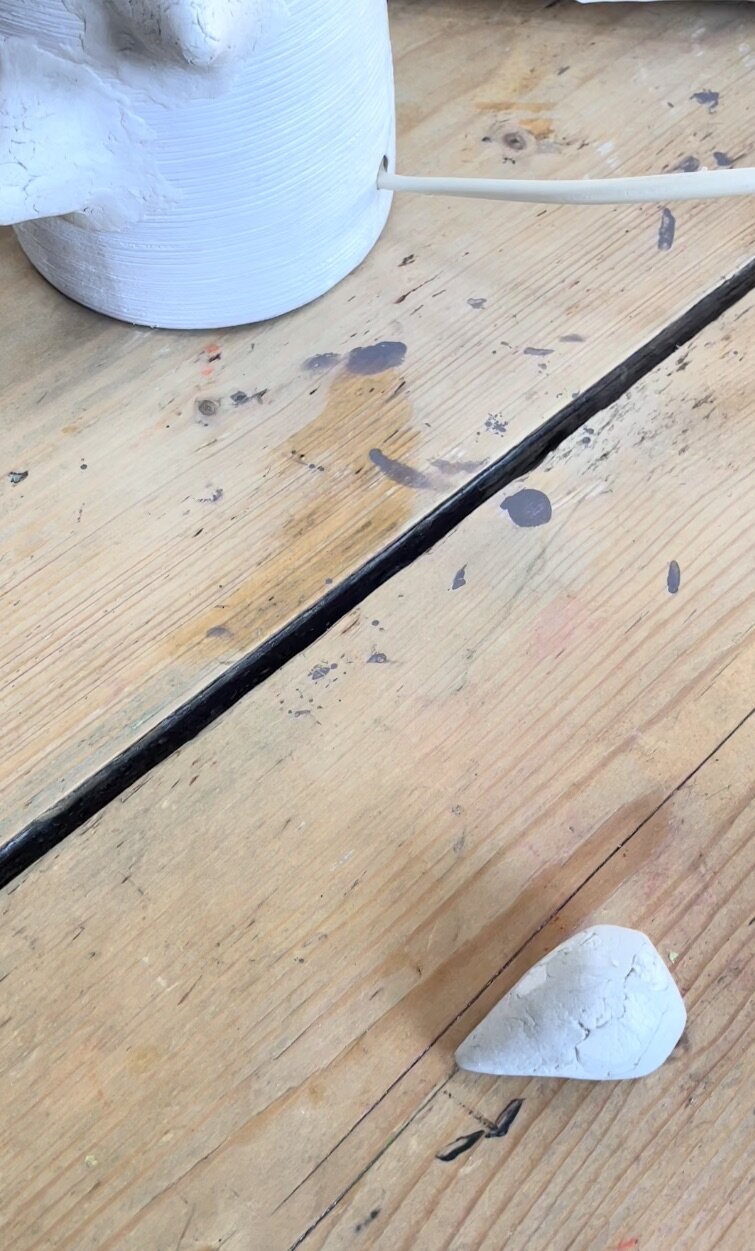
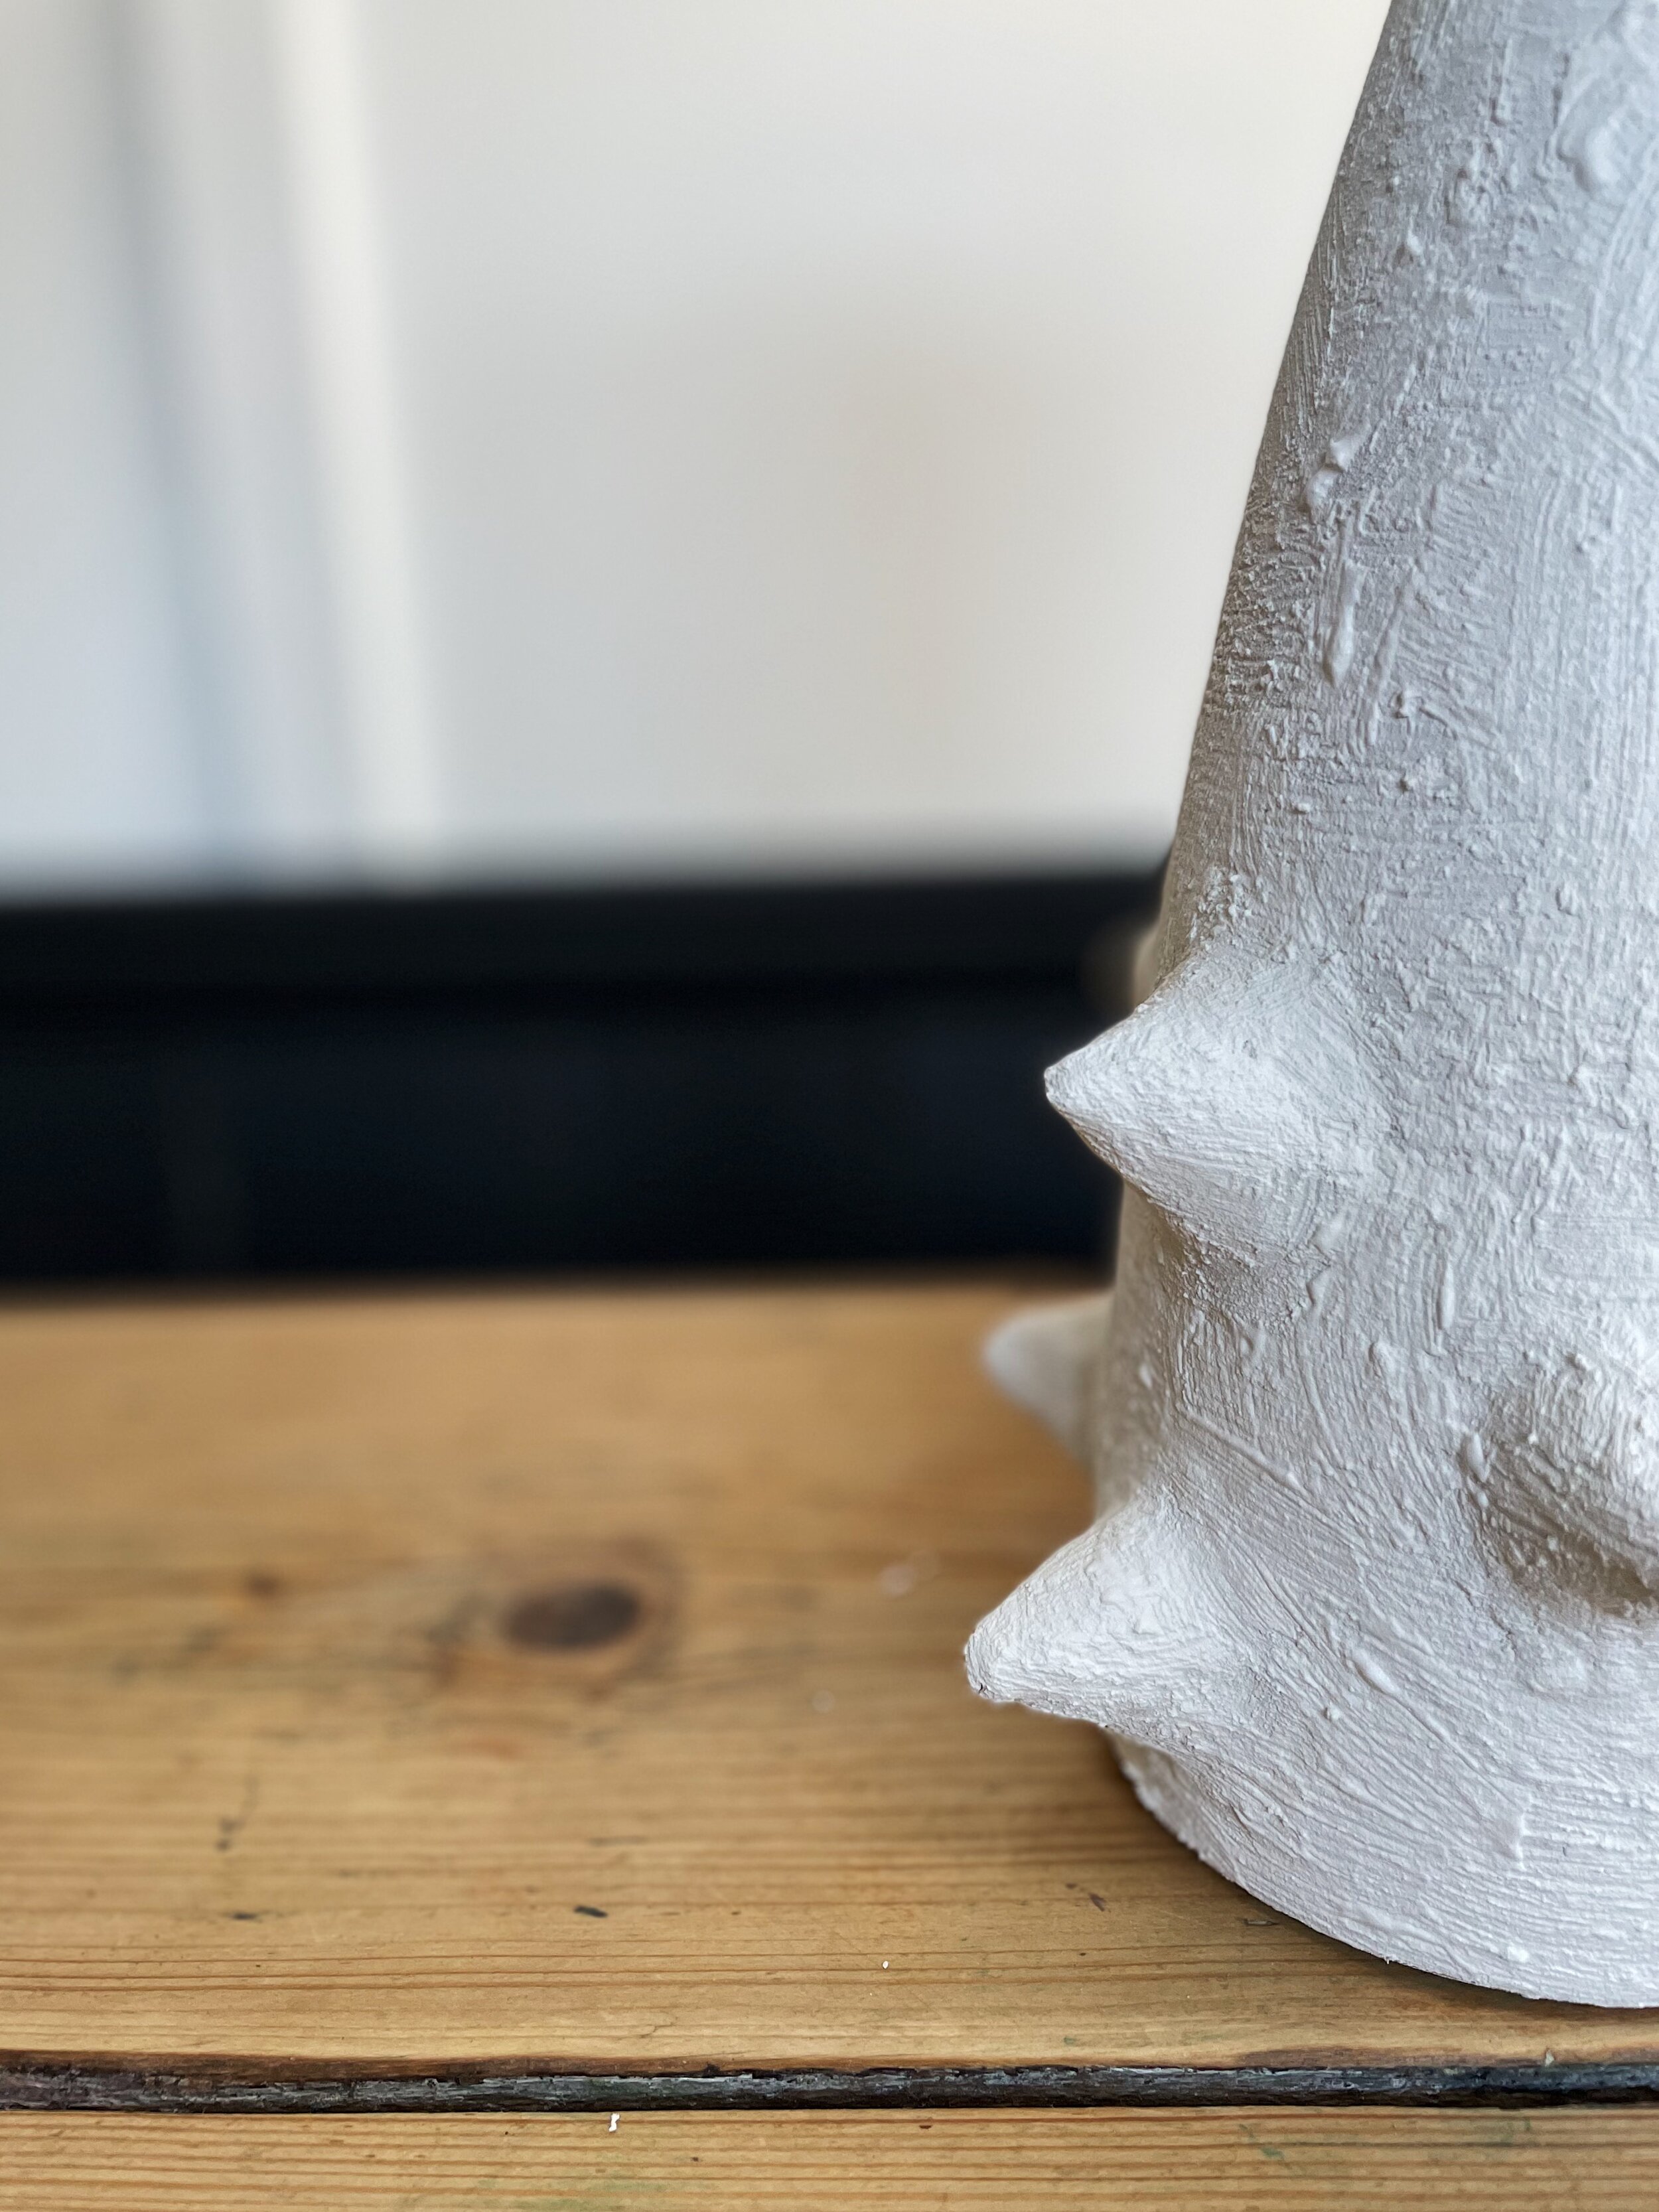
Then start making the pointy bits. Air clay is brilliant, so many uses and it does exactly as described. Once you’ve made your nodules just leave them to dry. I was making this outside on a warm day though so they dried incredibly quickly and I stuck them on pretty much staight away. You can use your glue gun to do this, though I used some Gorilla glue. You’ll need to really smooth down the edges to make the joins as seamless as possible, wetting the clay with a bit of water will help to smooth it on seamlessly to the lamp base surface.
Once they are all attached, and you can do as few or as many as you like. I made mine a bit bigger and more ‘rustic’ looking I guess than the original and only did them on the bottom part of the base (partly because I ran out of clay!)
Leave them till they are nice and dry and then you can start painting the whole base. I mixed plain white emulsion with just a bit of a tester pot I had to get an off white colour and then mixed in my bicarb to get a rough textured paint. The more bicarb you add the thicker and more textural it will be. You want it nice and thick so you can cover up the joins
Once you’ve painted a couple of coats of your textured paint you’re ready to do the shade! I pre painted it a dark grey/brown colour as I didn't wany any of the white shade to be visible, although as it turned out I pretty much covered the whole surface with the palm fronds any way so needn’t have bothered with that step.
First of all you want to cover all your shade with a base layer of leaves. I used the grasses I’d cut off my wall hanging for this. Starting with a layer half way up the shade and attaching them with my glue gun at a 45 degree angle. I then did another layer starting from the top of the shade to ensure all of the shade was covered with the grass. You don’t want to see any of the shade peeking through.
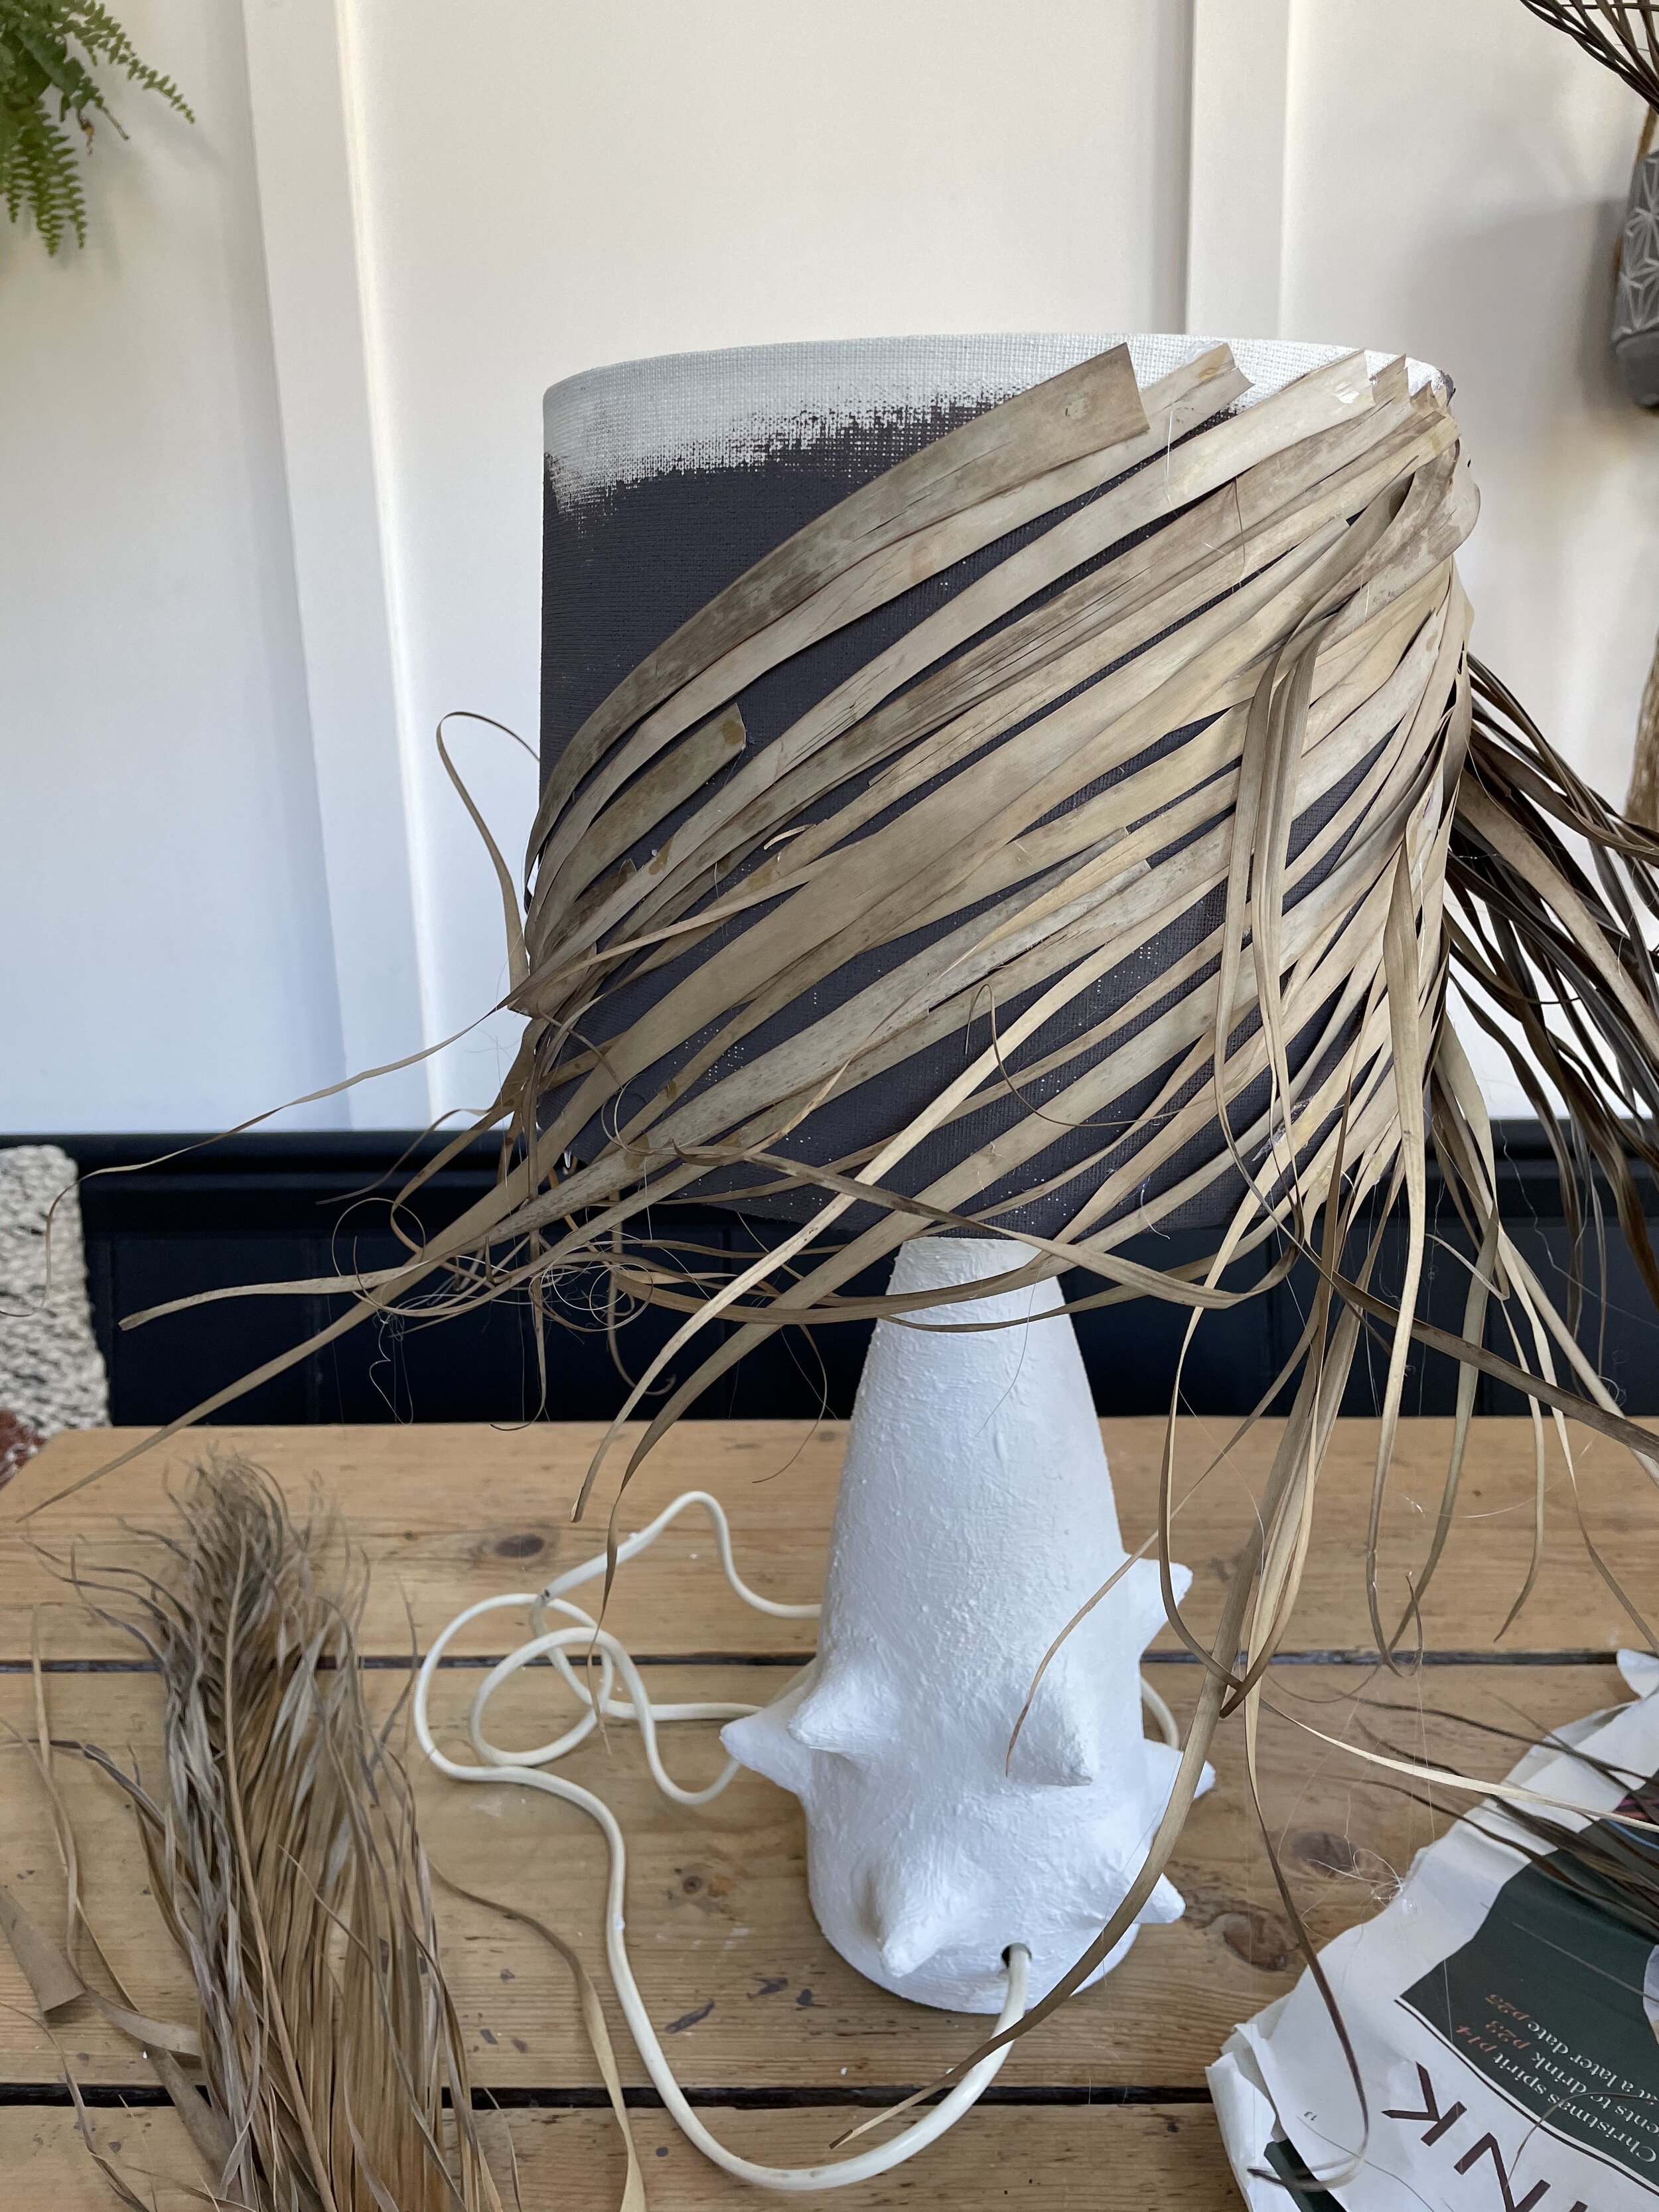
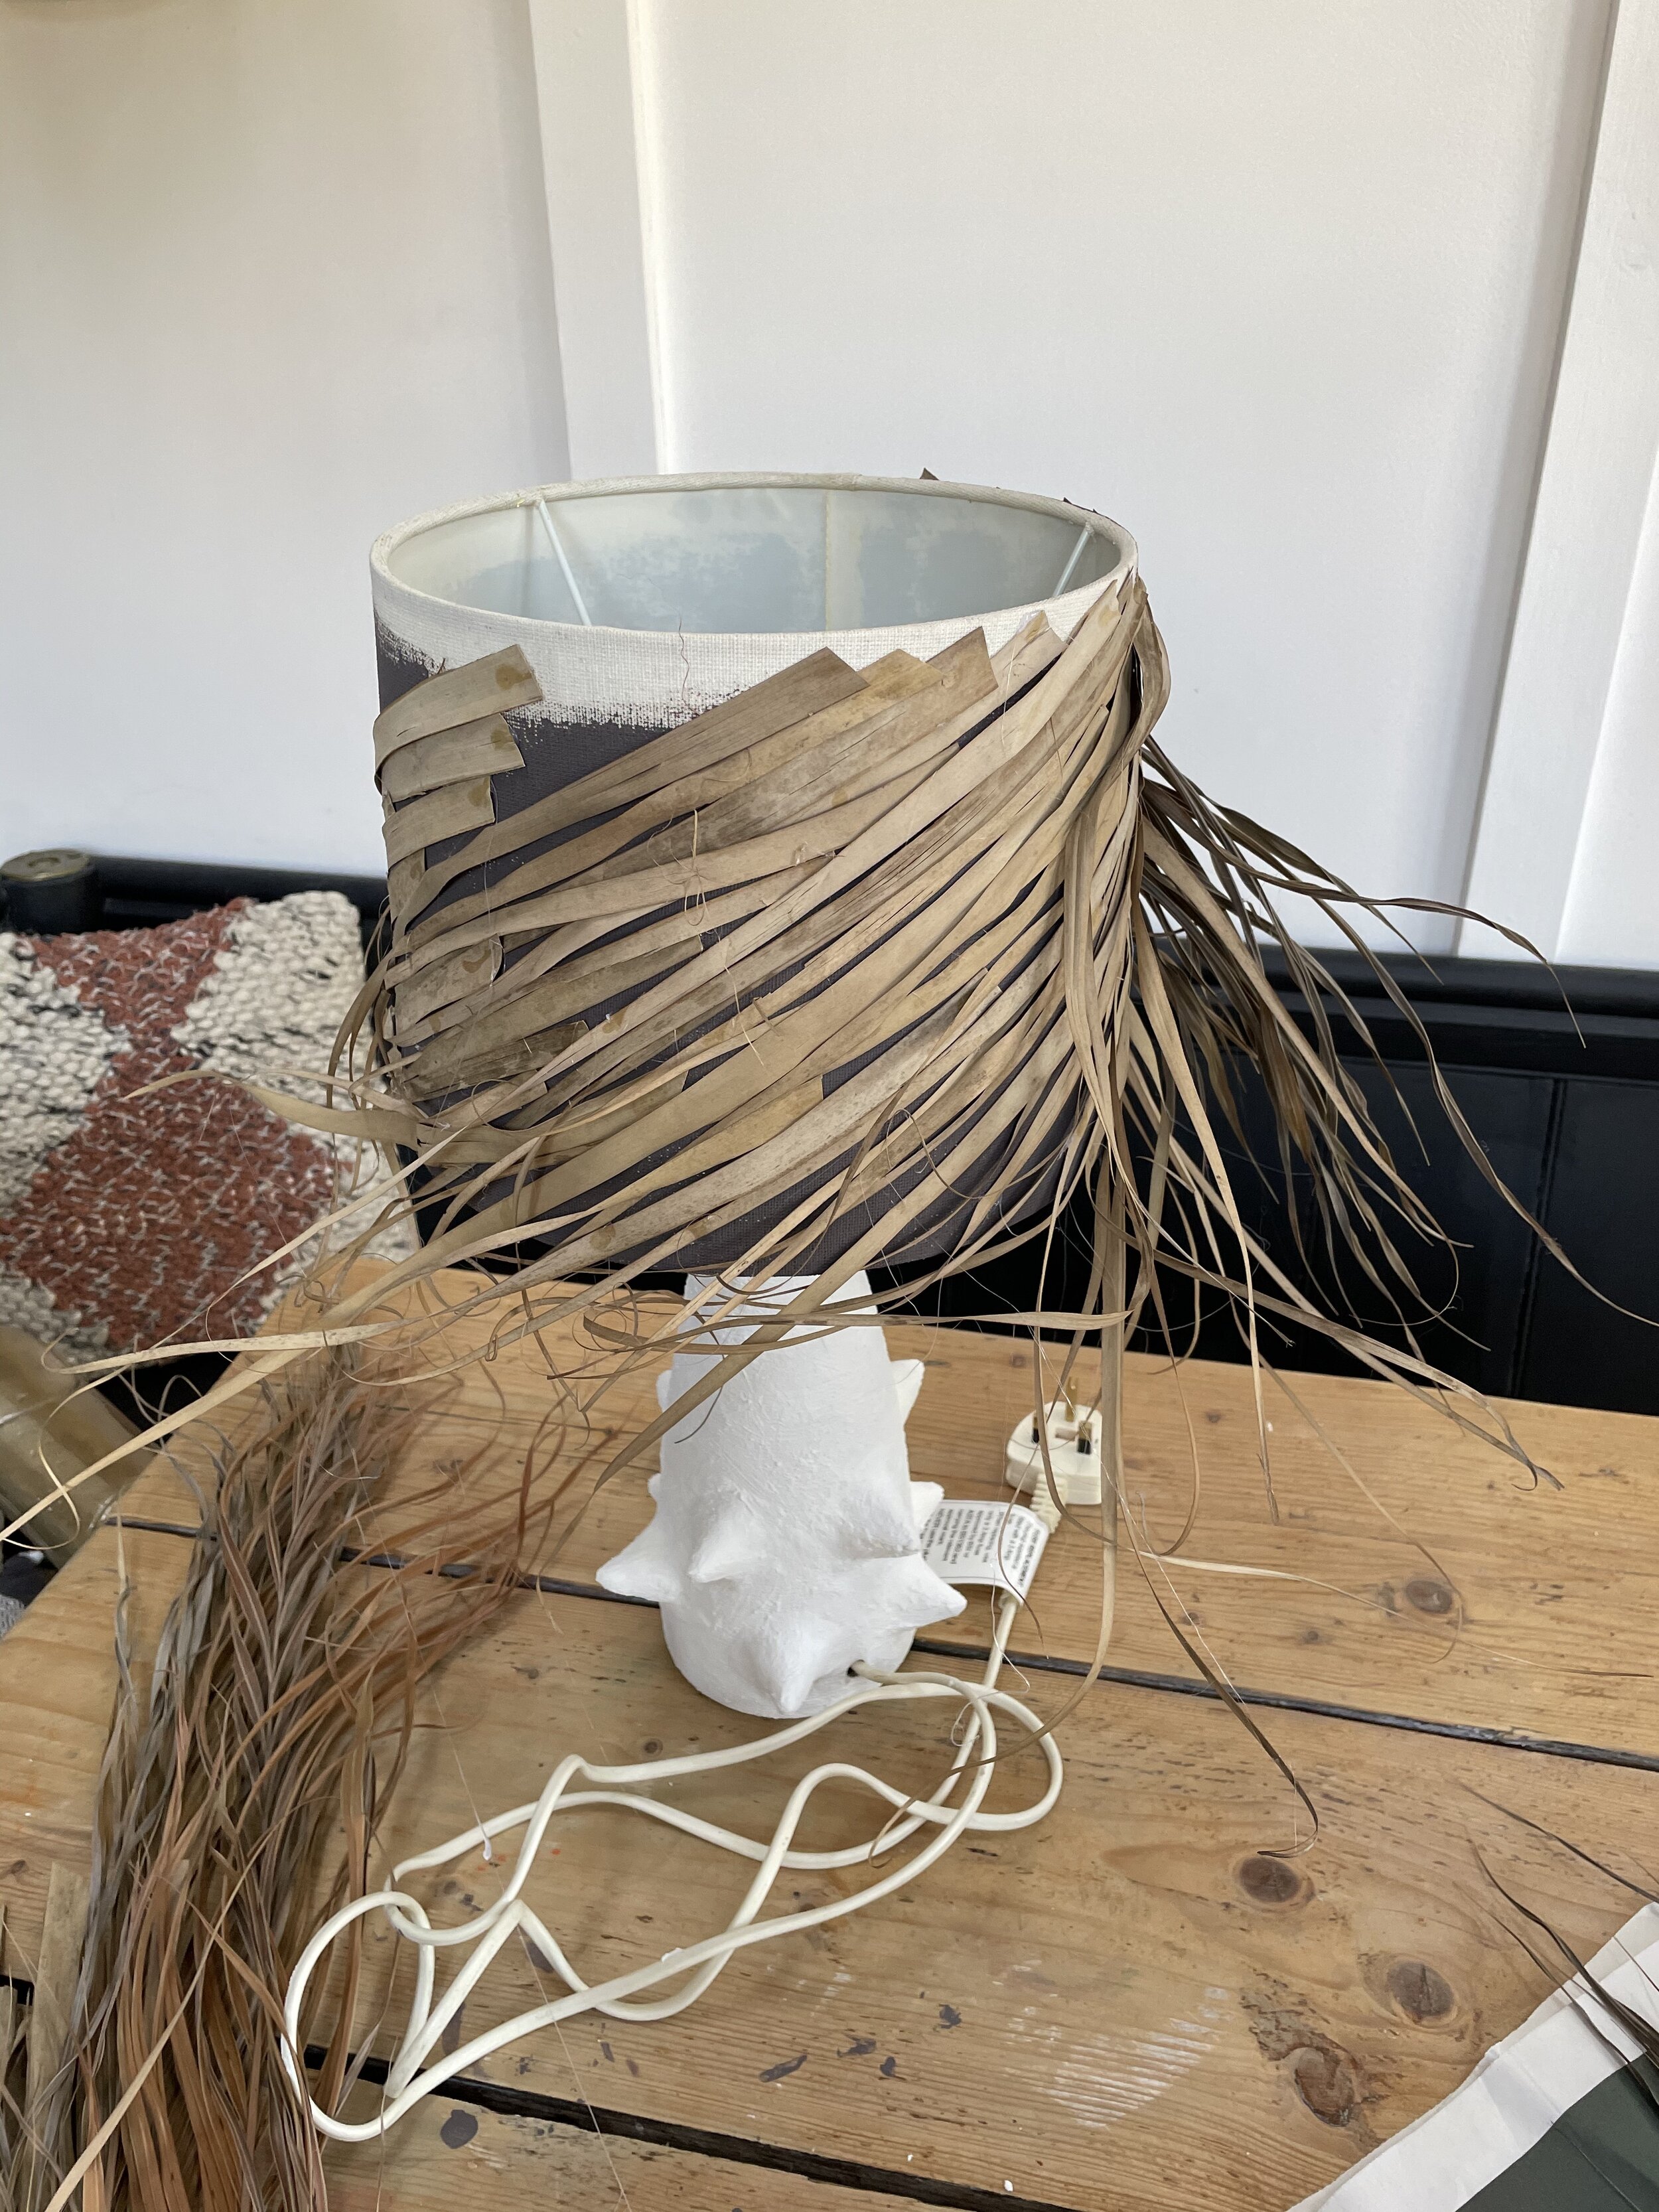
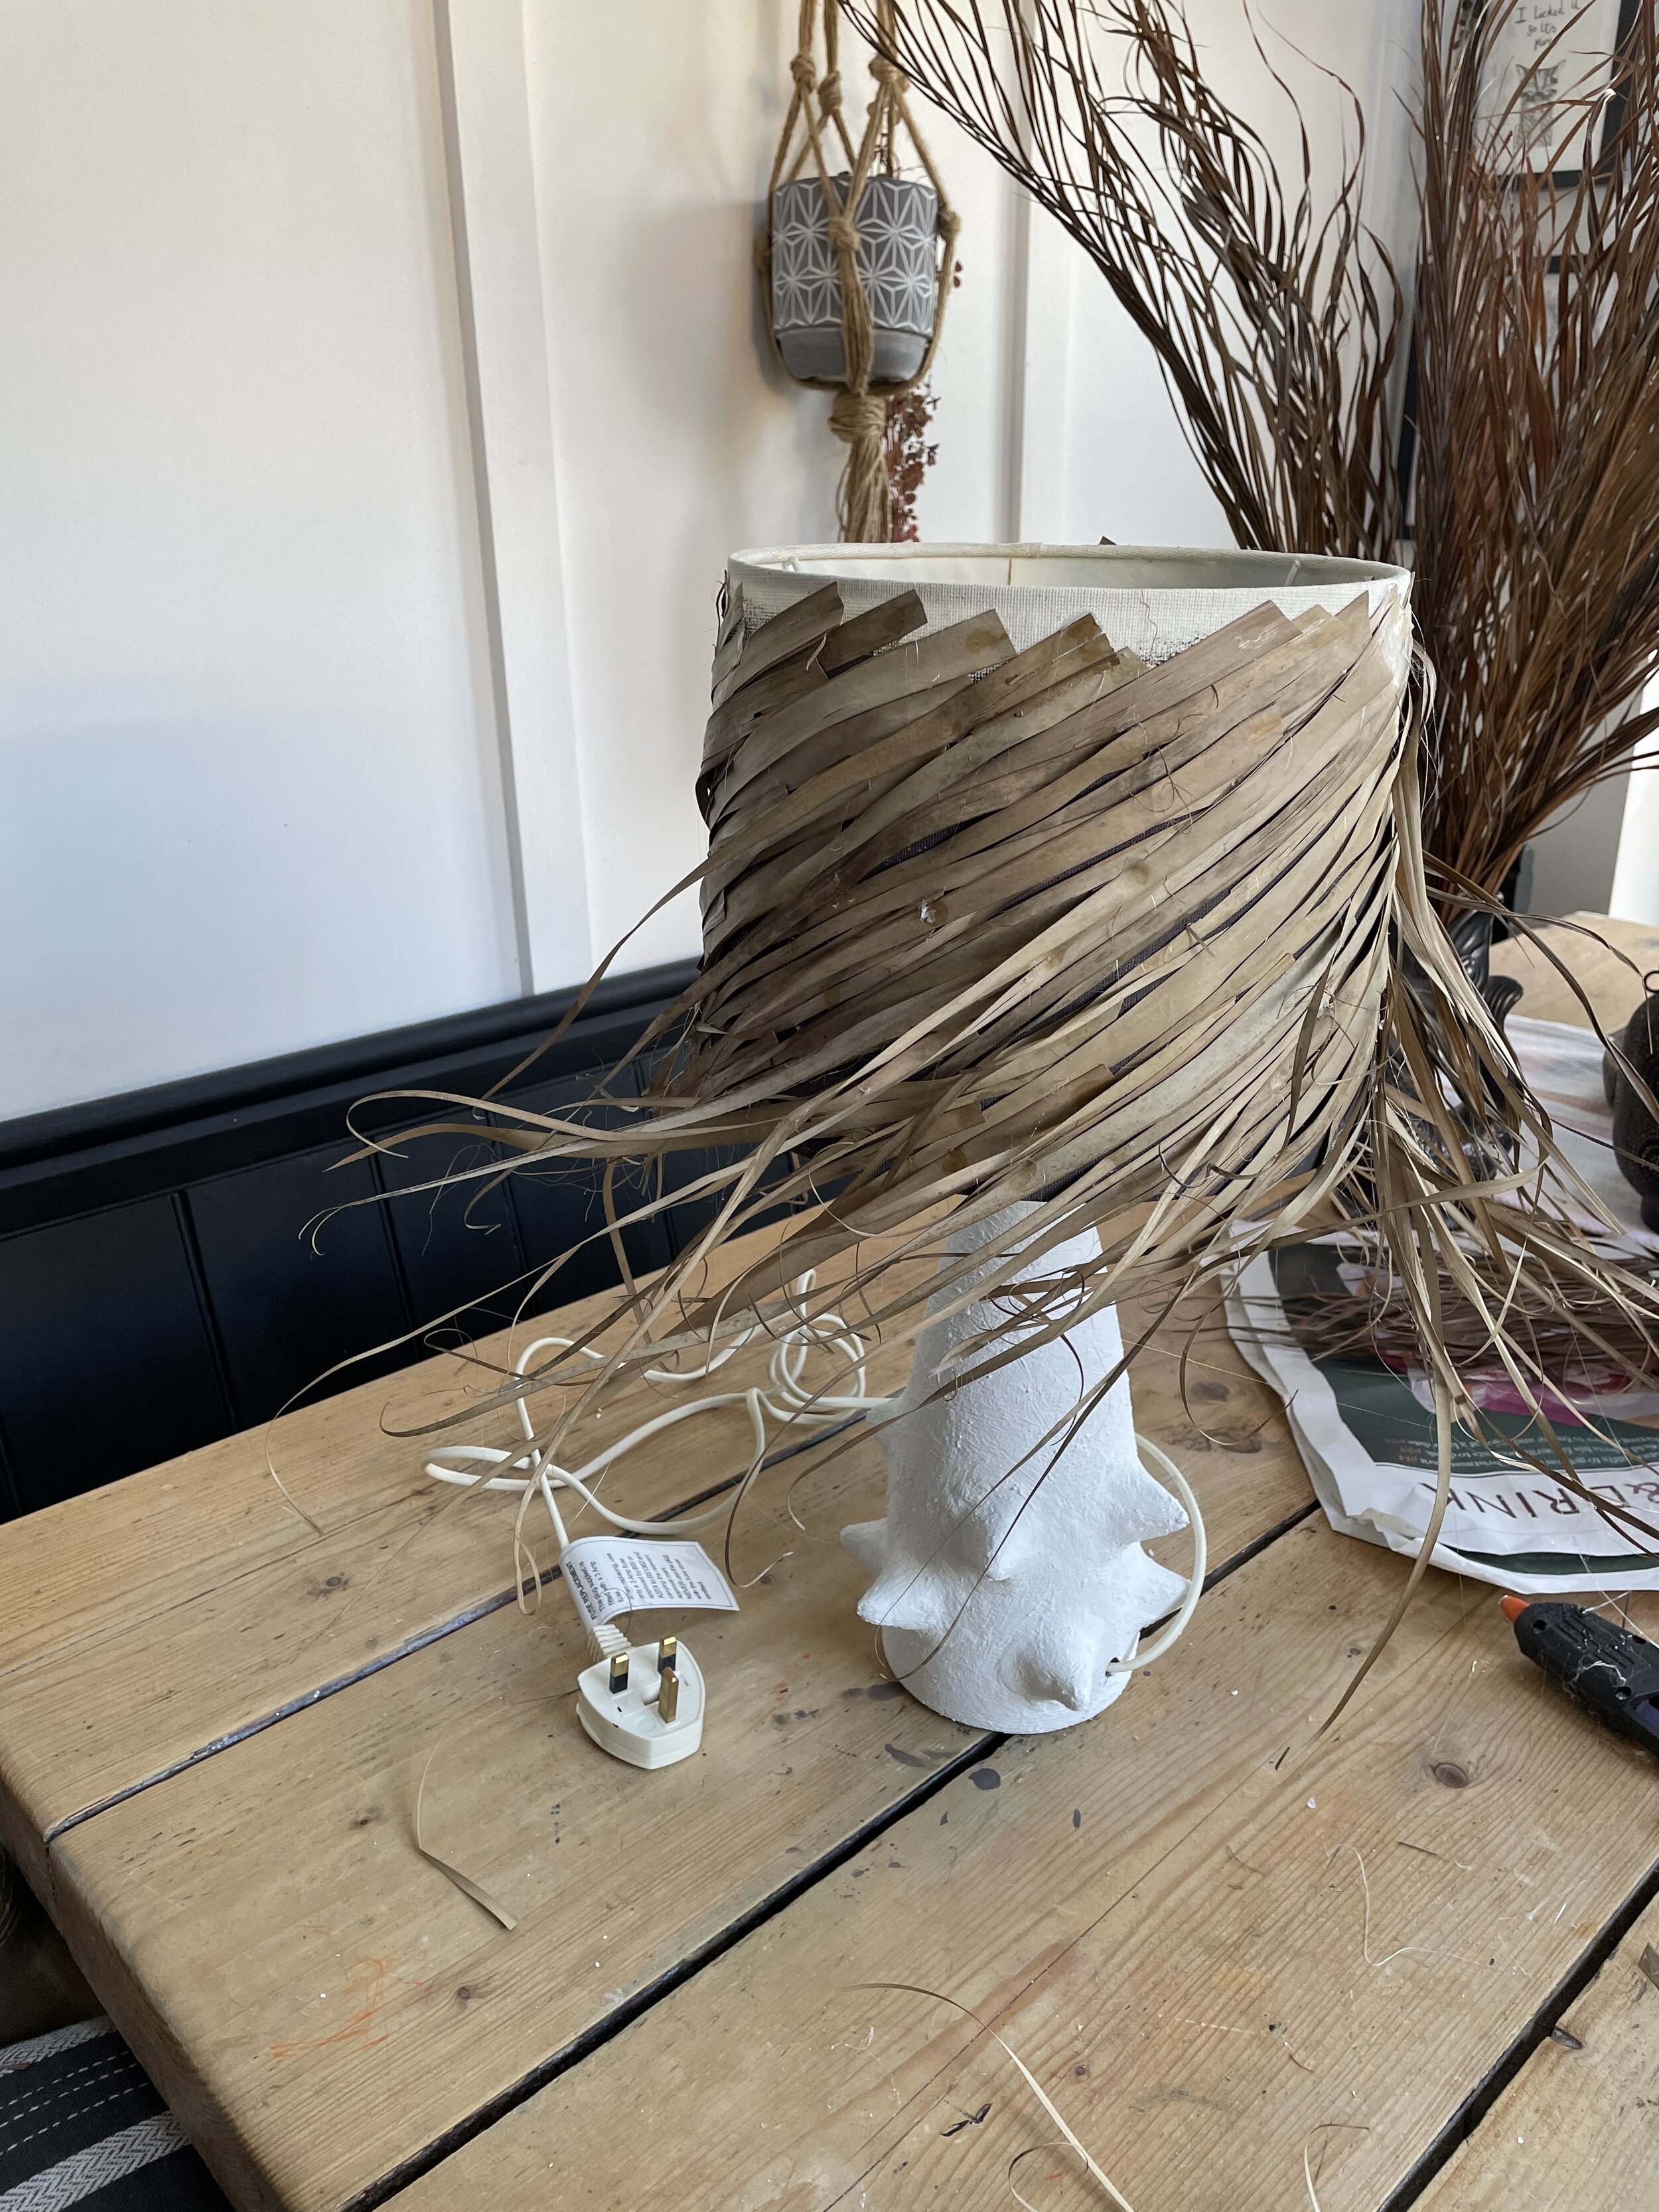
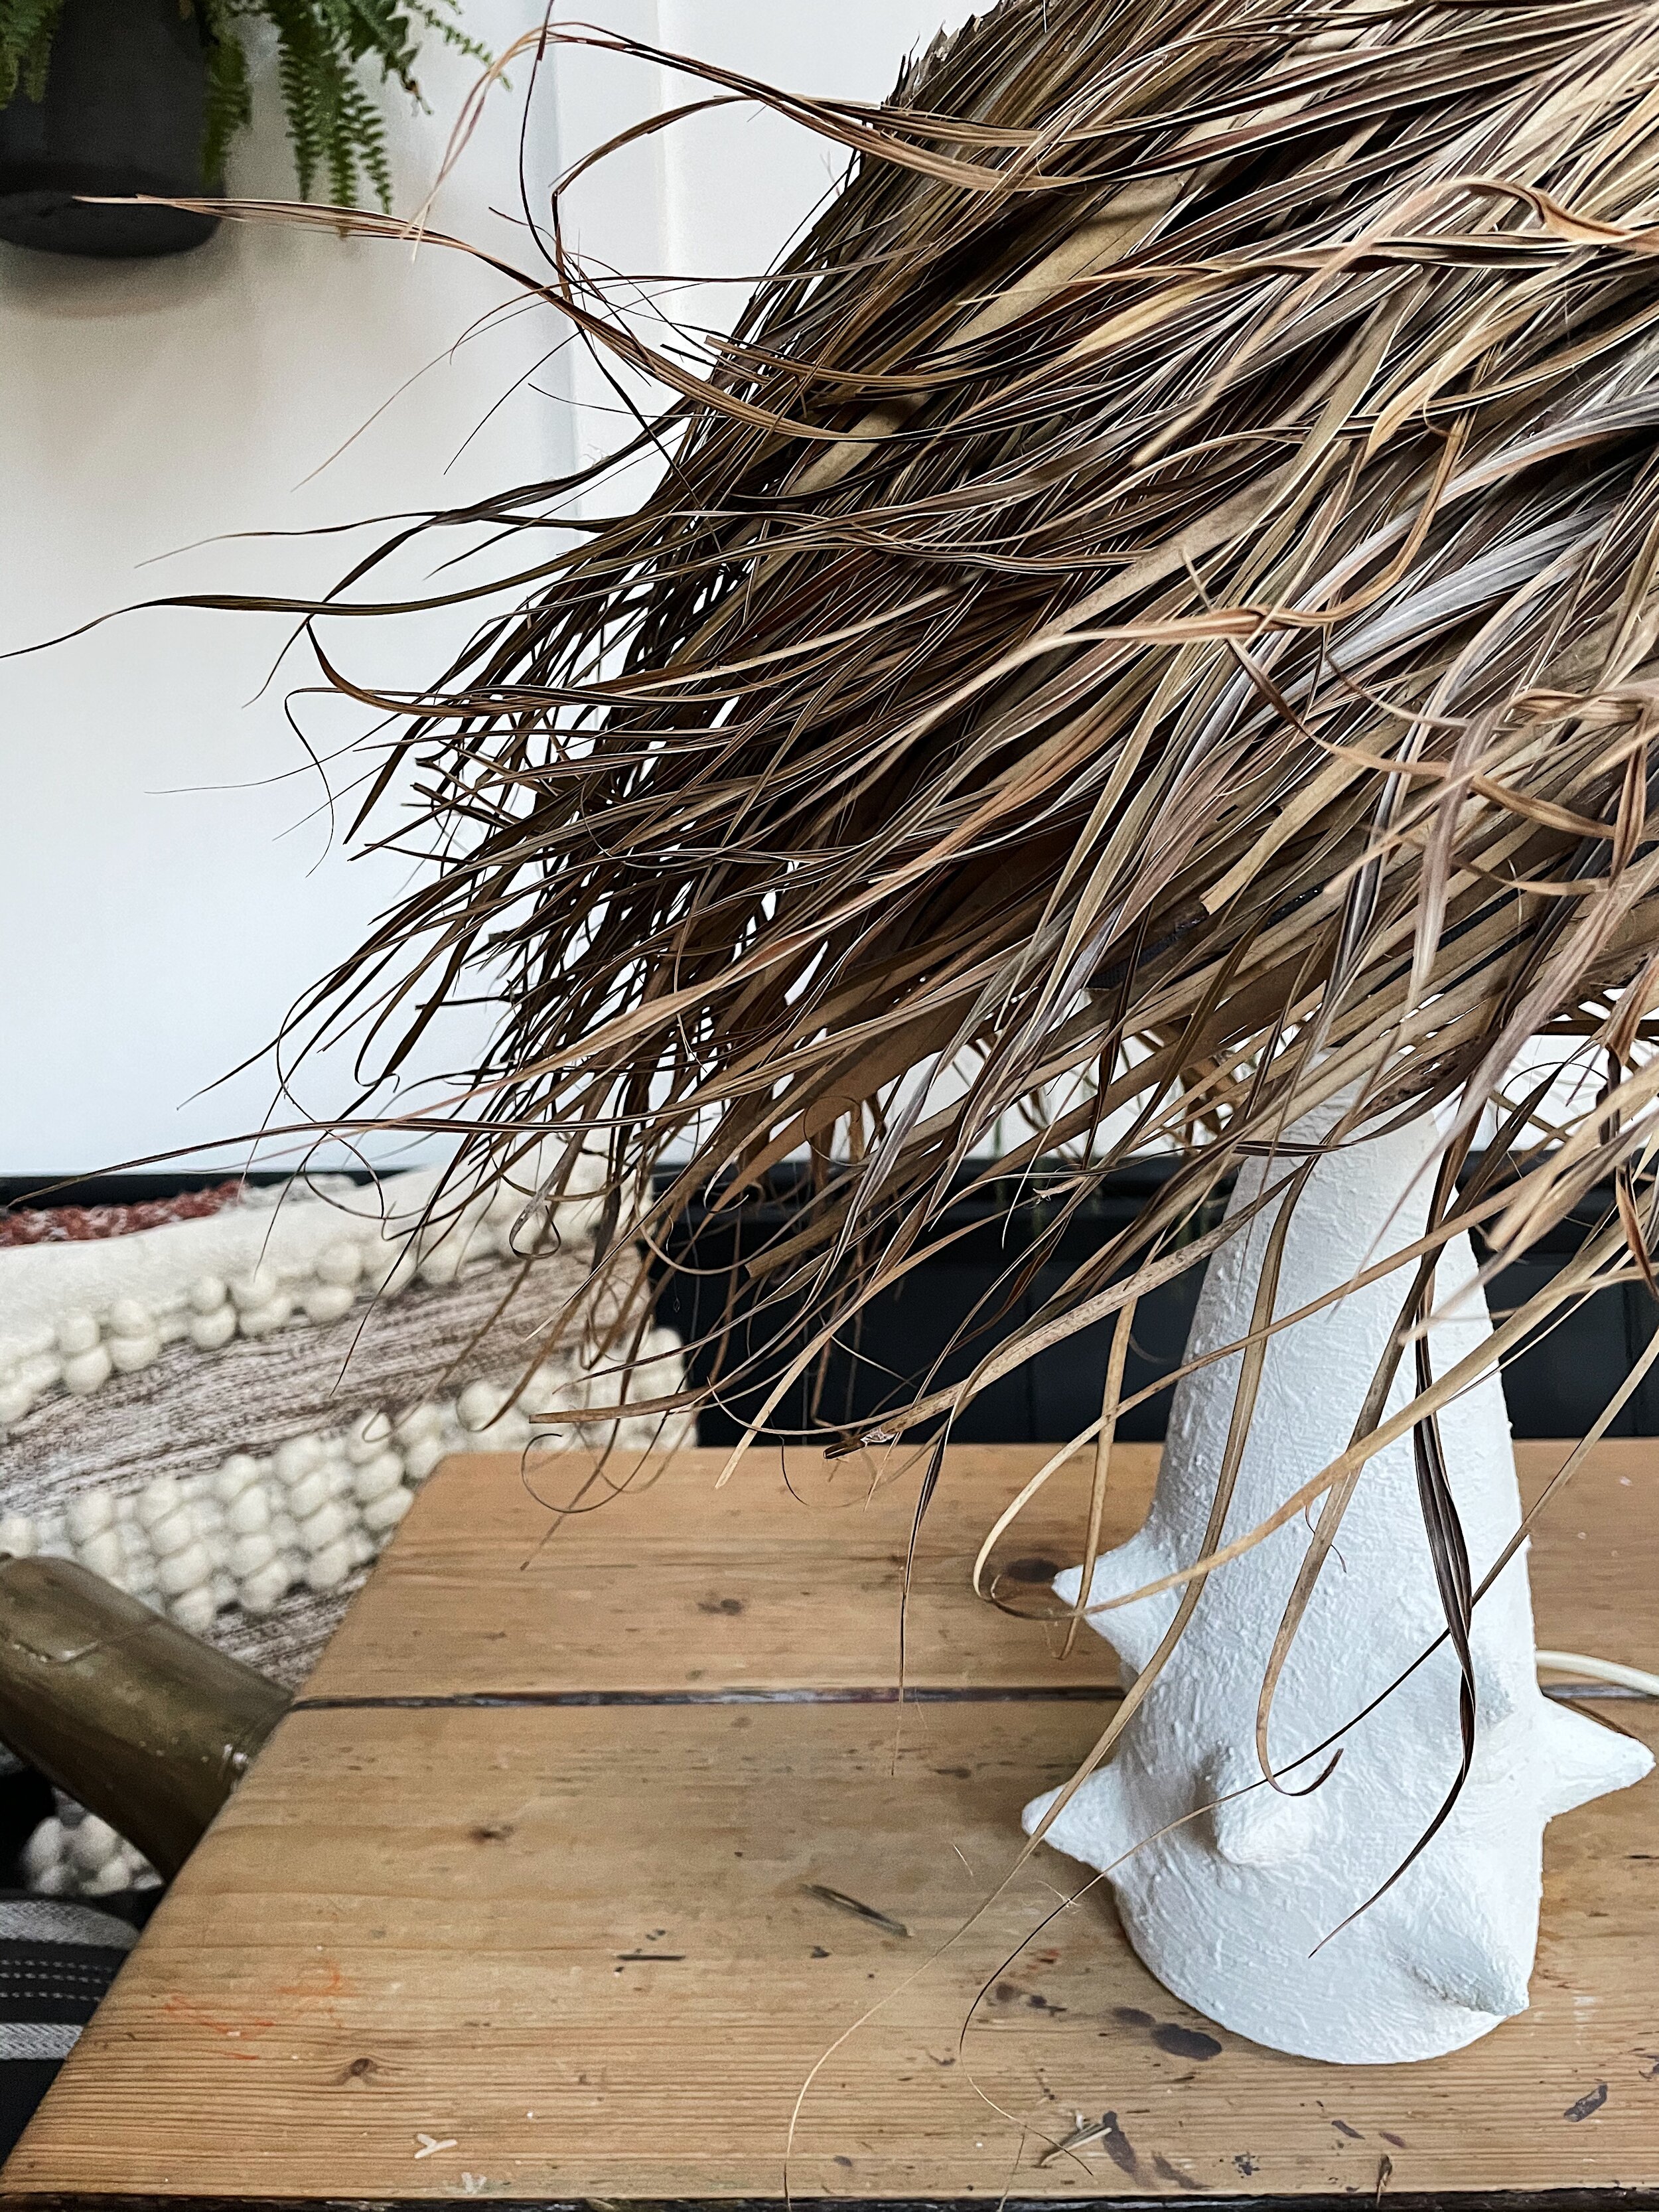
Then start attaching the palm frond leaves, these have a wilder, curlier texture that you can see on my lamp, so I placed these ones on as the top layer. First of all I cut the end section, about 9 inches of each frond to stick on in one piece, I alternated these with seperate sections of small bunches (about 5 in a bunch) of the seperate frond sections. You’ll want to manipulate your sections so they curve around the shade as you can see on the original lamp and on mine. You want to create a kind of swirling effect. So just bend the leaves round in the way you want them. Keep going until you’ve got the fullness you want, you can always pop in any extra leaves at the end if you see any bare patches or lamp shade showing through.
Finally you need to attach a trim around the top to neaten it off. I used a length of jute type braid (easily found on ebay) I pressed it first so it had a nice sharp crease and attached it using PVA glue. It’s a bit fiddly and you need to made cuts on the inside section so it will fit around the lamp fixture. One reason I used PVA glue for this rather than the glue gun is that it allows you to tweak it and move it about to get it exactly right. With hindsight I would have sewn a line of stitching around the top crease to make it look even sharper and neater.

But that’s it, your lamp completed! I hope you like the finished lamp and found this tutorial useful. Please add any questions you have in the comments section below and let me know if you plan to make your own version! And if you do be sure to tag me in and show me on Instagram!
Theresa x