How I Transformed my kitchen on a budget
How I Transformed my Kitchen on a Budget
Kitchens, expensive aren’t they? The average kitchen re model these days is about 10k and that’s without major building work, the cost of appliances and any extra expenses that will inevitably arise. Factor in high end kitchen cabinets and taps, worktops etcetera which you’ll inevitably want if you go down a kitchen Instagram rabbit hole and you’re talking a budget busting 20/30k plus.
I won’t lie I’d LOVE to rip out our kitchen, knock down the walls to build into the side return, install my dream DeVol Sebastian Cox kitchen and concrete worktops and install REAL crittall doors right across the back wall into our garden but unless I win the lottery or bump off Mr G for for the life insurance it ain’t gonna happen!
I’ve lived in my house for 8 years this Spring and when I bought it as a single mum with my 11 month son this kitchen was a dream! I’d sold my flat in a victorian converted house and whilst it was a beautiful flat in my favourite part of Birmingham the kitchen was tiny! No space for a table or even a breakfast bar.
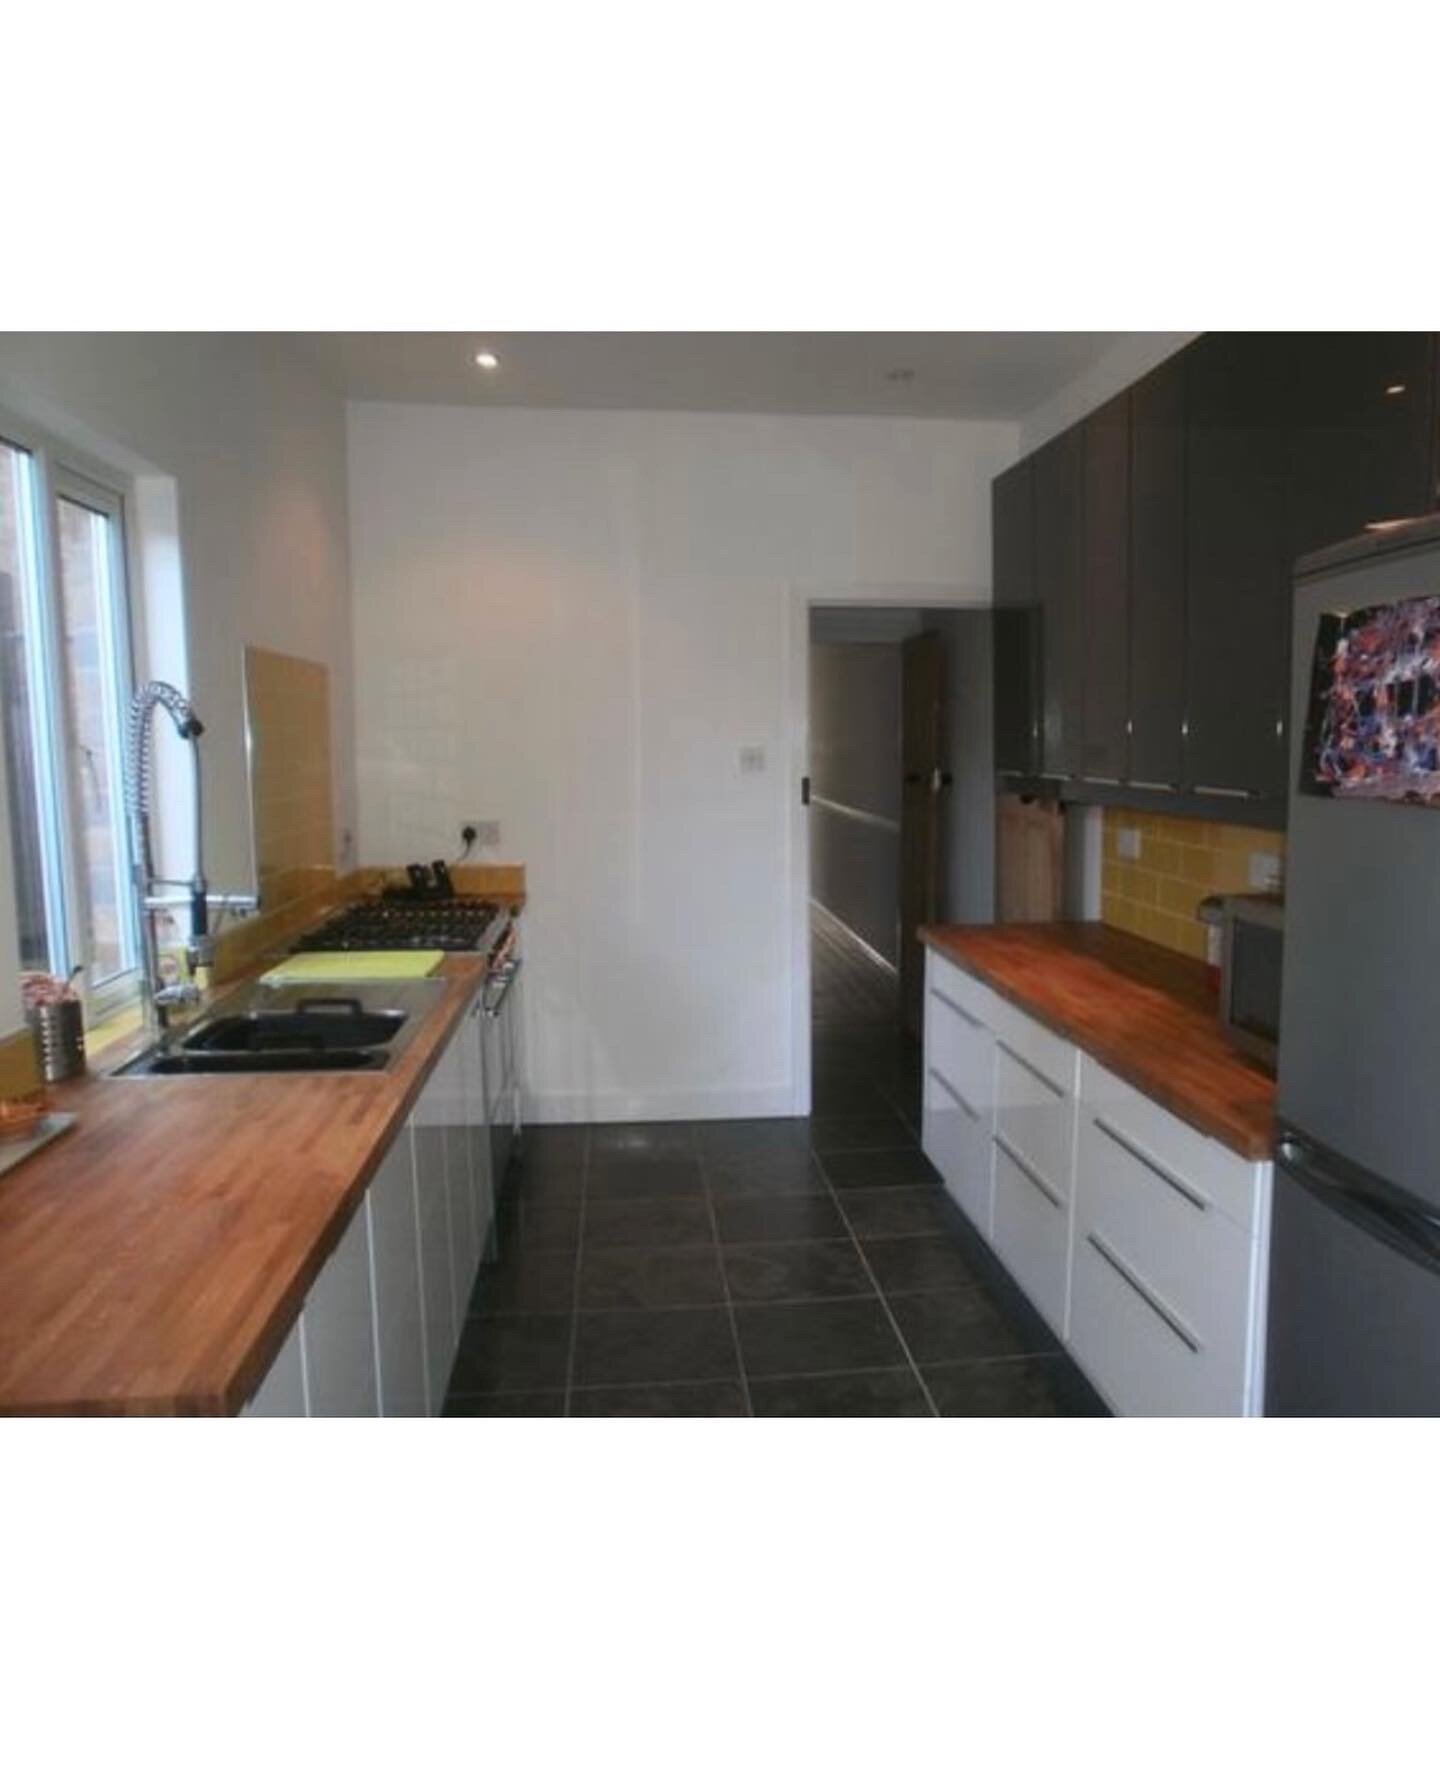
So to move into a house with a brand new kitchen with space for a dining area was life changing. At the time I was so giddy with excitement I was even prepared to overlook the vomit coloured splashback and questionable speckled floor tiles!

So I settled in and started putting my own stamp on thing, but as time went on and I became more interested in interior design I longed to make the kitchen more ‘me.’ If you follow me on Instagram you’ll know I love rustic, quirky, vintage, bohemian style interiors. Everything this stark white and grey glossy kitchen was not!
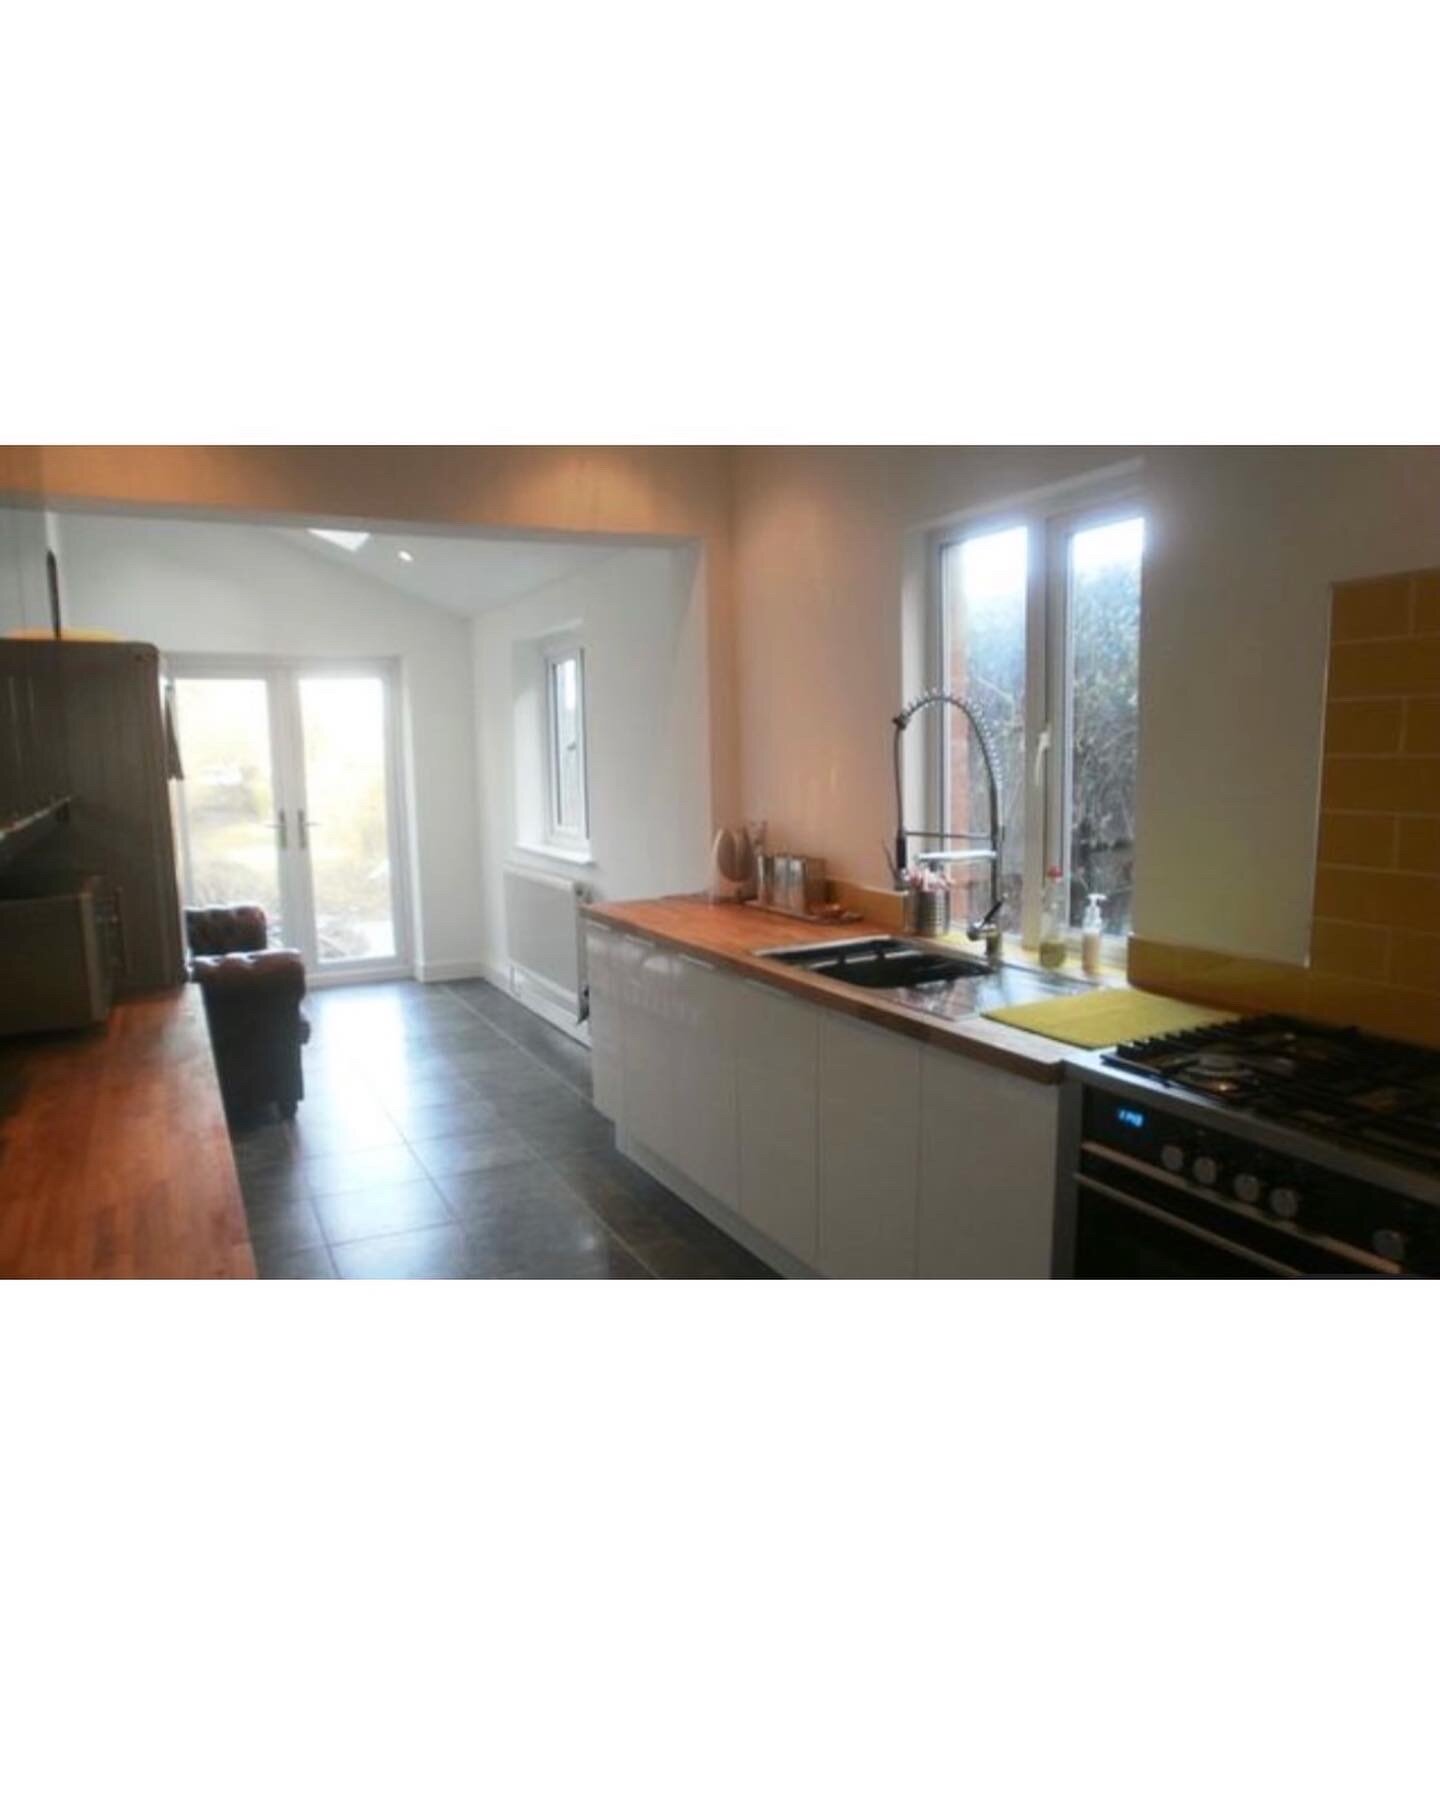
The things I loved - the wooden worktops, the large range cooker, the ample cupboard space (though it’s never enough right?!) The masses of light let in by the windows, patio doors and Velux skylights, the view on to the large garden and beautiful trees in my leafy neighbourhood.
The things I didn’t love - The lime green tiles! The ridiculously huge mixer tap, two years after moving in I still struggled to work it properly. The UPVC windows and patio doors, the grey speckled floor tiles, the bland shiny cupboards, especially the wall cupboards which were dark grey and huge, whilst you could fit lots in they dominated the space and made my galley style kitchen feel even narrower. The harsh downlighter spotlights, practical yes, but lacking in any sort or softest or cosiness.
I’ve talked before about how I love kitchens that don’t feel like kitchens, the unkitcheny kitchen if you will. A kitchen has to be practical, it is filled with appliances that are essential for day to day modern living. It has to be functional and easy to keep clean. On the other hand these days we increasingly desire open plan living and so our kitchen spaces have gradually become more integrated into our living areas.
We want to invite our friends into our kitchens whilst we cook, we want to enjoy coffee in a comfortable spot with soft flattering lighting and somewhere cosy to sit. We want to have intersting things to look at, not just wall cupboards and fridge doors. We want personality and soulfulness.
The problem with all this is it would be easy (though expensive) to rip it all out and replace, the issue I had with that though is that the kitchen was brand new and completely inoffensive (apart from maybe those tiles!) just not to my taste.
So to turn it into more of my style of kitchen was a slow process over a number of years. I met my husband Tom in 2014 and he moved in in 2015. That’s when the serious DIY could begin. Reader, I didn’t marry him for his looks alone!
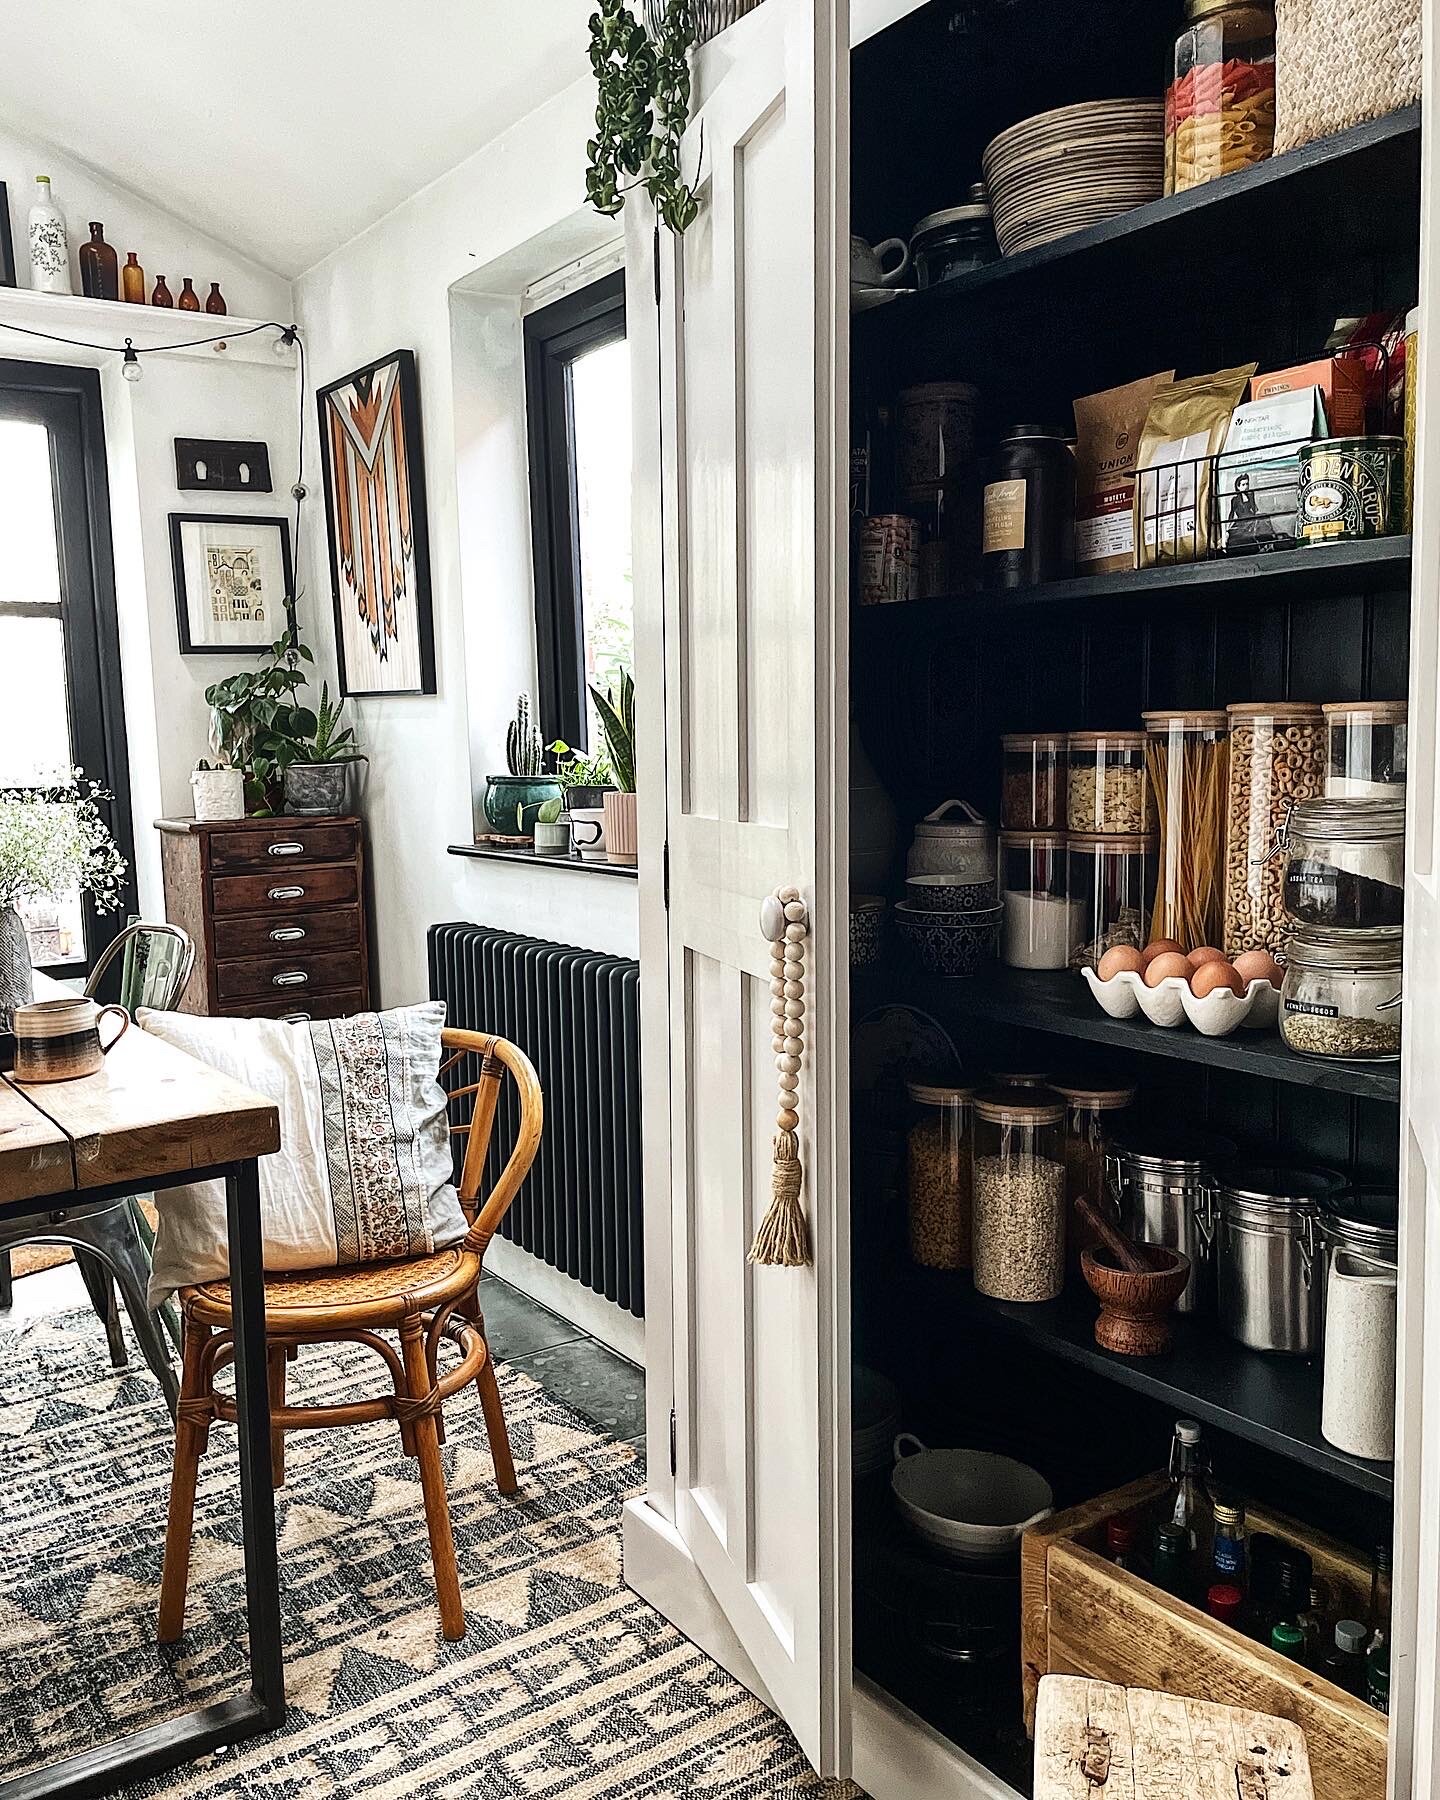
We didn’t want to replace it for budgetary reasons but also its just not an eco friendly solution is it? Just to chuck something out because we don’t like it. So little things, gradually over the years, all on a budget, mostly done by ourselves, transformed the kitchen to what you can see today. I estimate everything we have done (apart from the odd gifted item such as the new radiator and the larder cupboard which I bought second hand from eBay for £400) has cost £500.
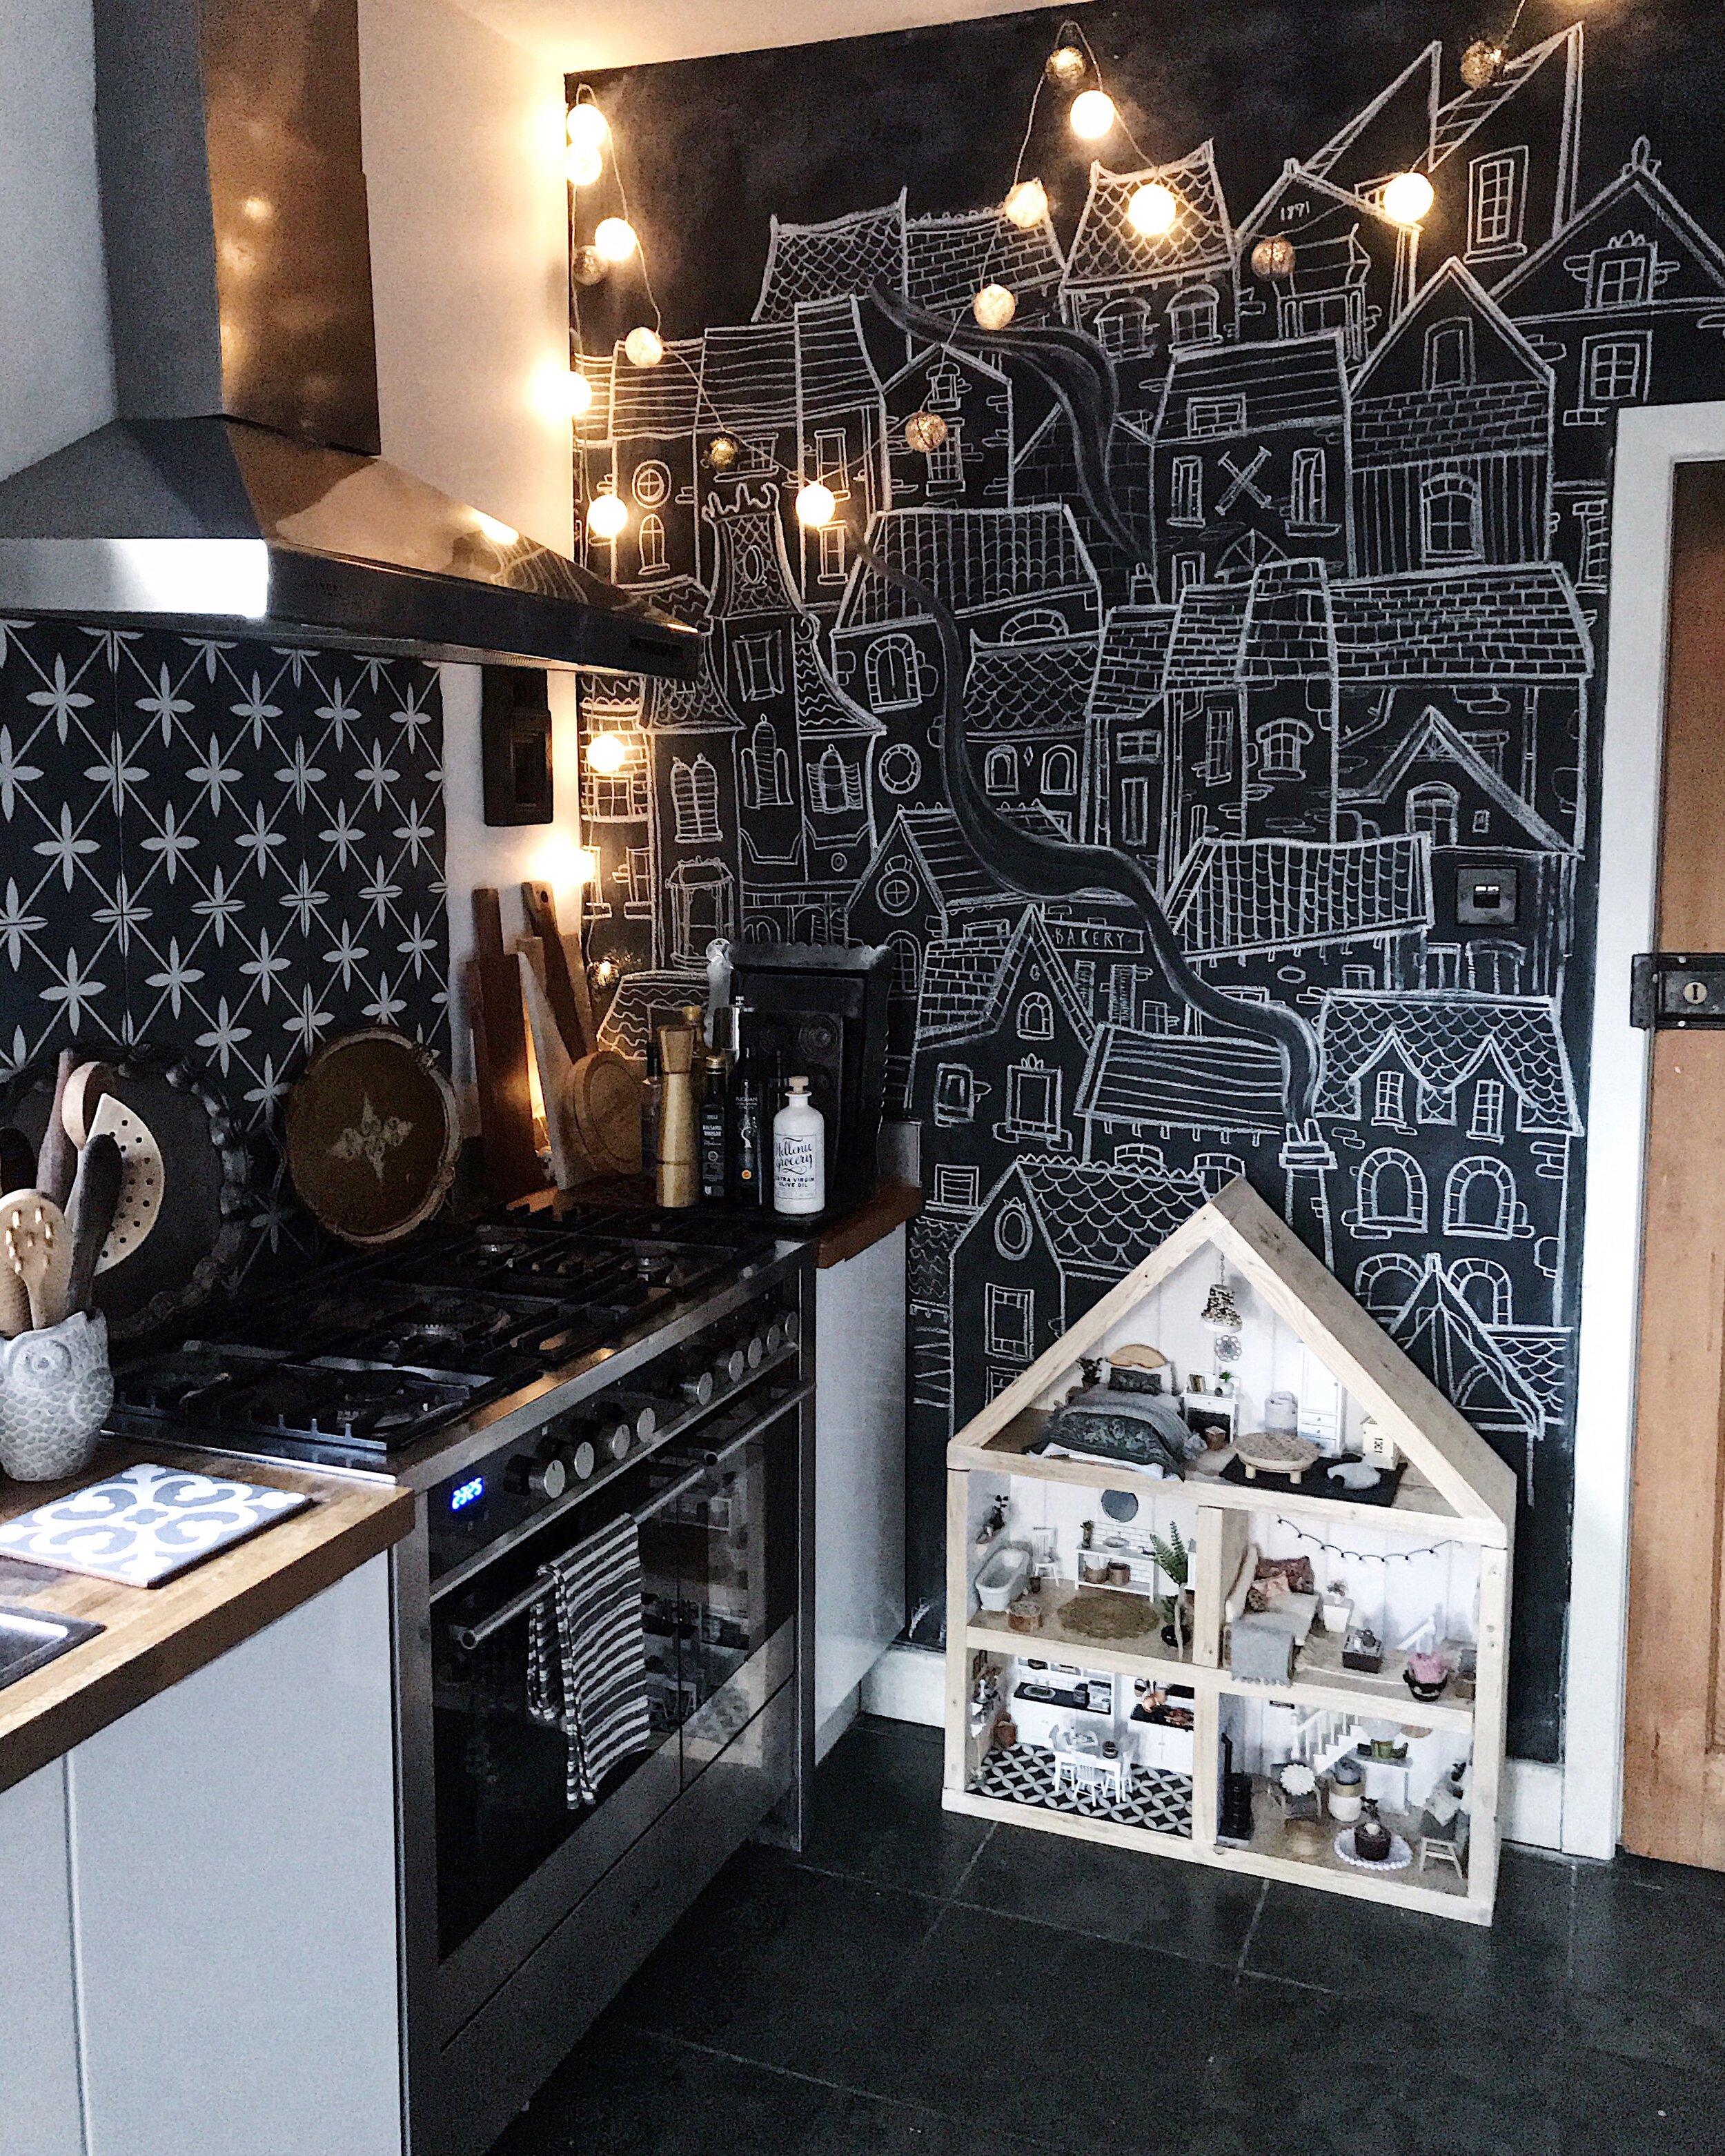
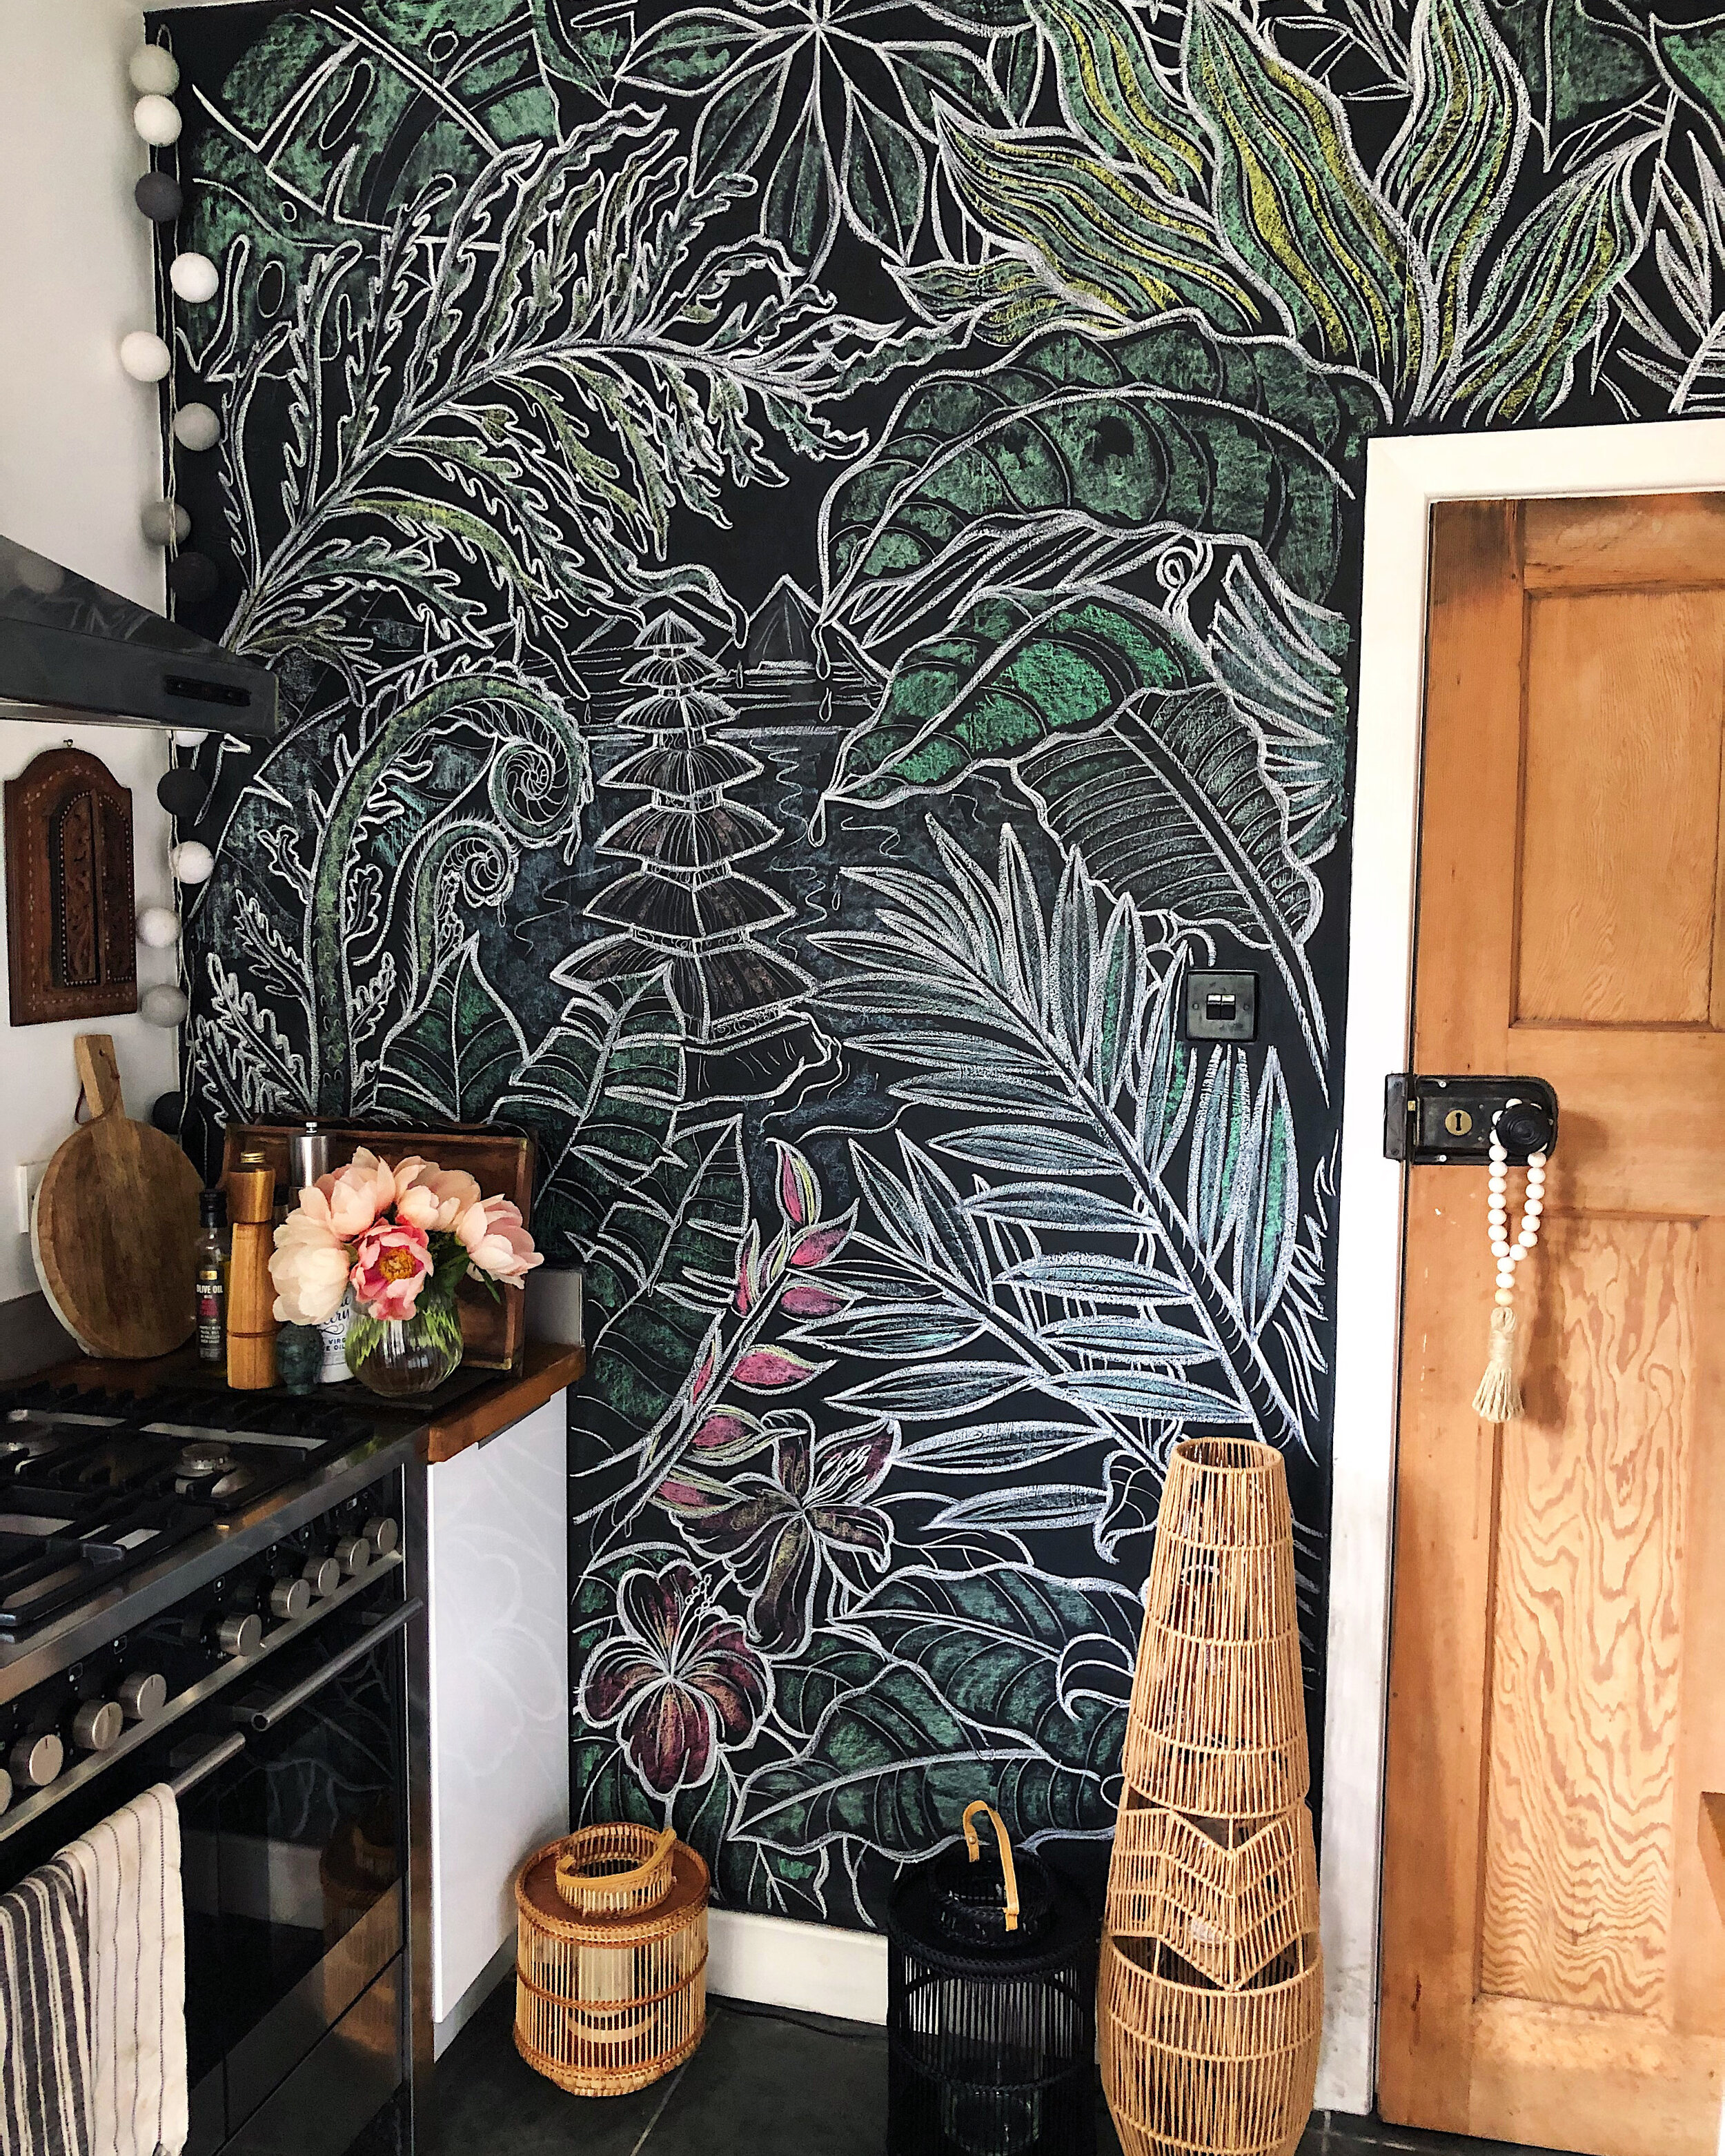
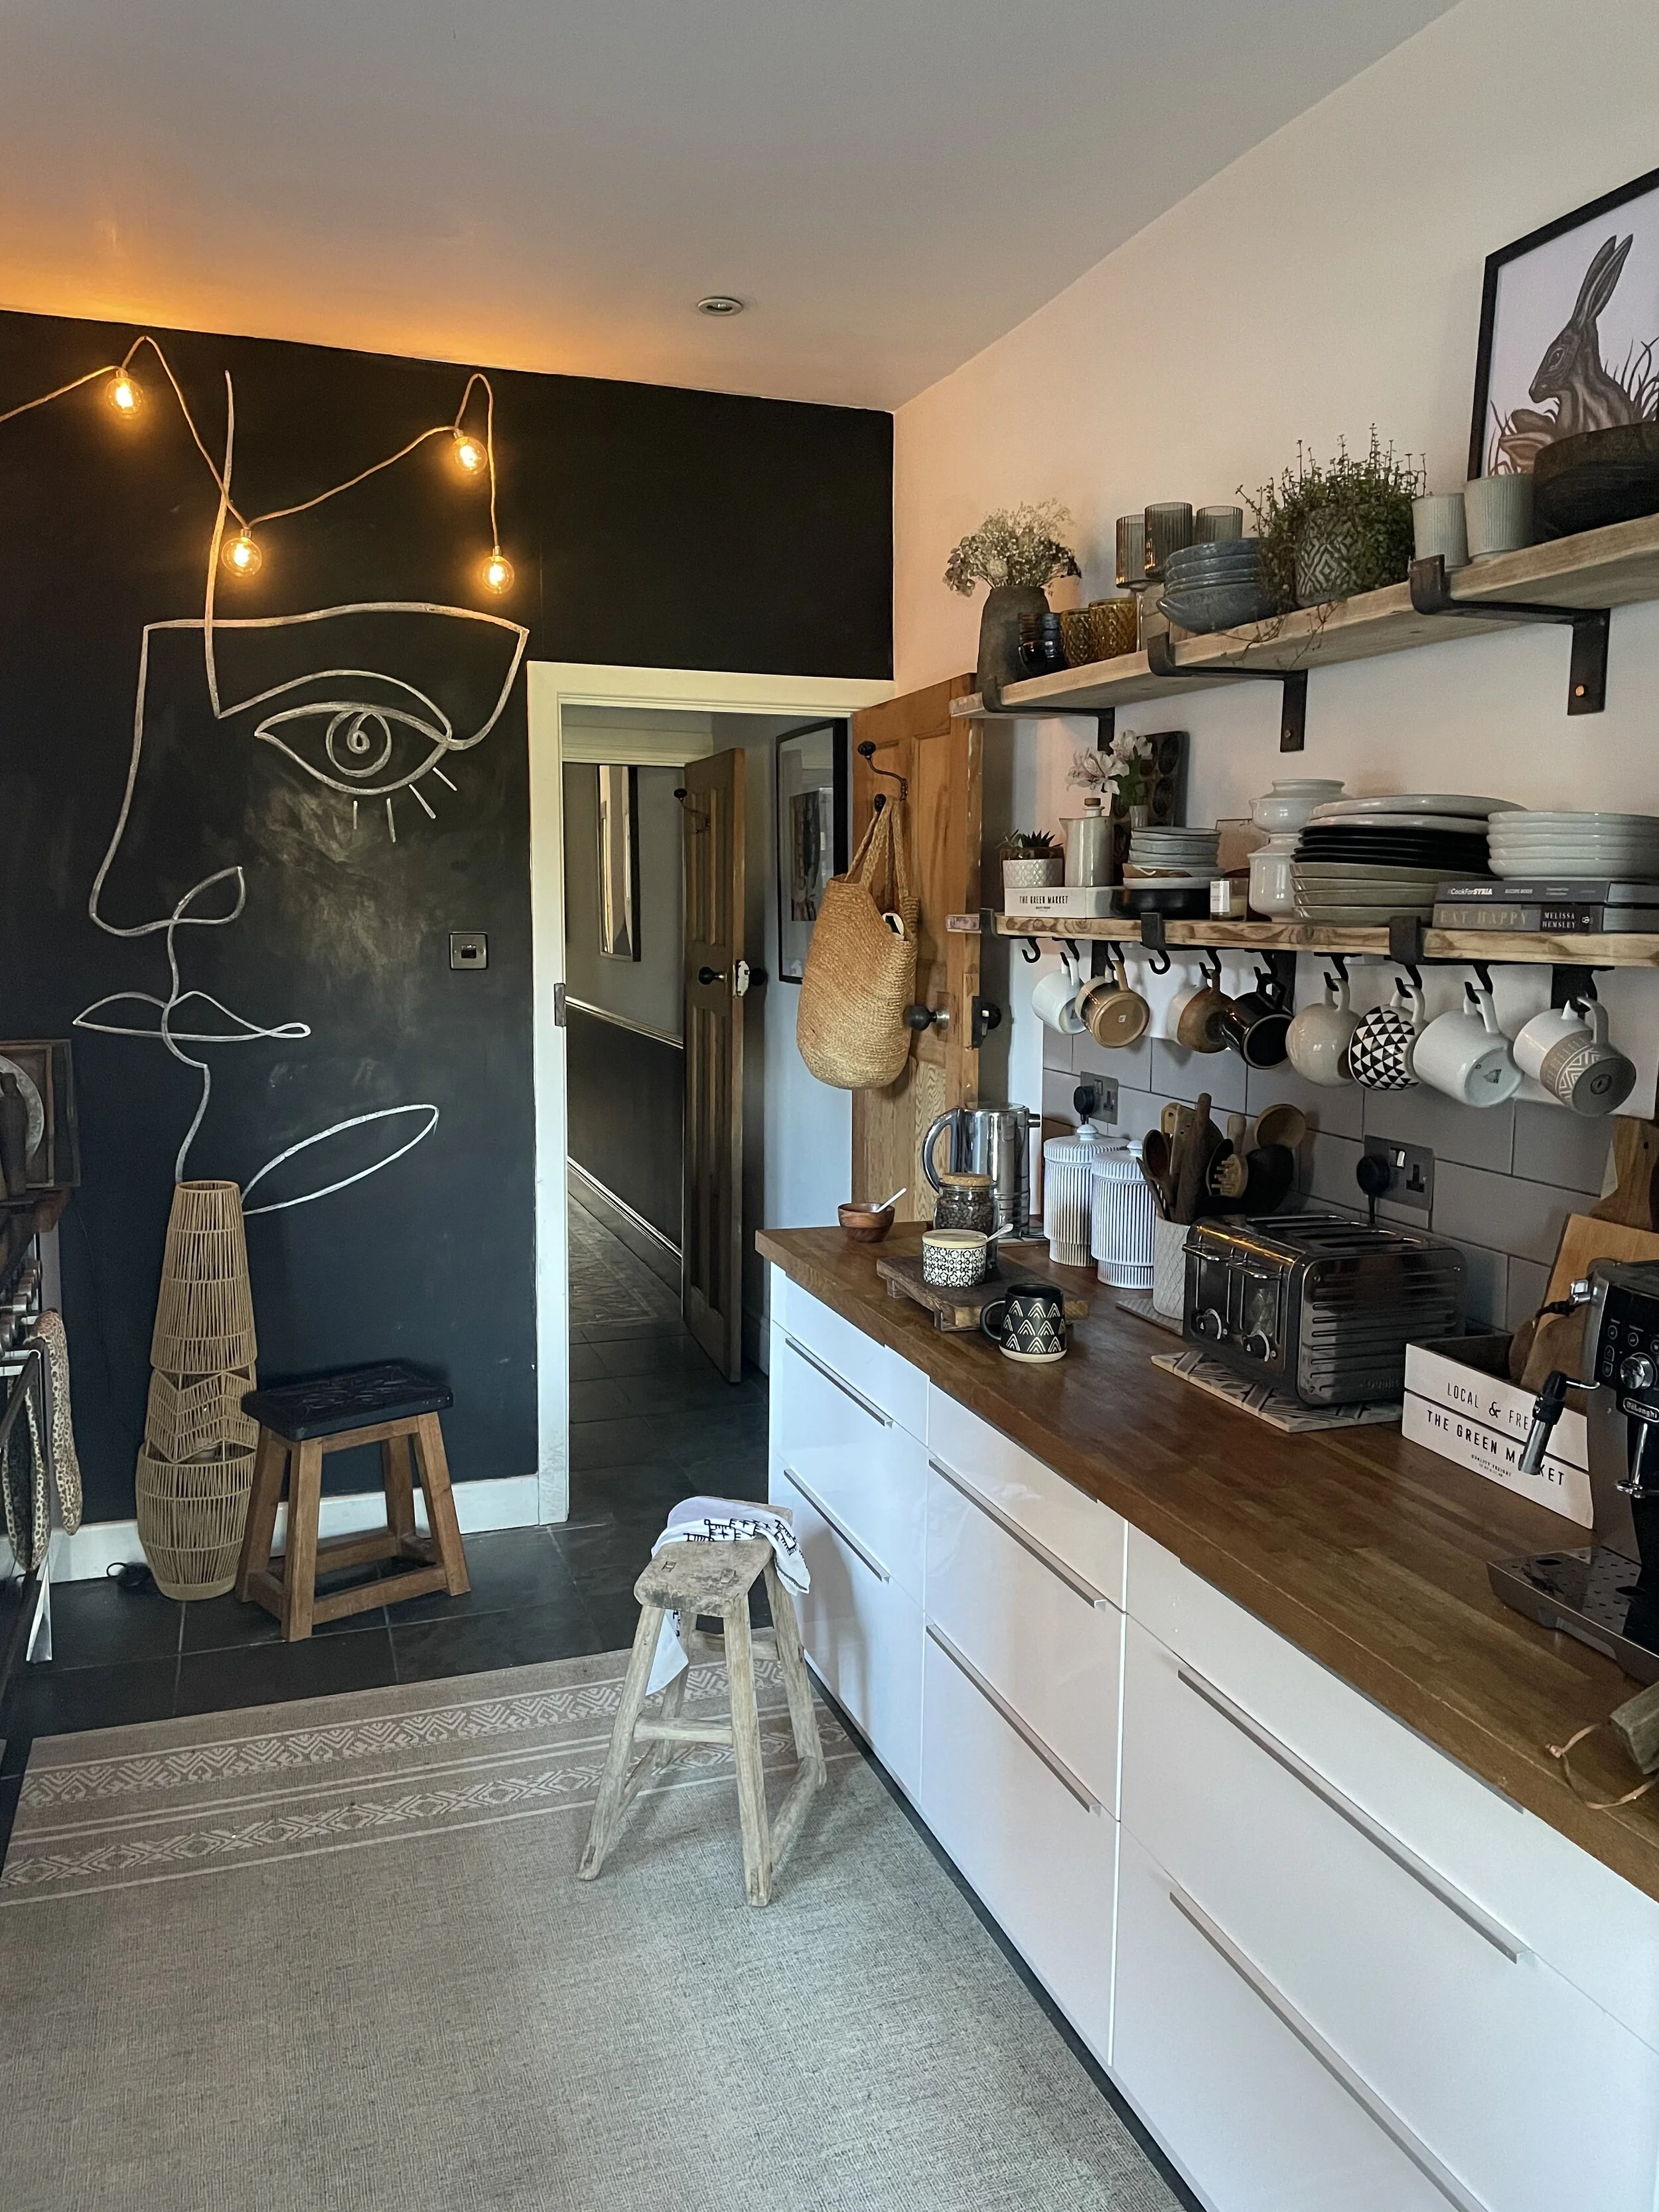
One of the very first things I did, not soon after moving in was to paint the entire end wall of the kitchen with blackboard paint to create a blackboard wall. Initially to create a place for my son to draw but now somewhere for me to play around with my illustration skills. This was the first thing that added some depth and interest to the space. Even if you’re not brave enough to add dark walls everywhere a section of dark paint I think lifts a space, provides contrast and stops it from feeling too flat. You can read more about my blackboard wall here.
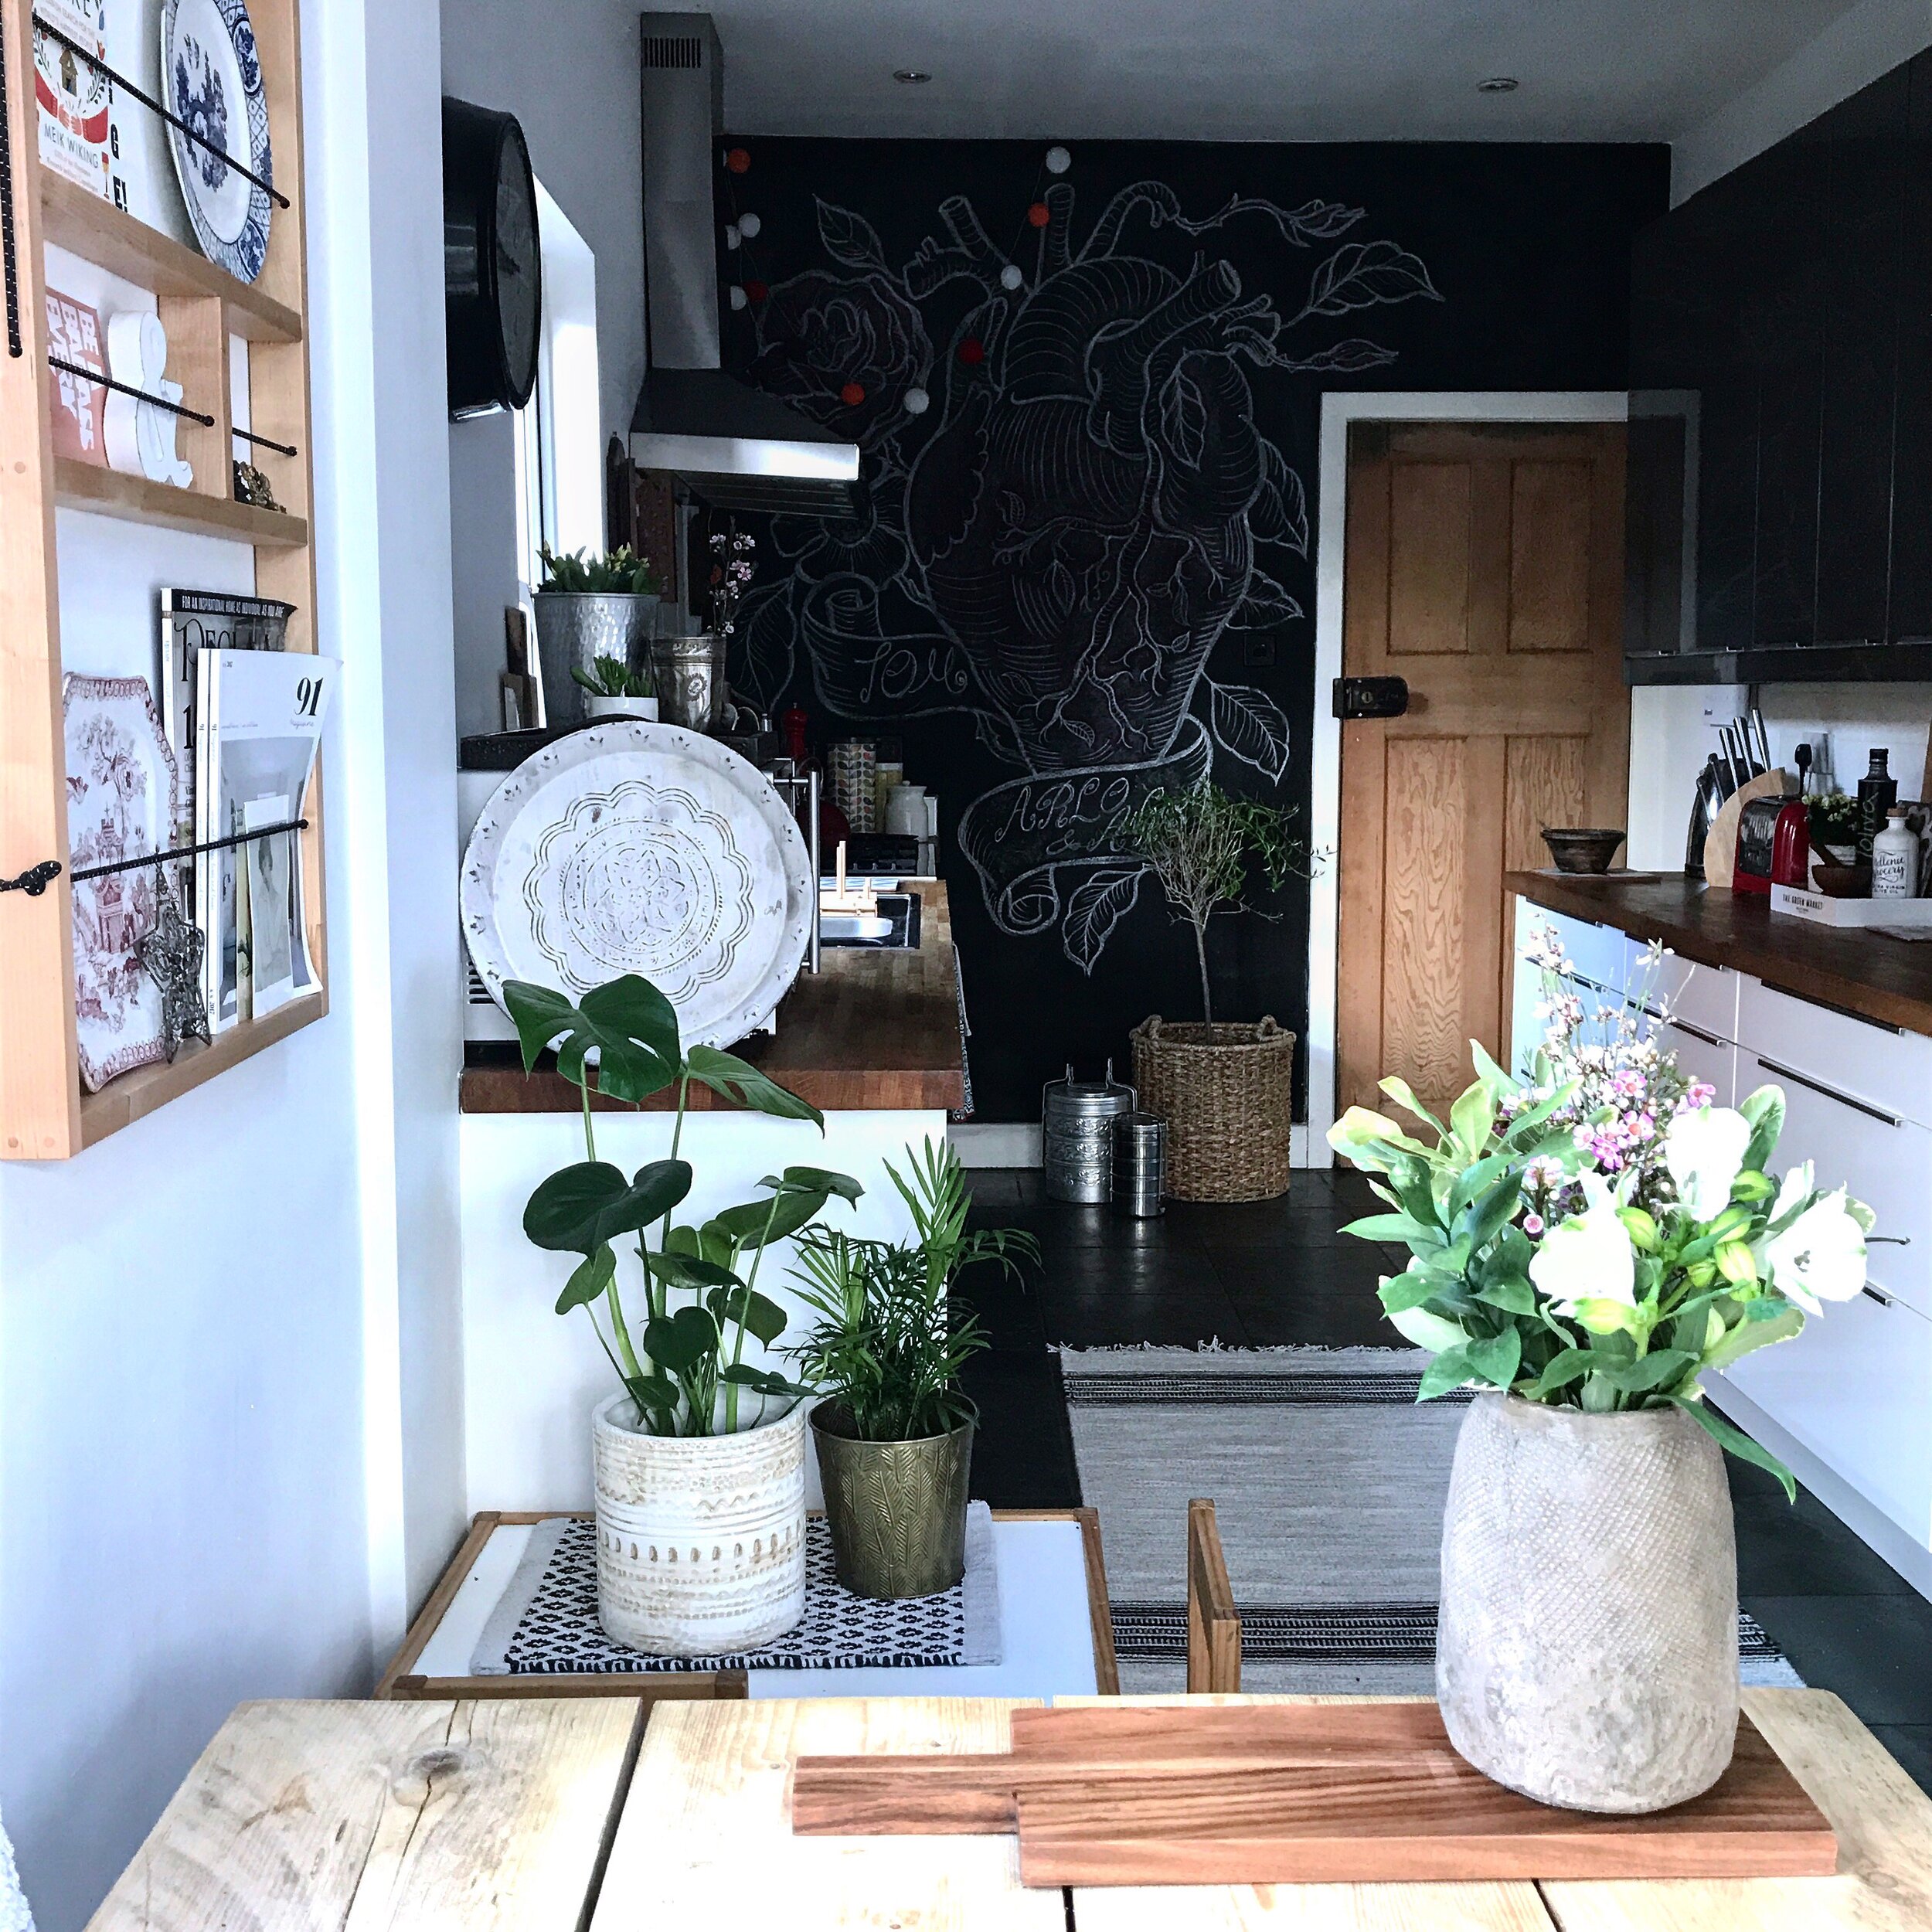
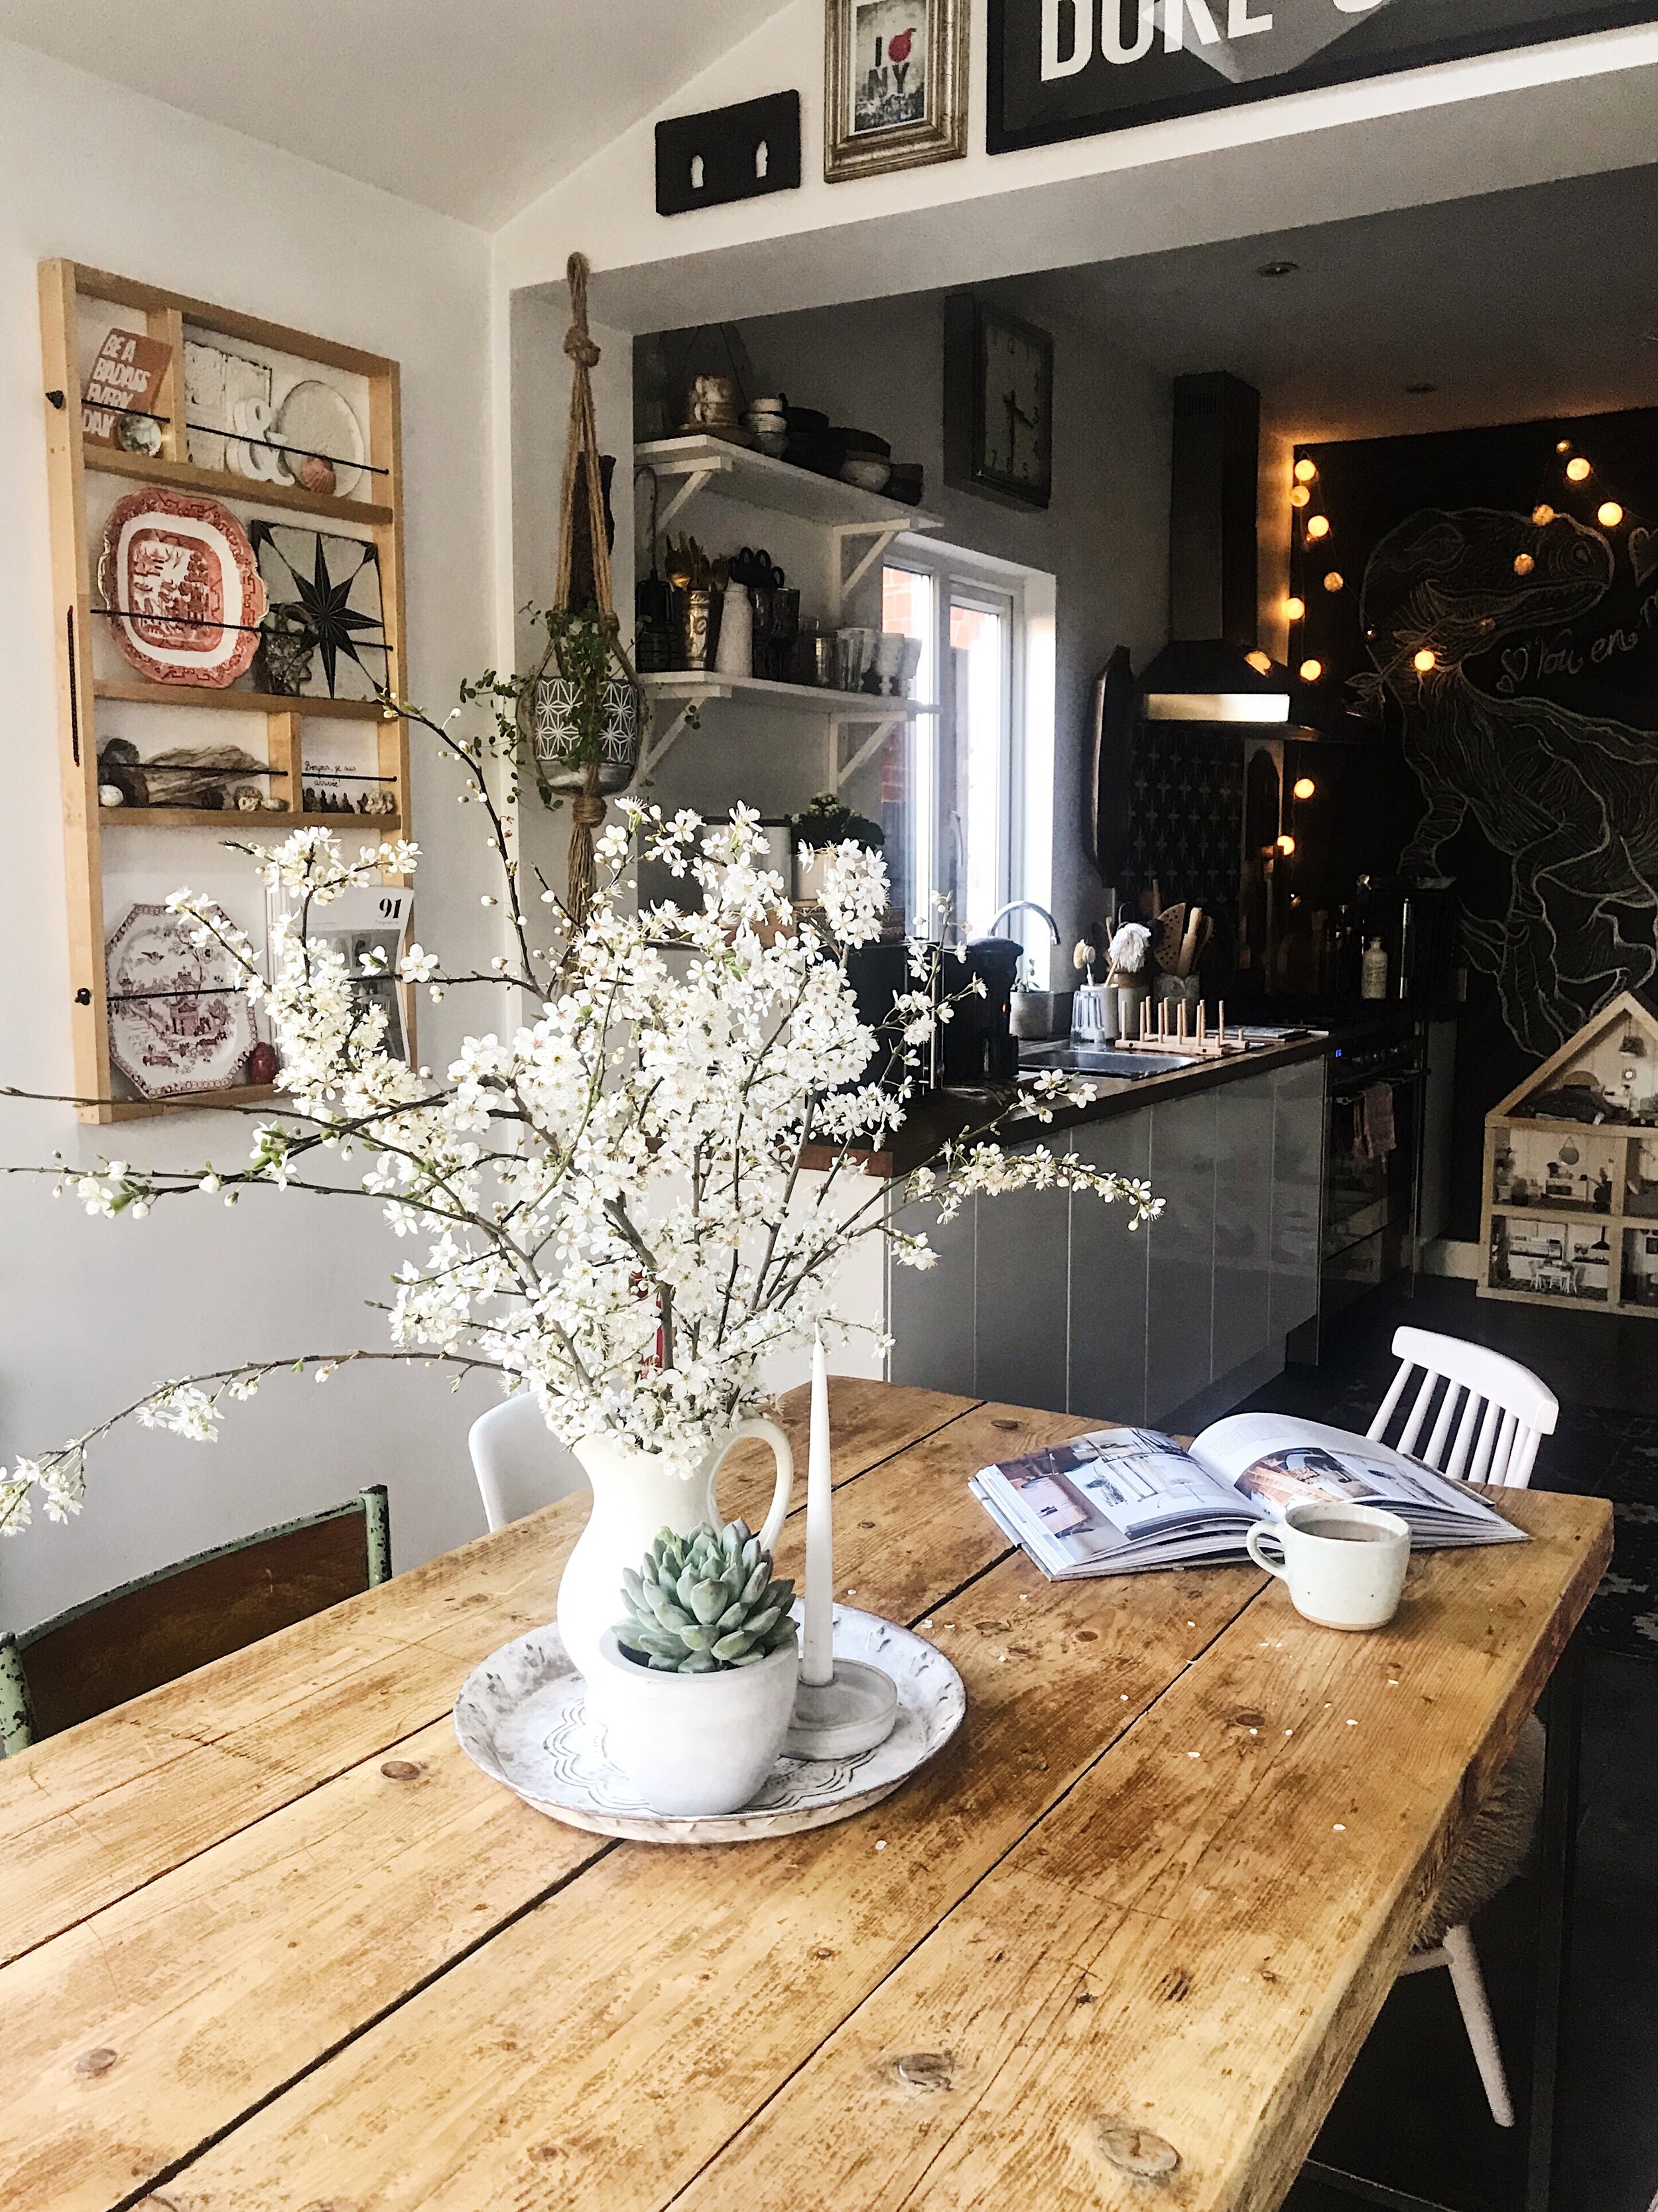
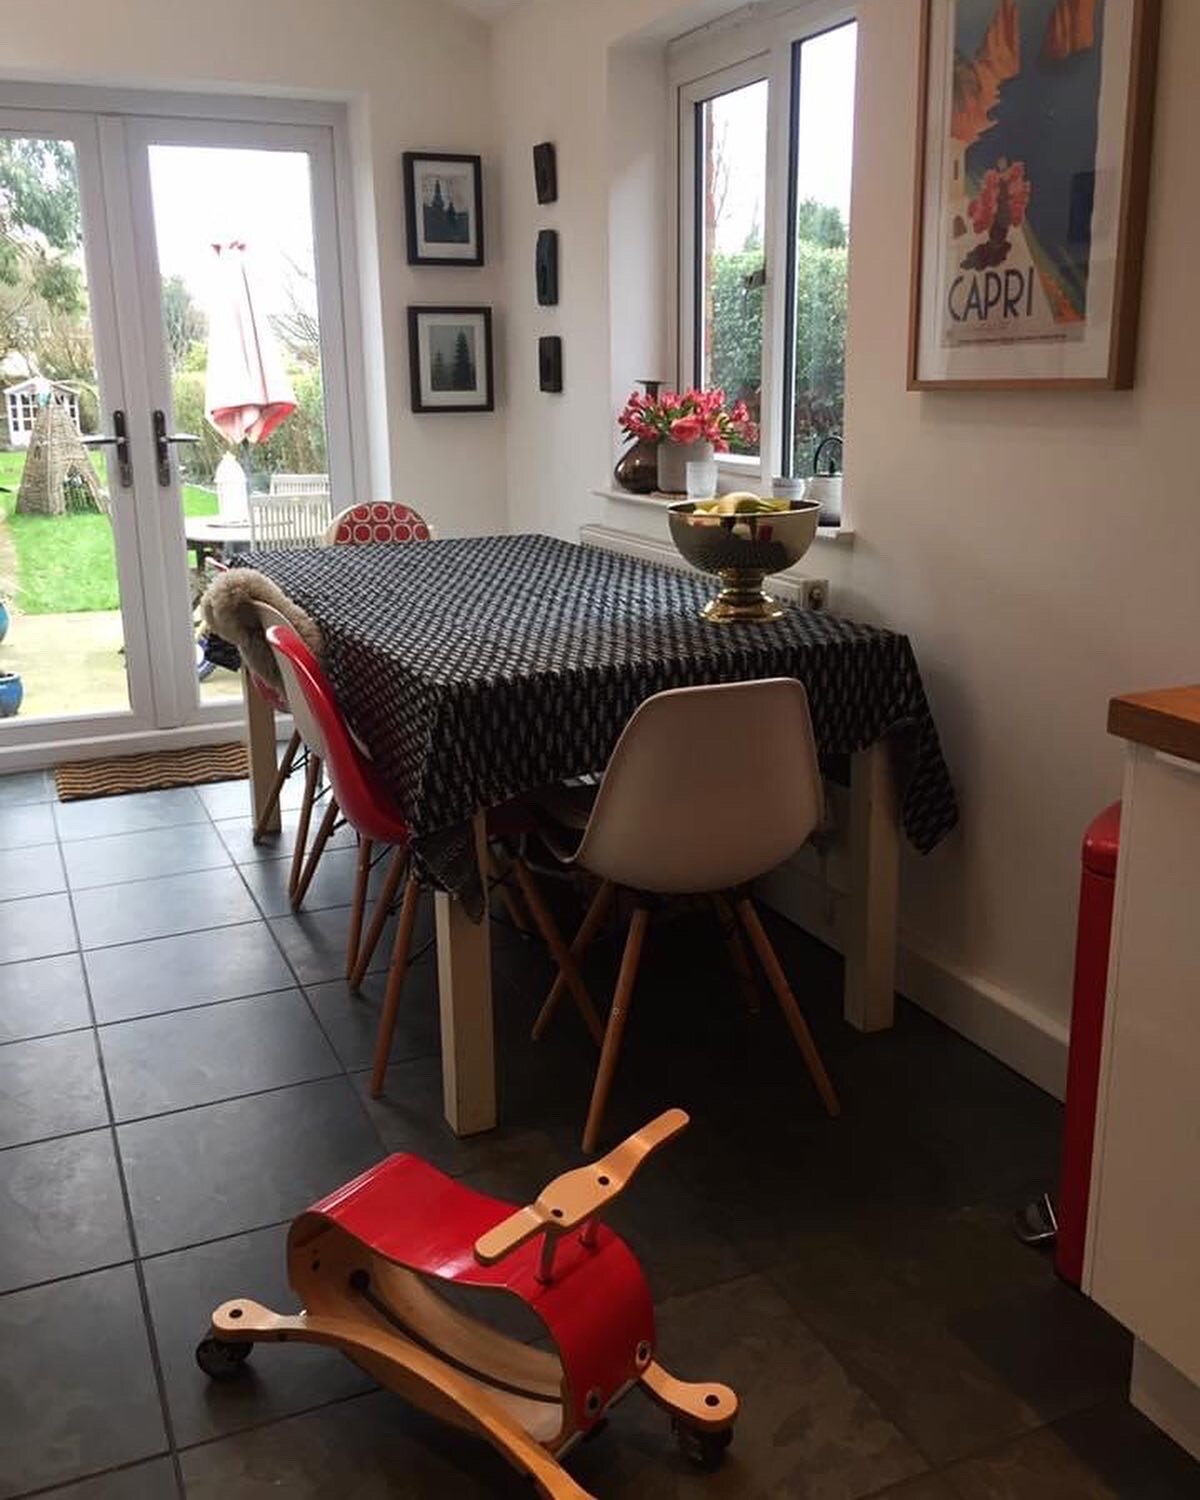
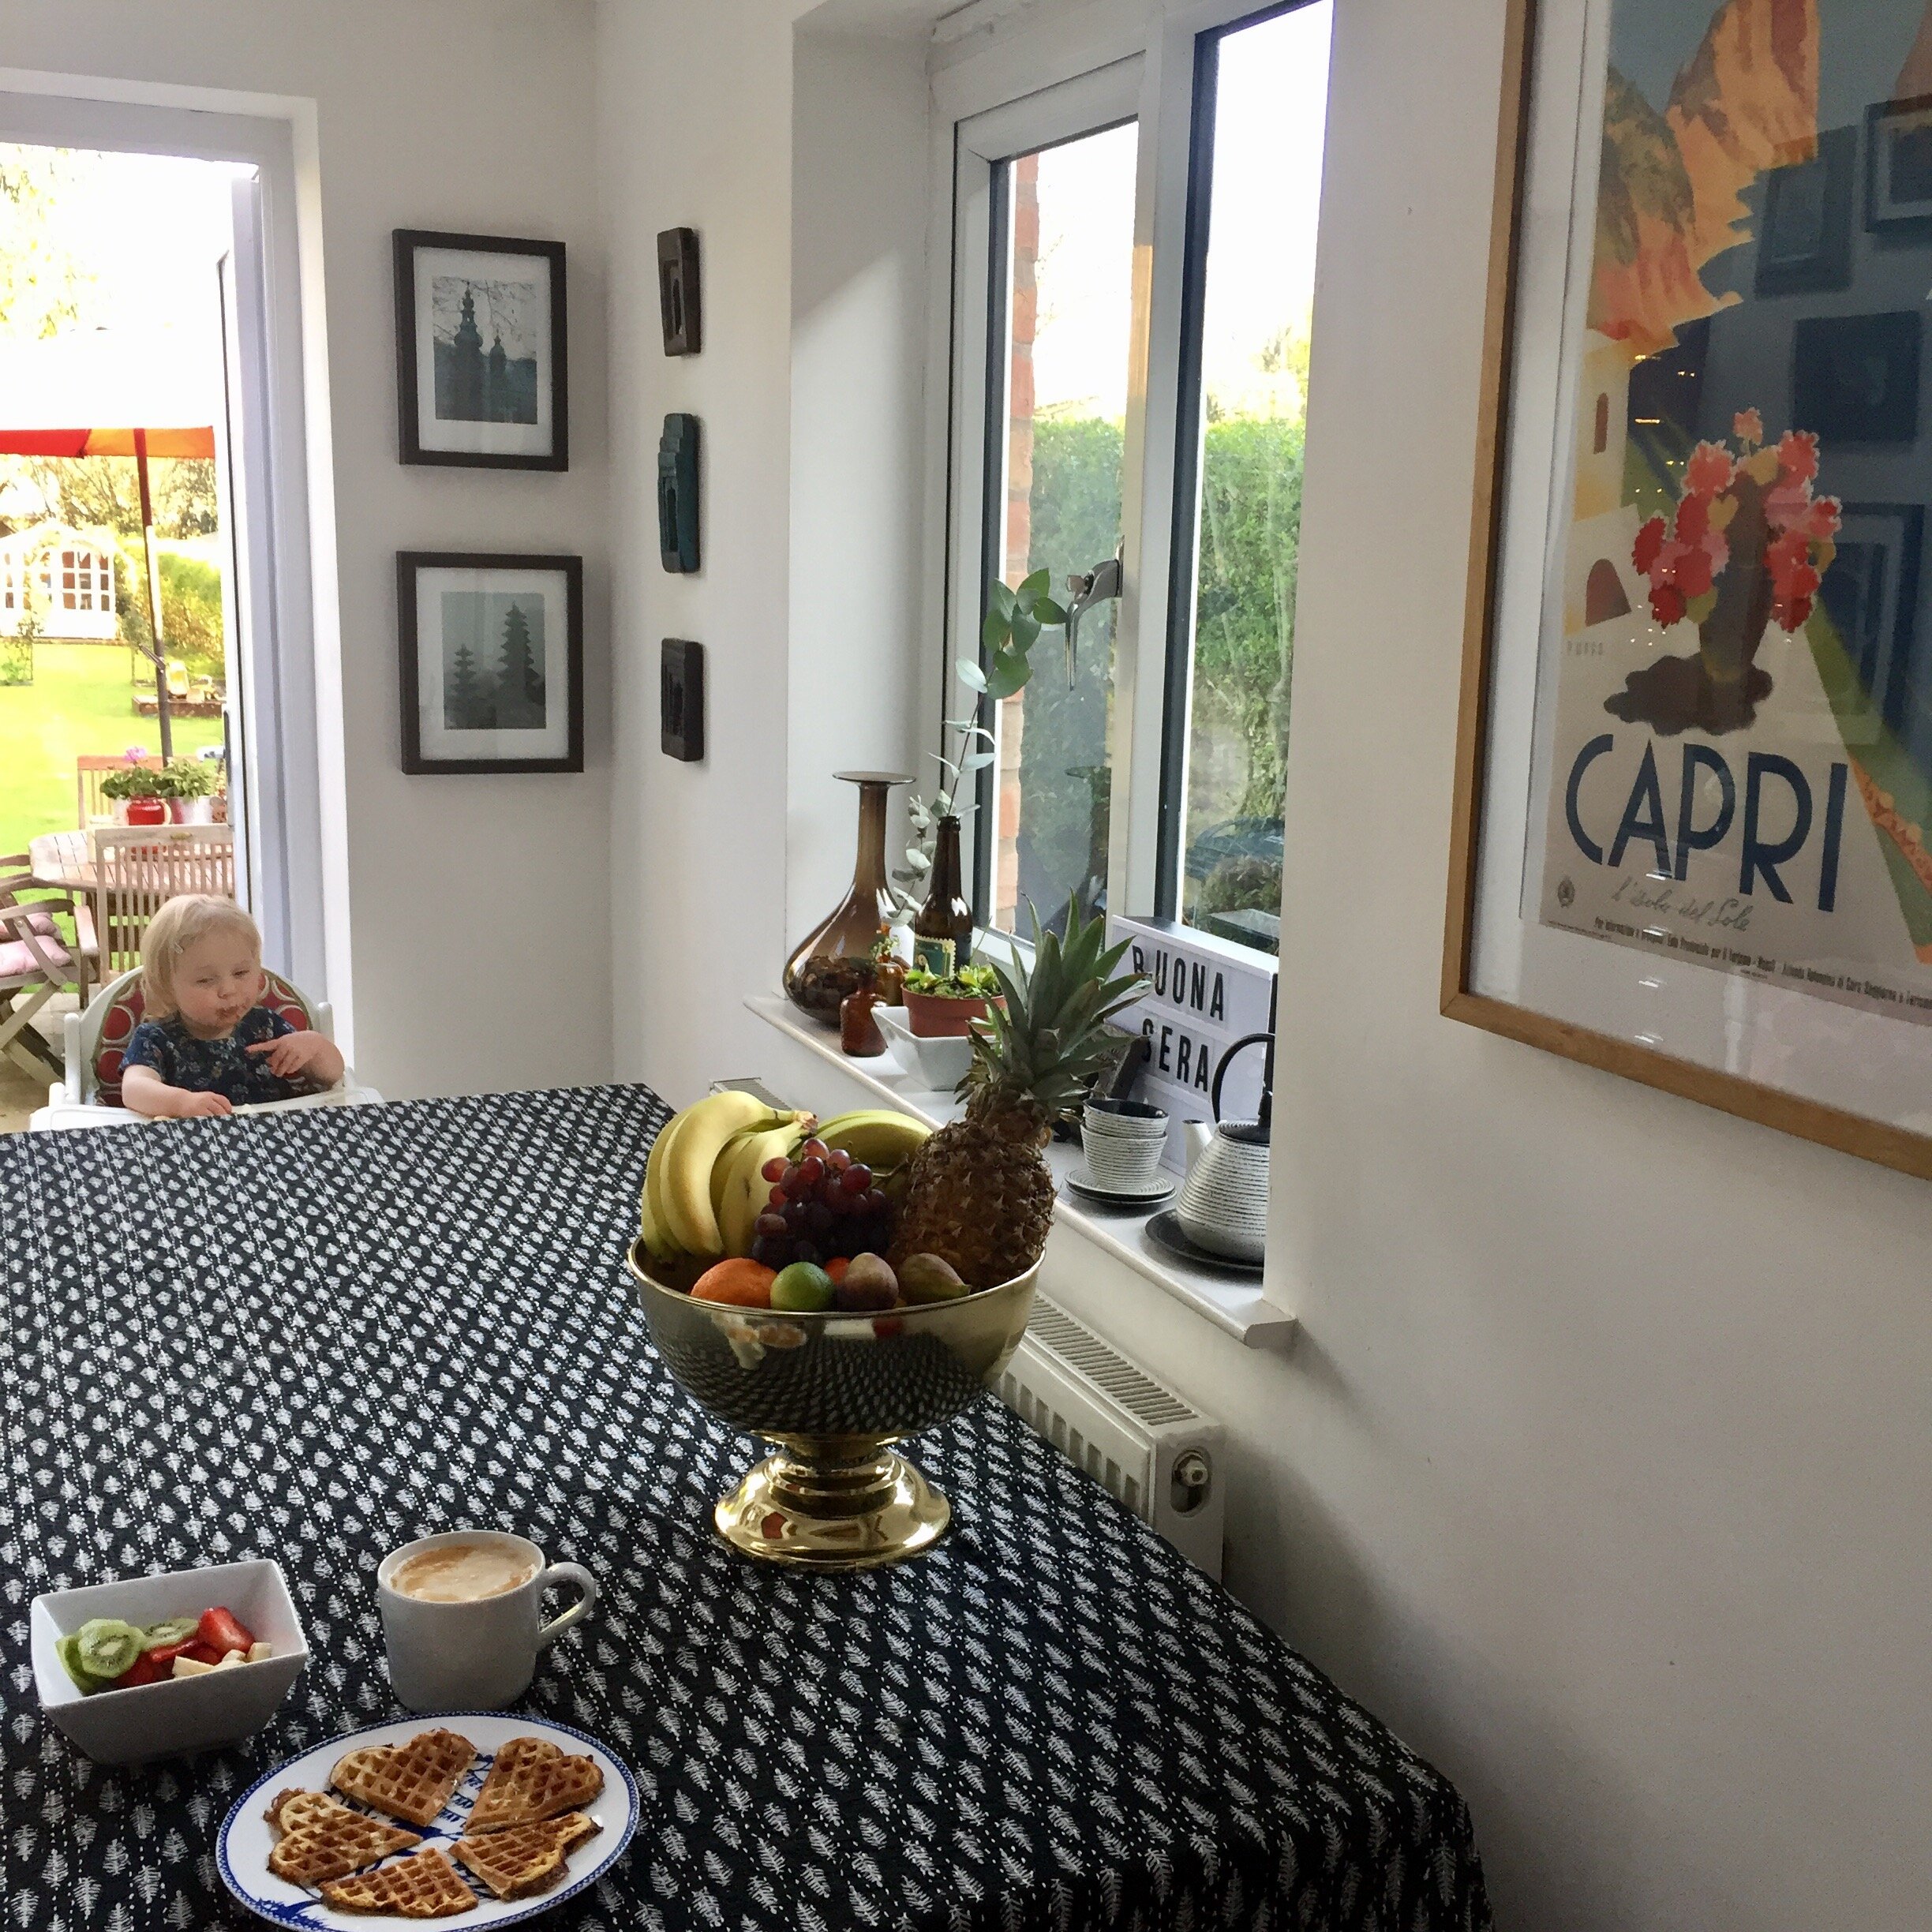
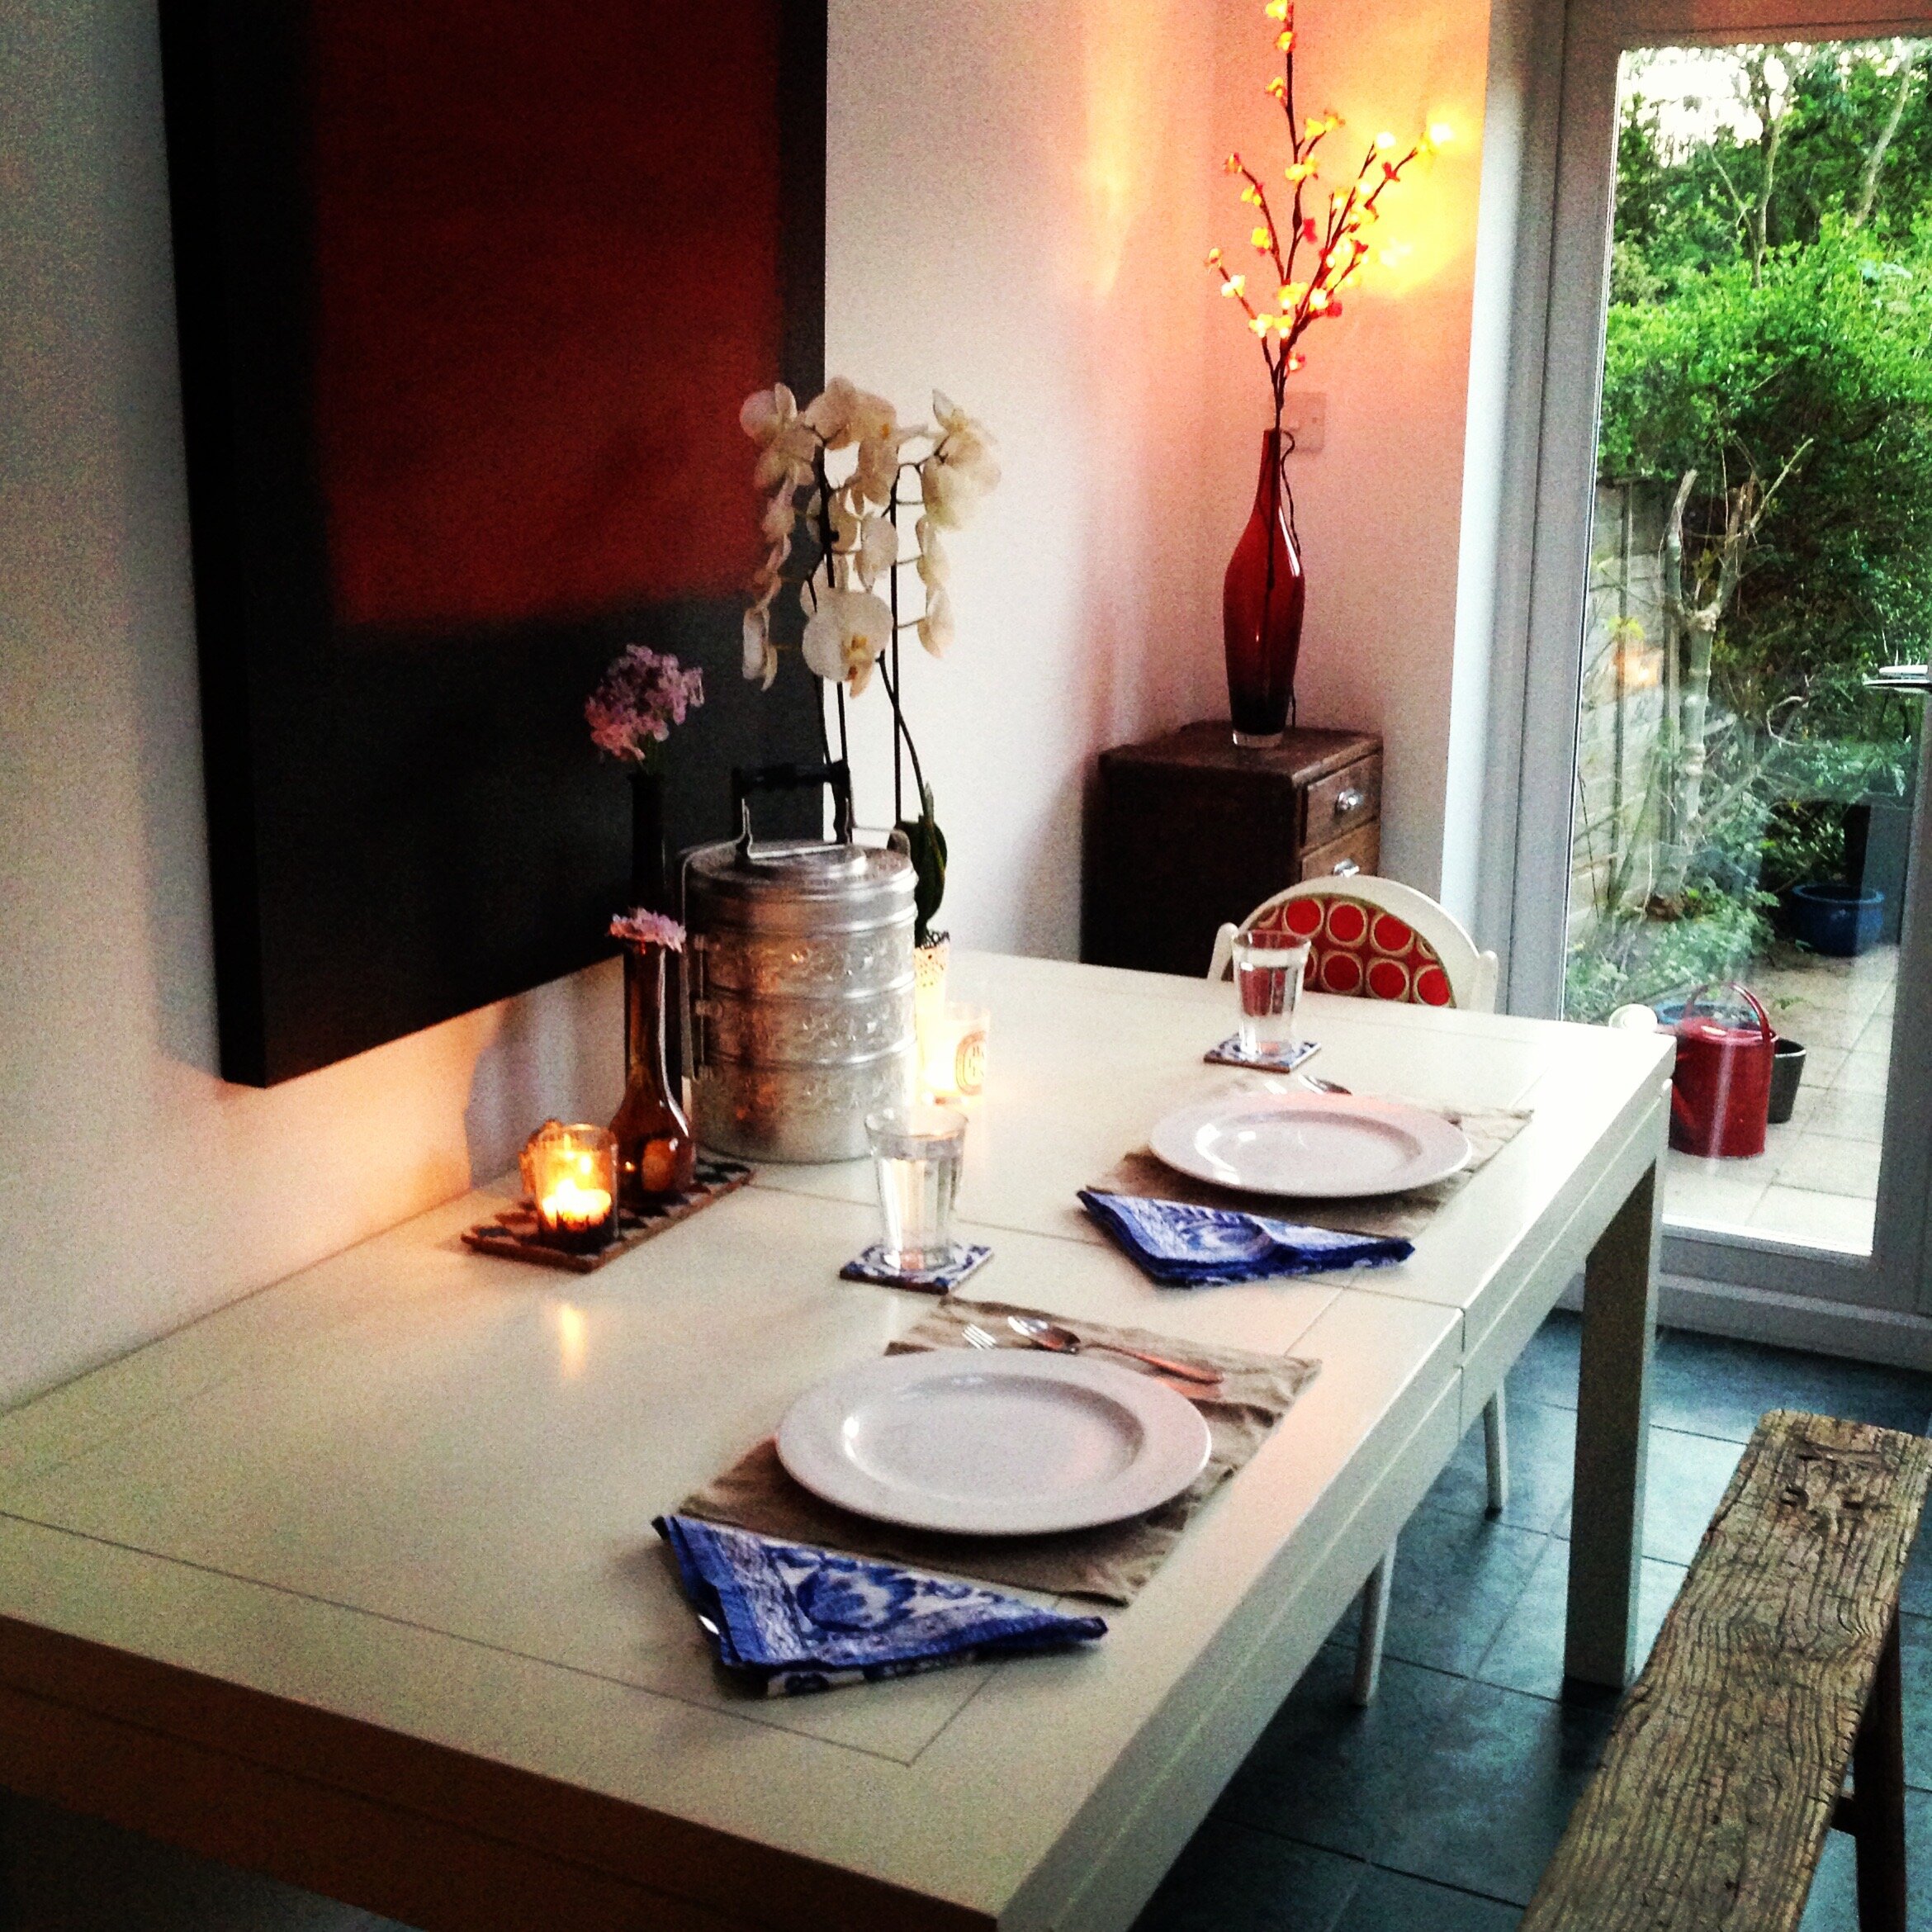
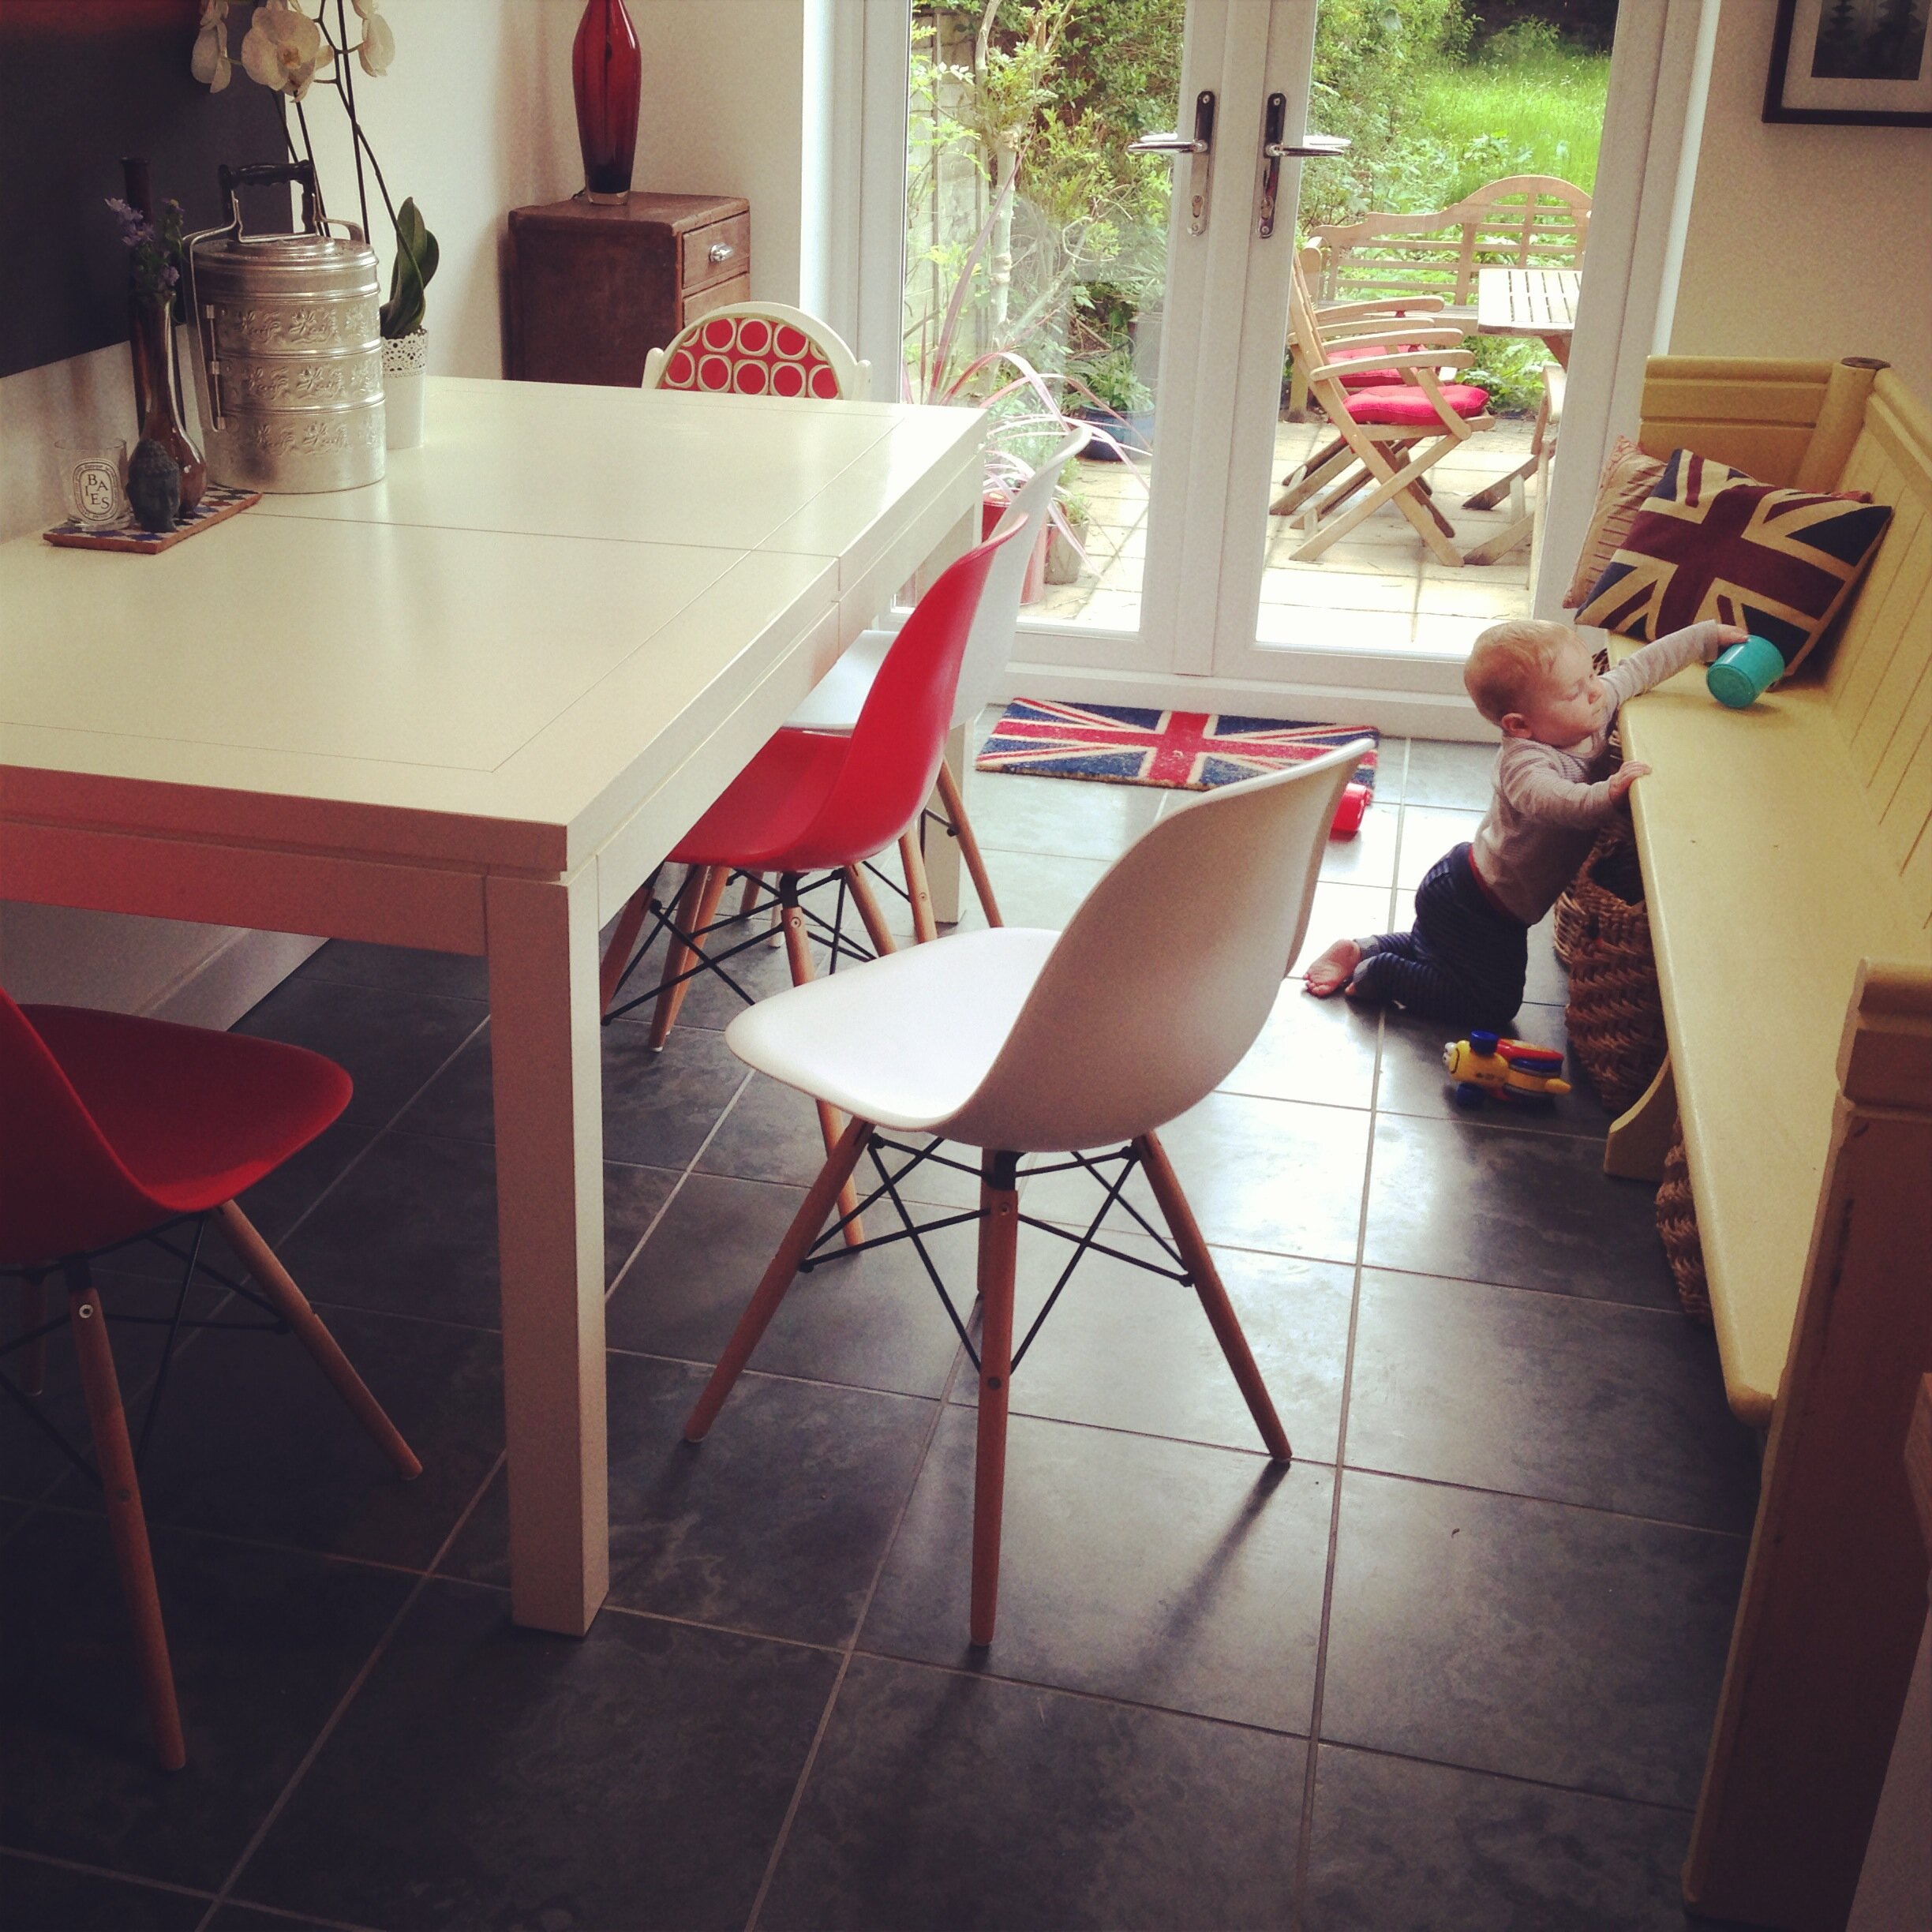
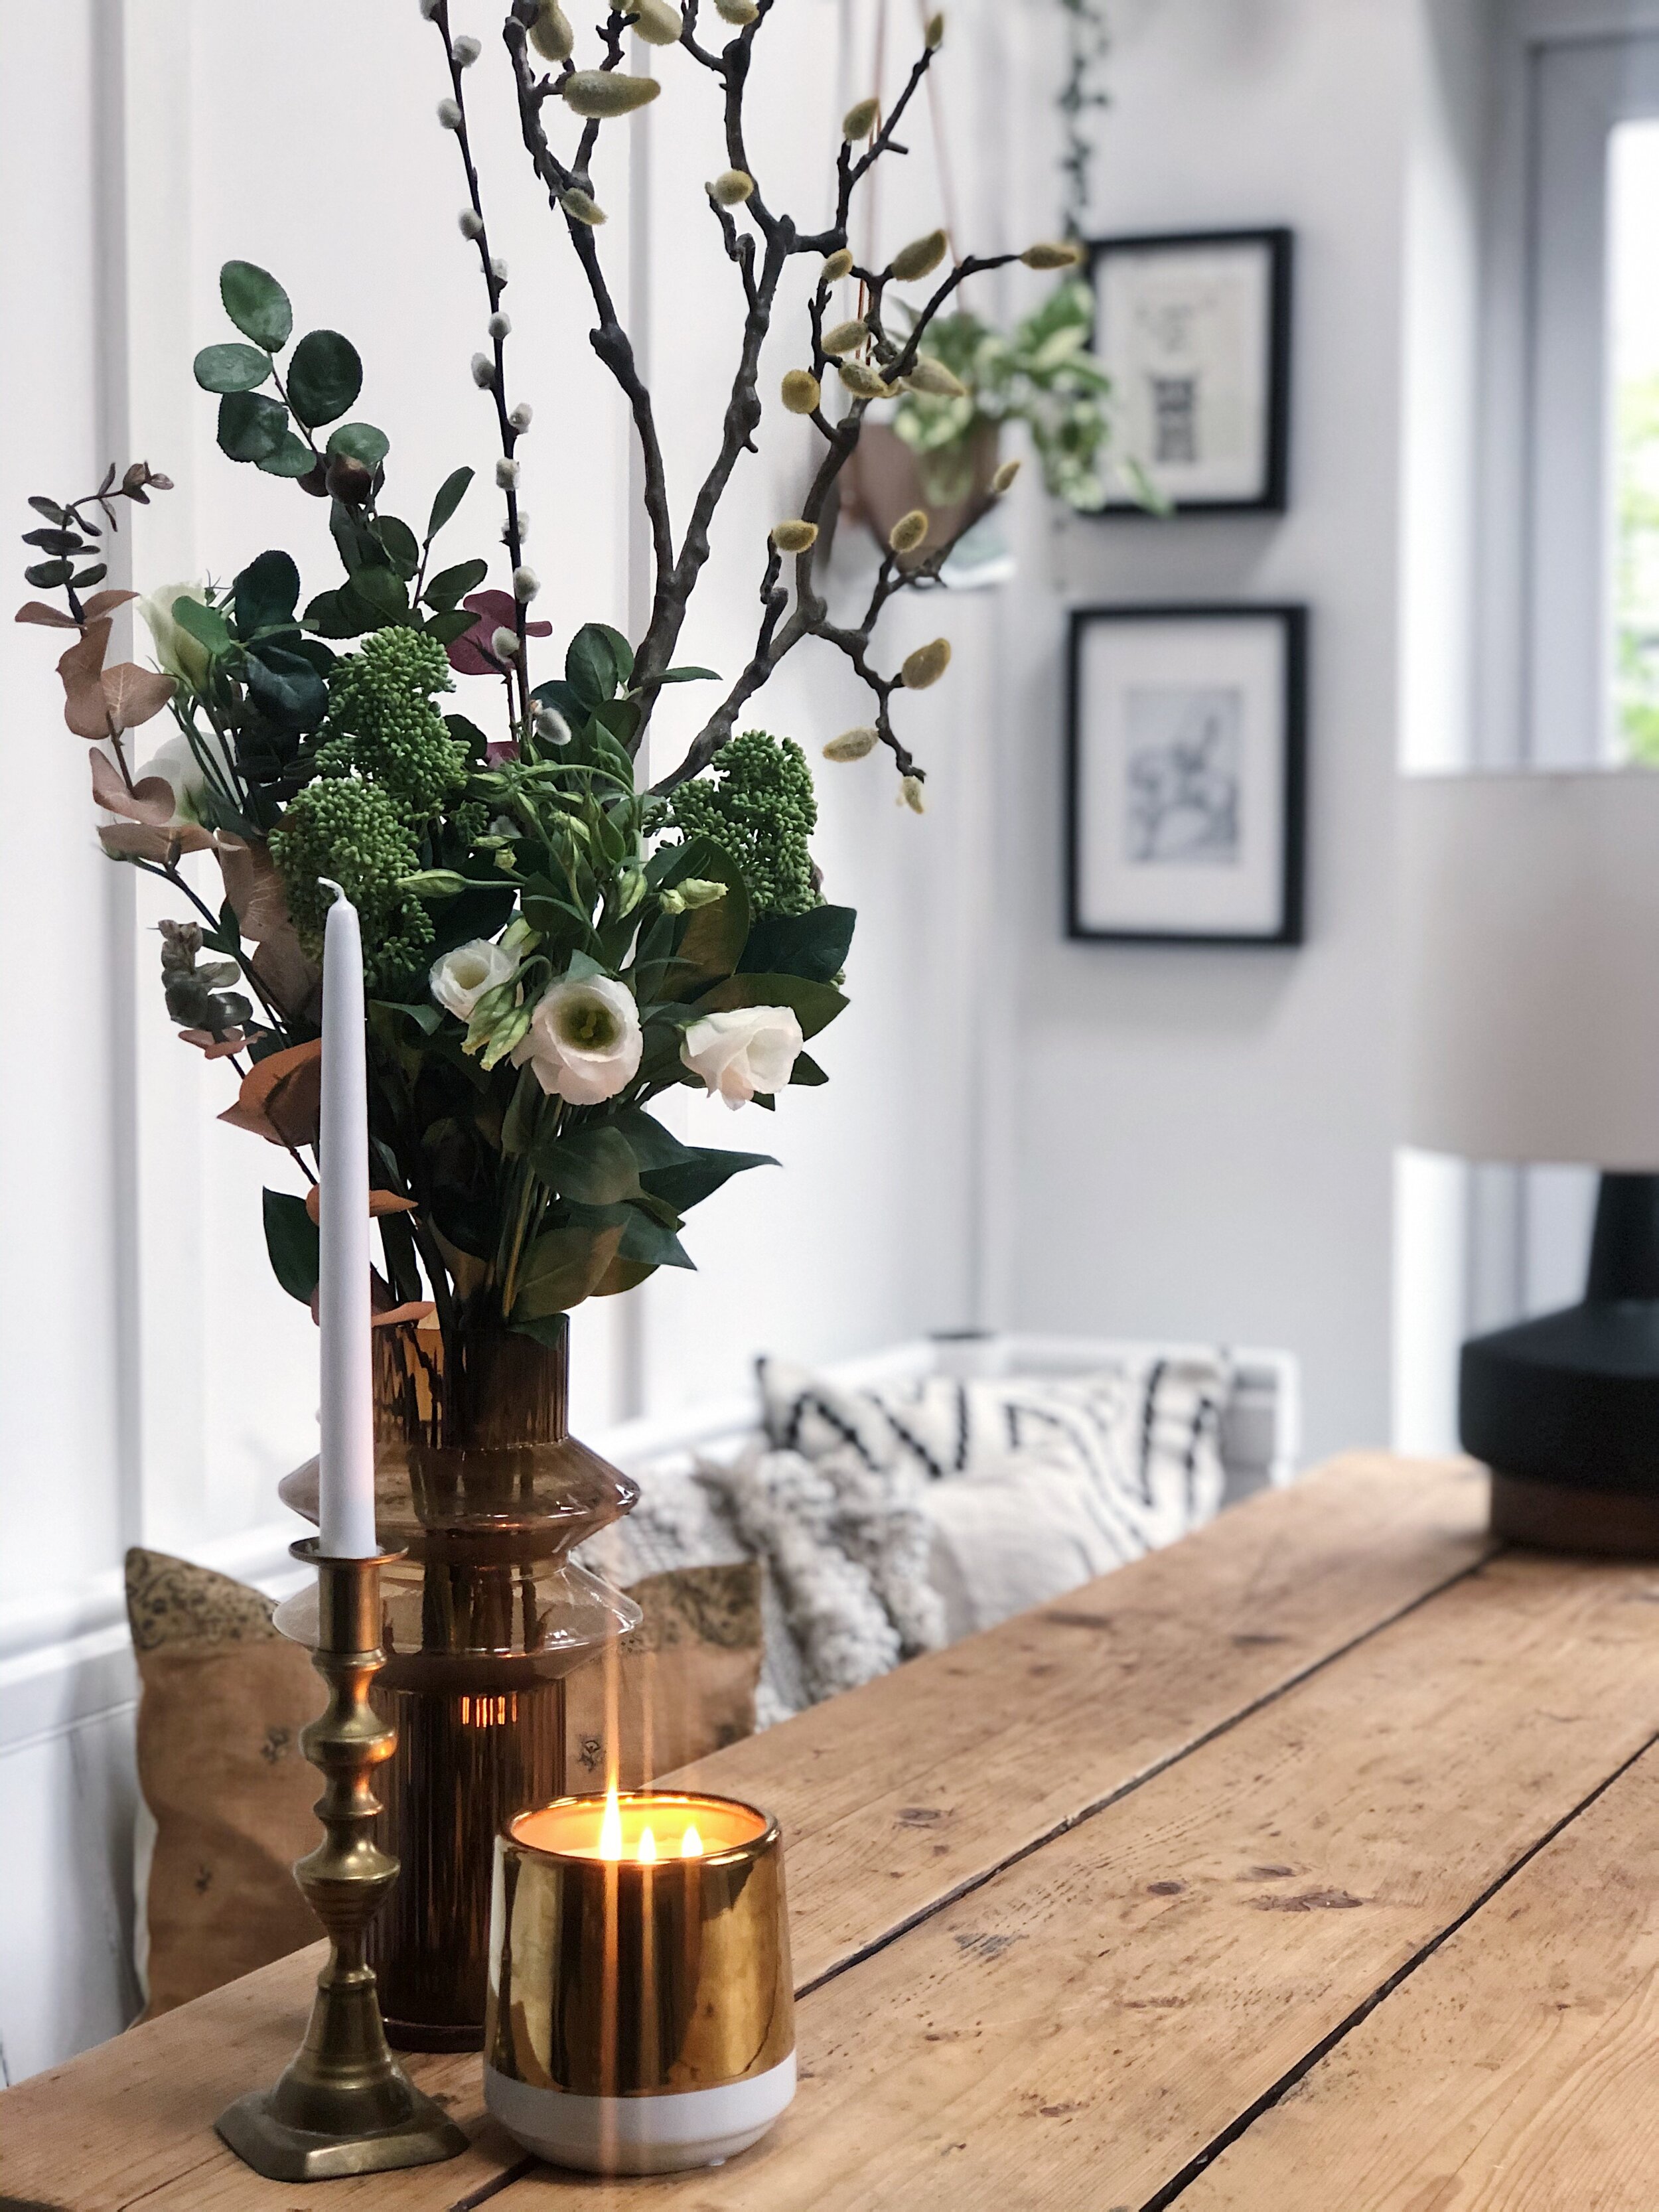
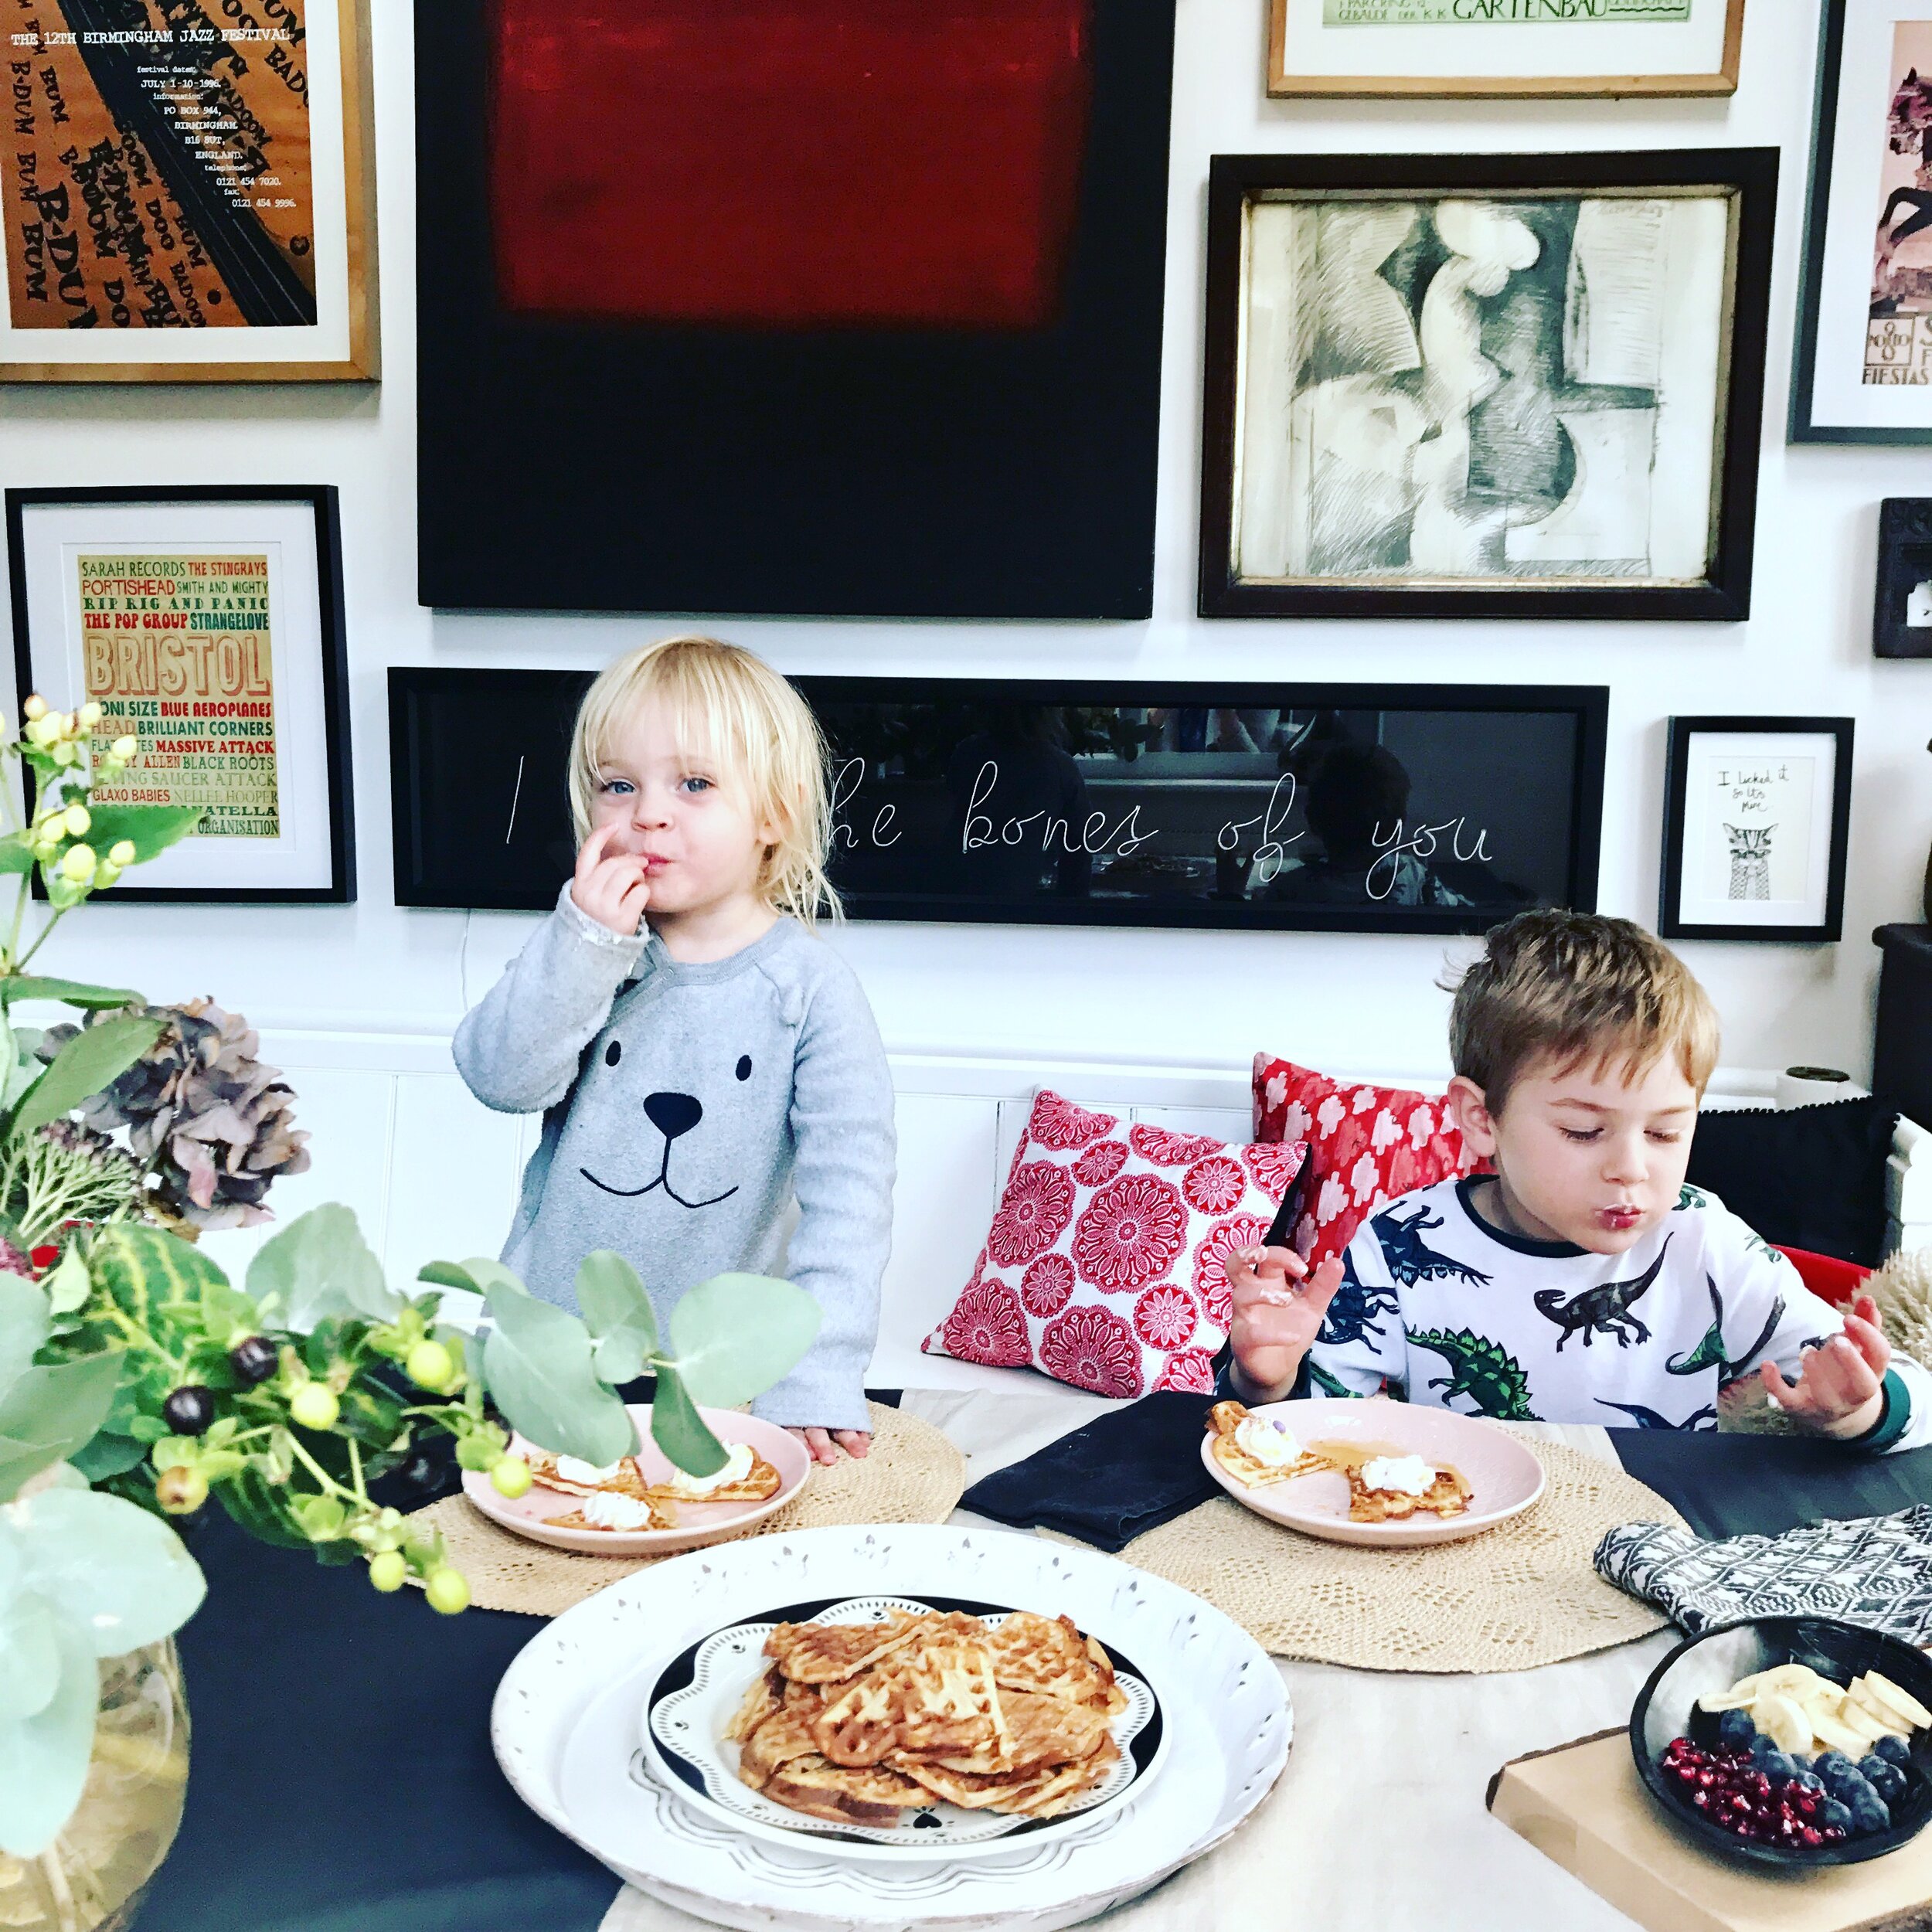
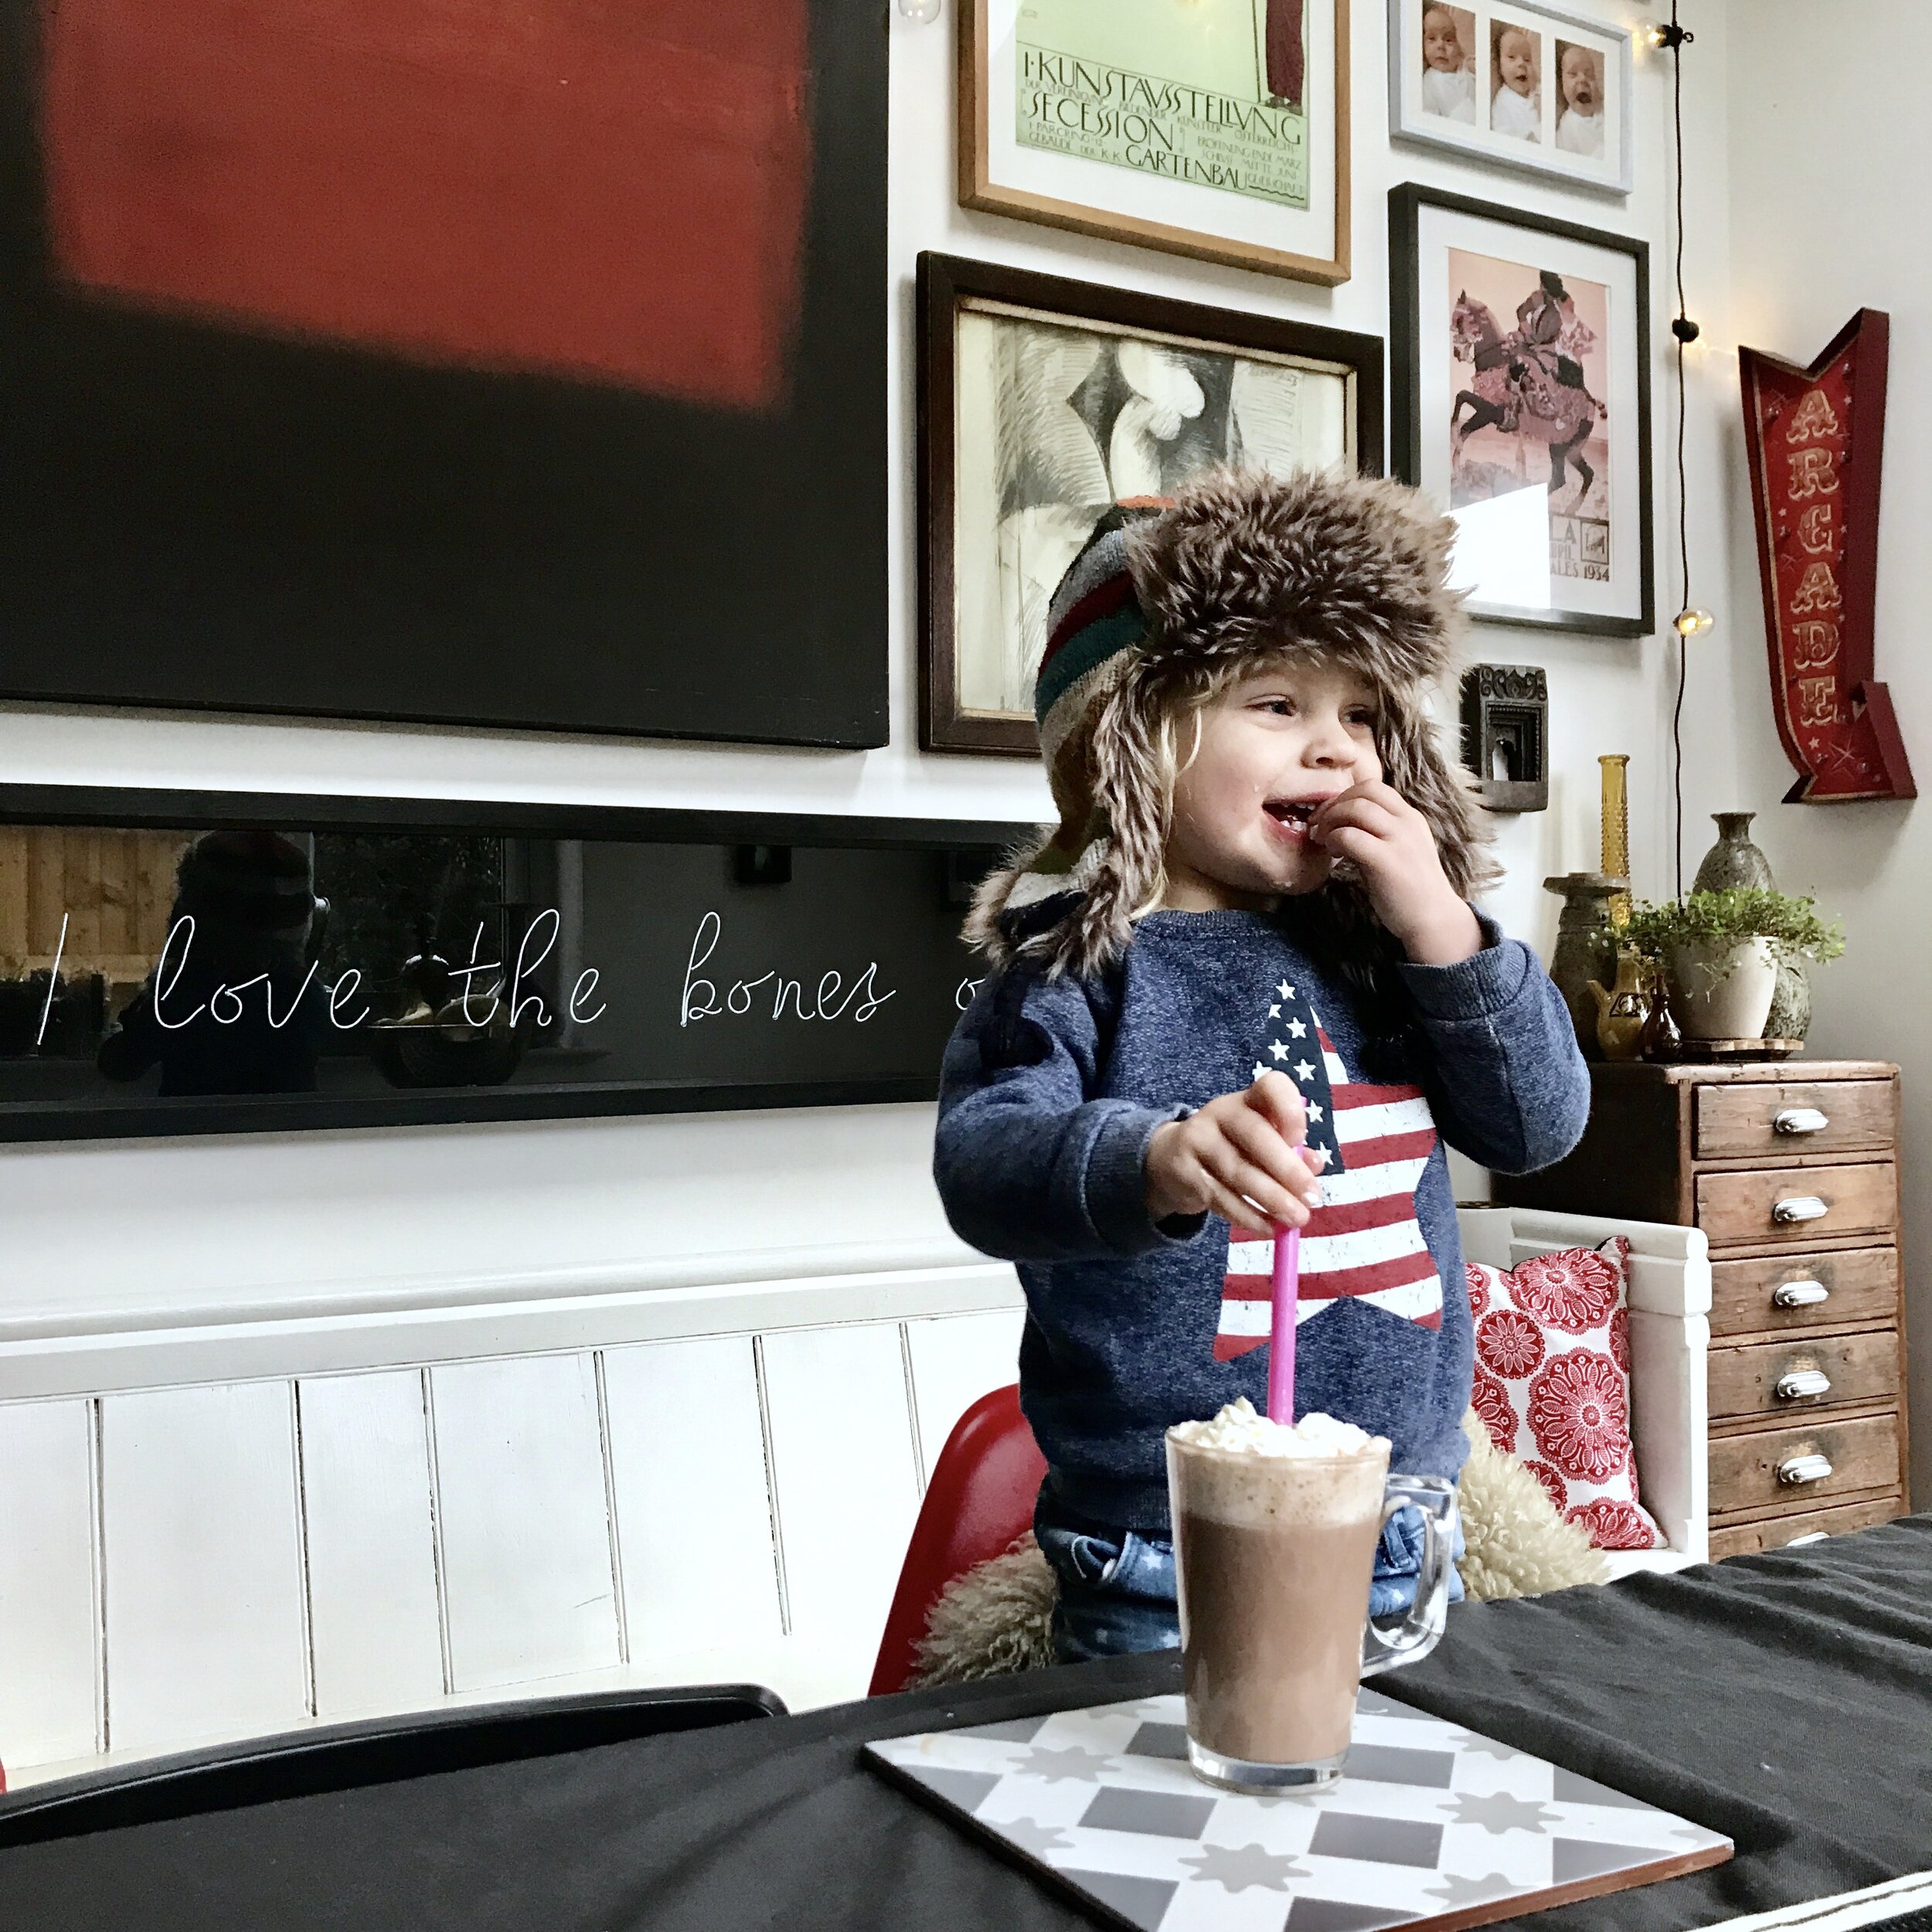
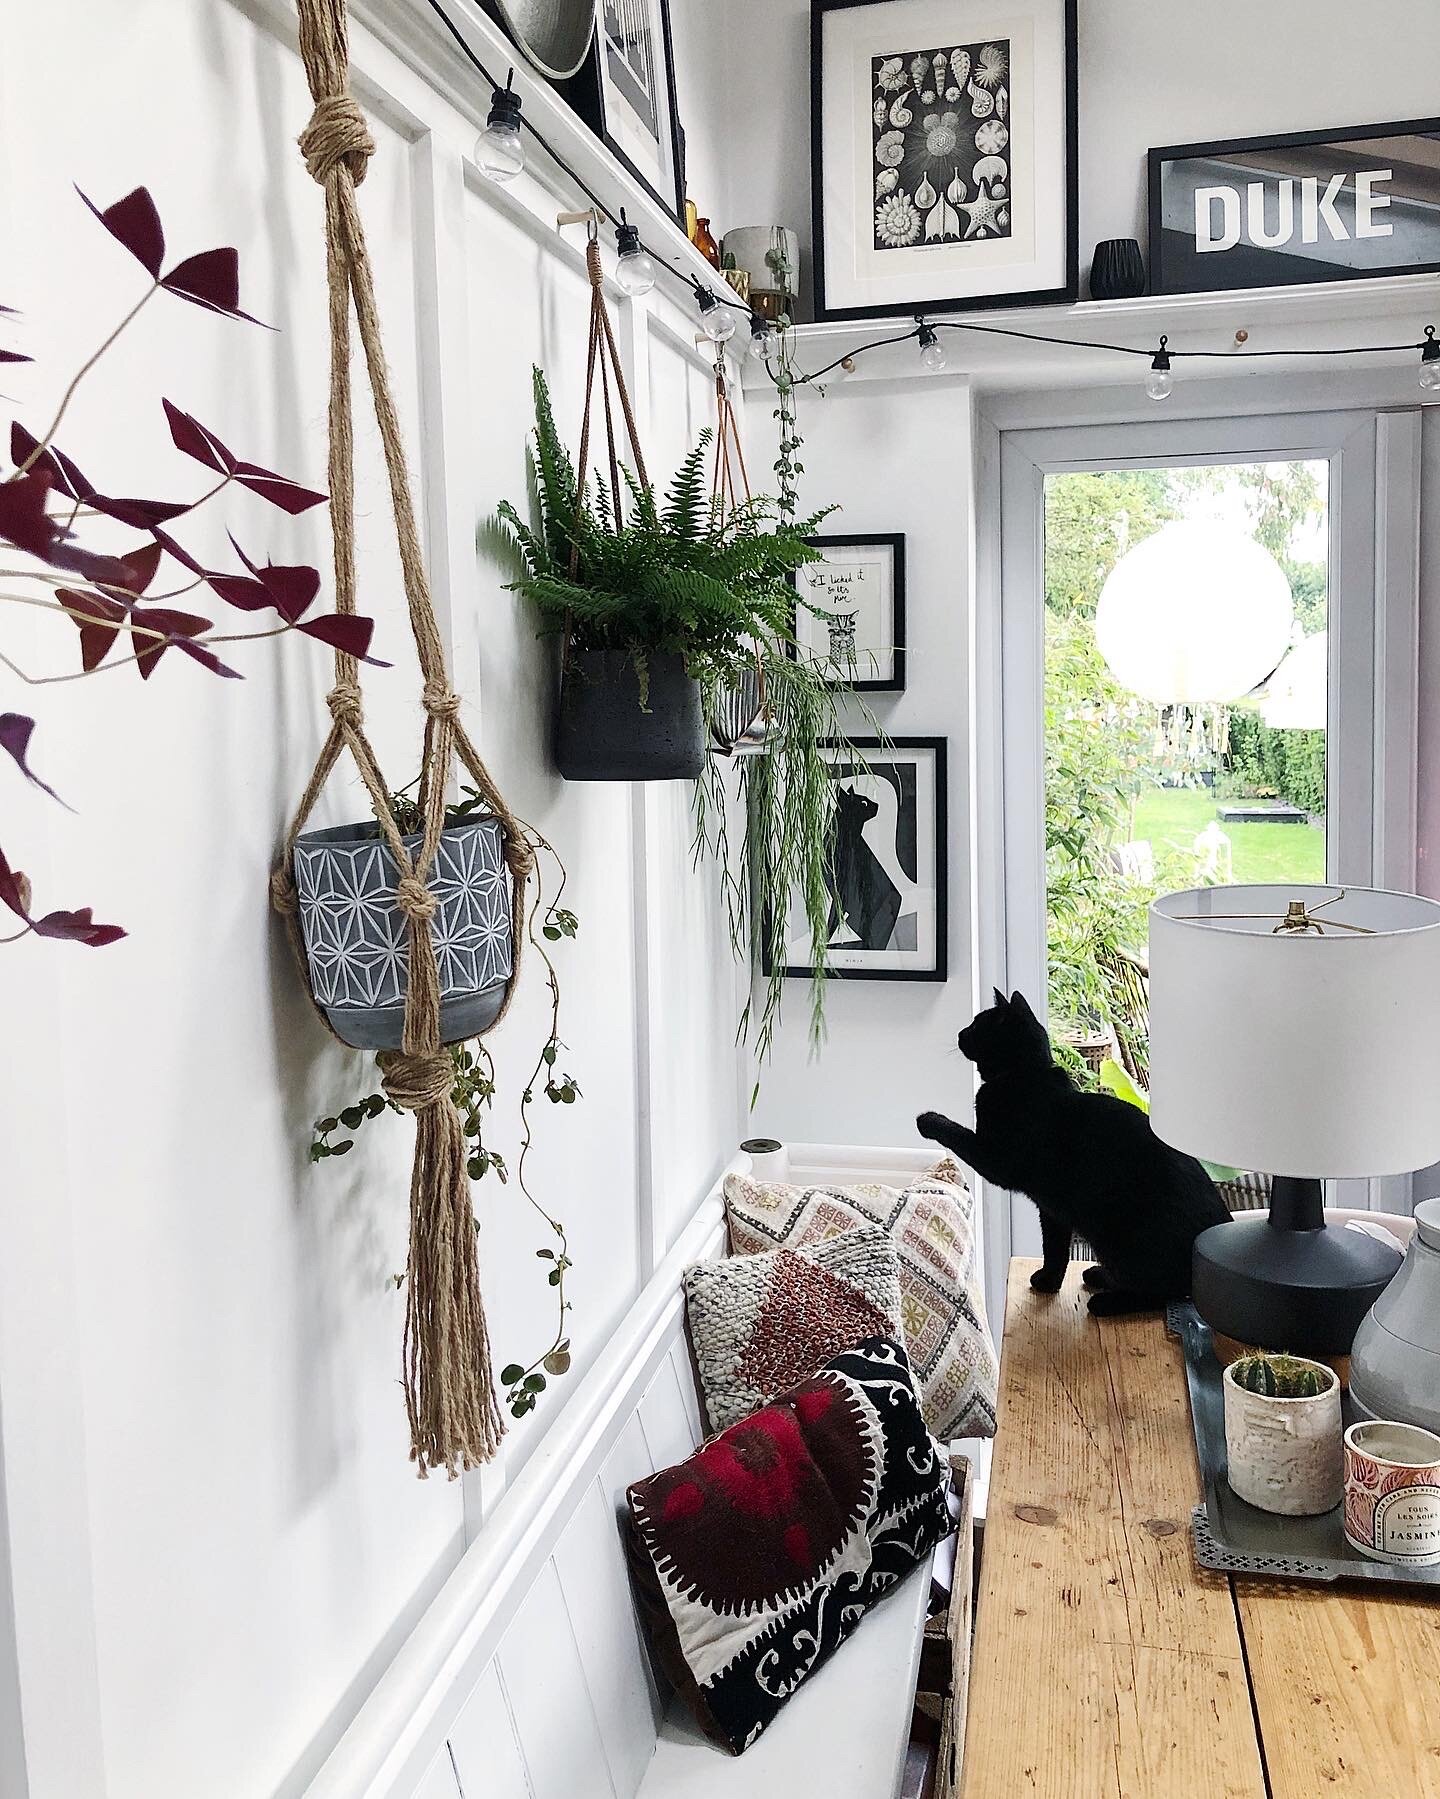
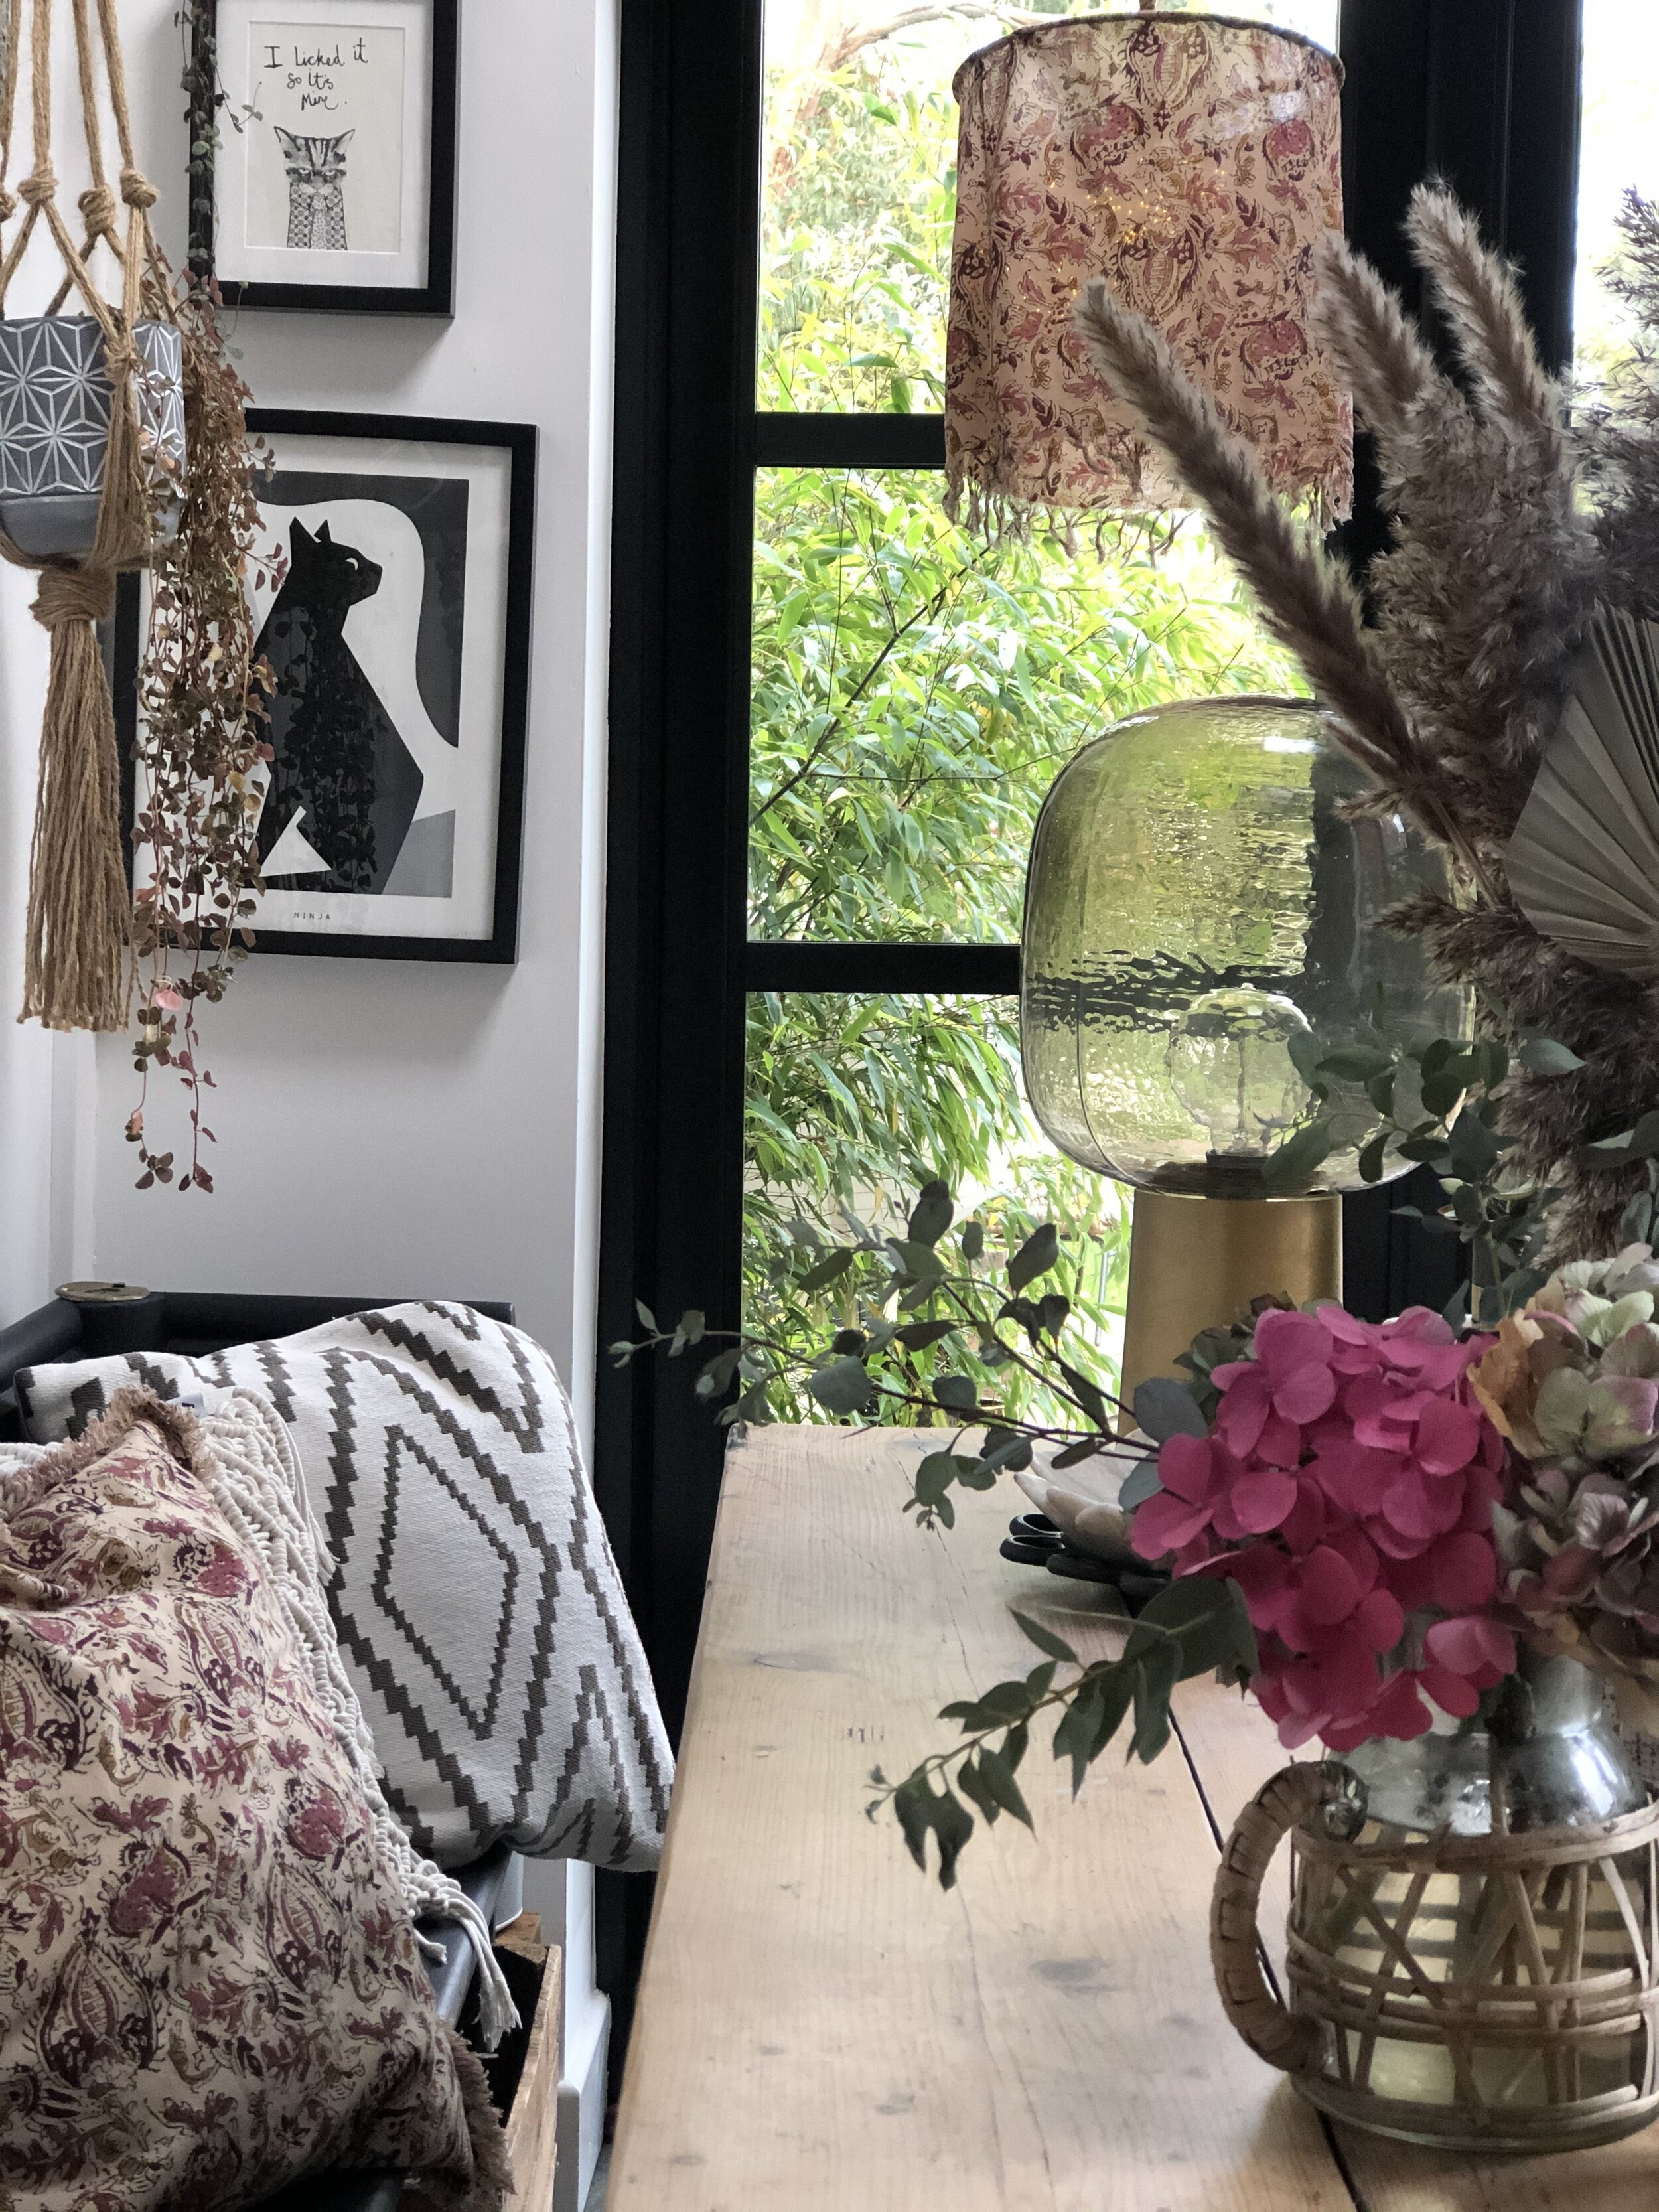
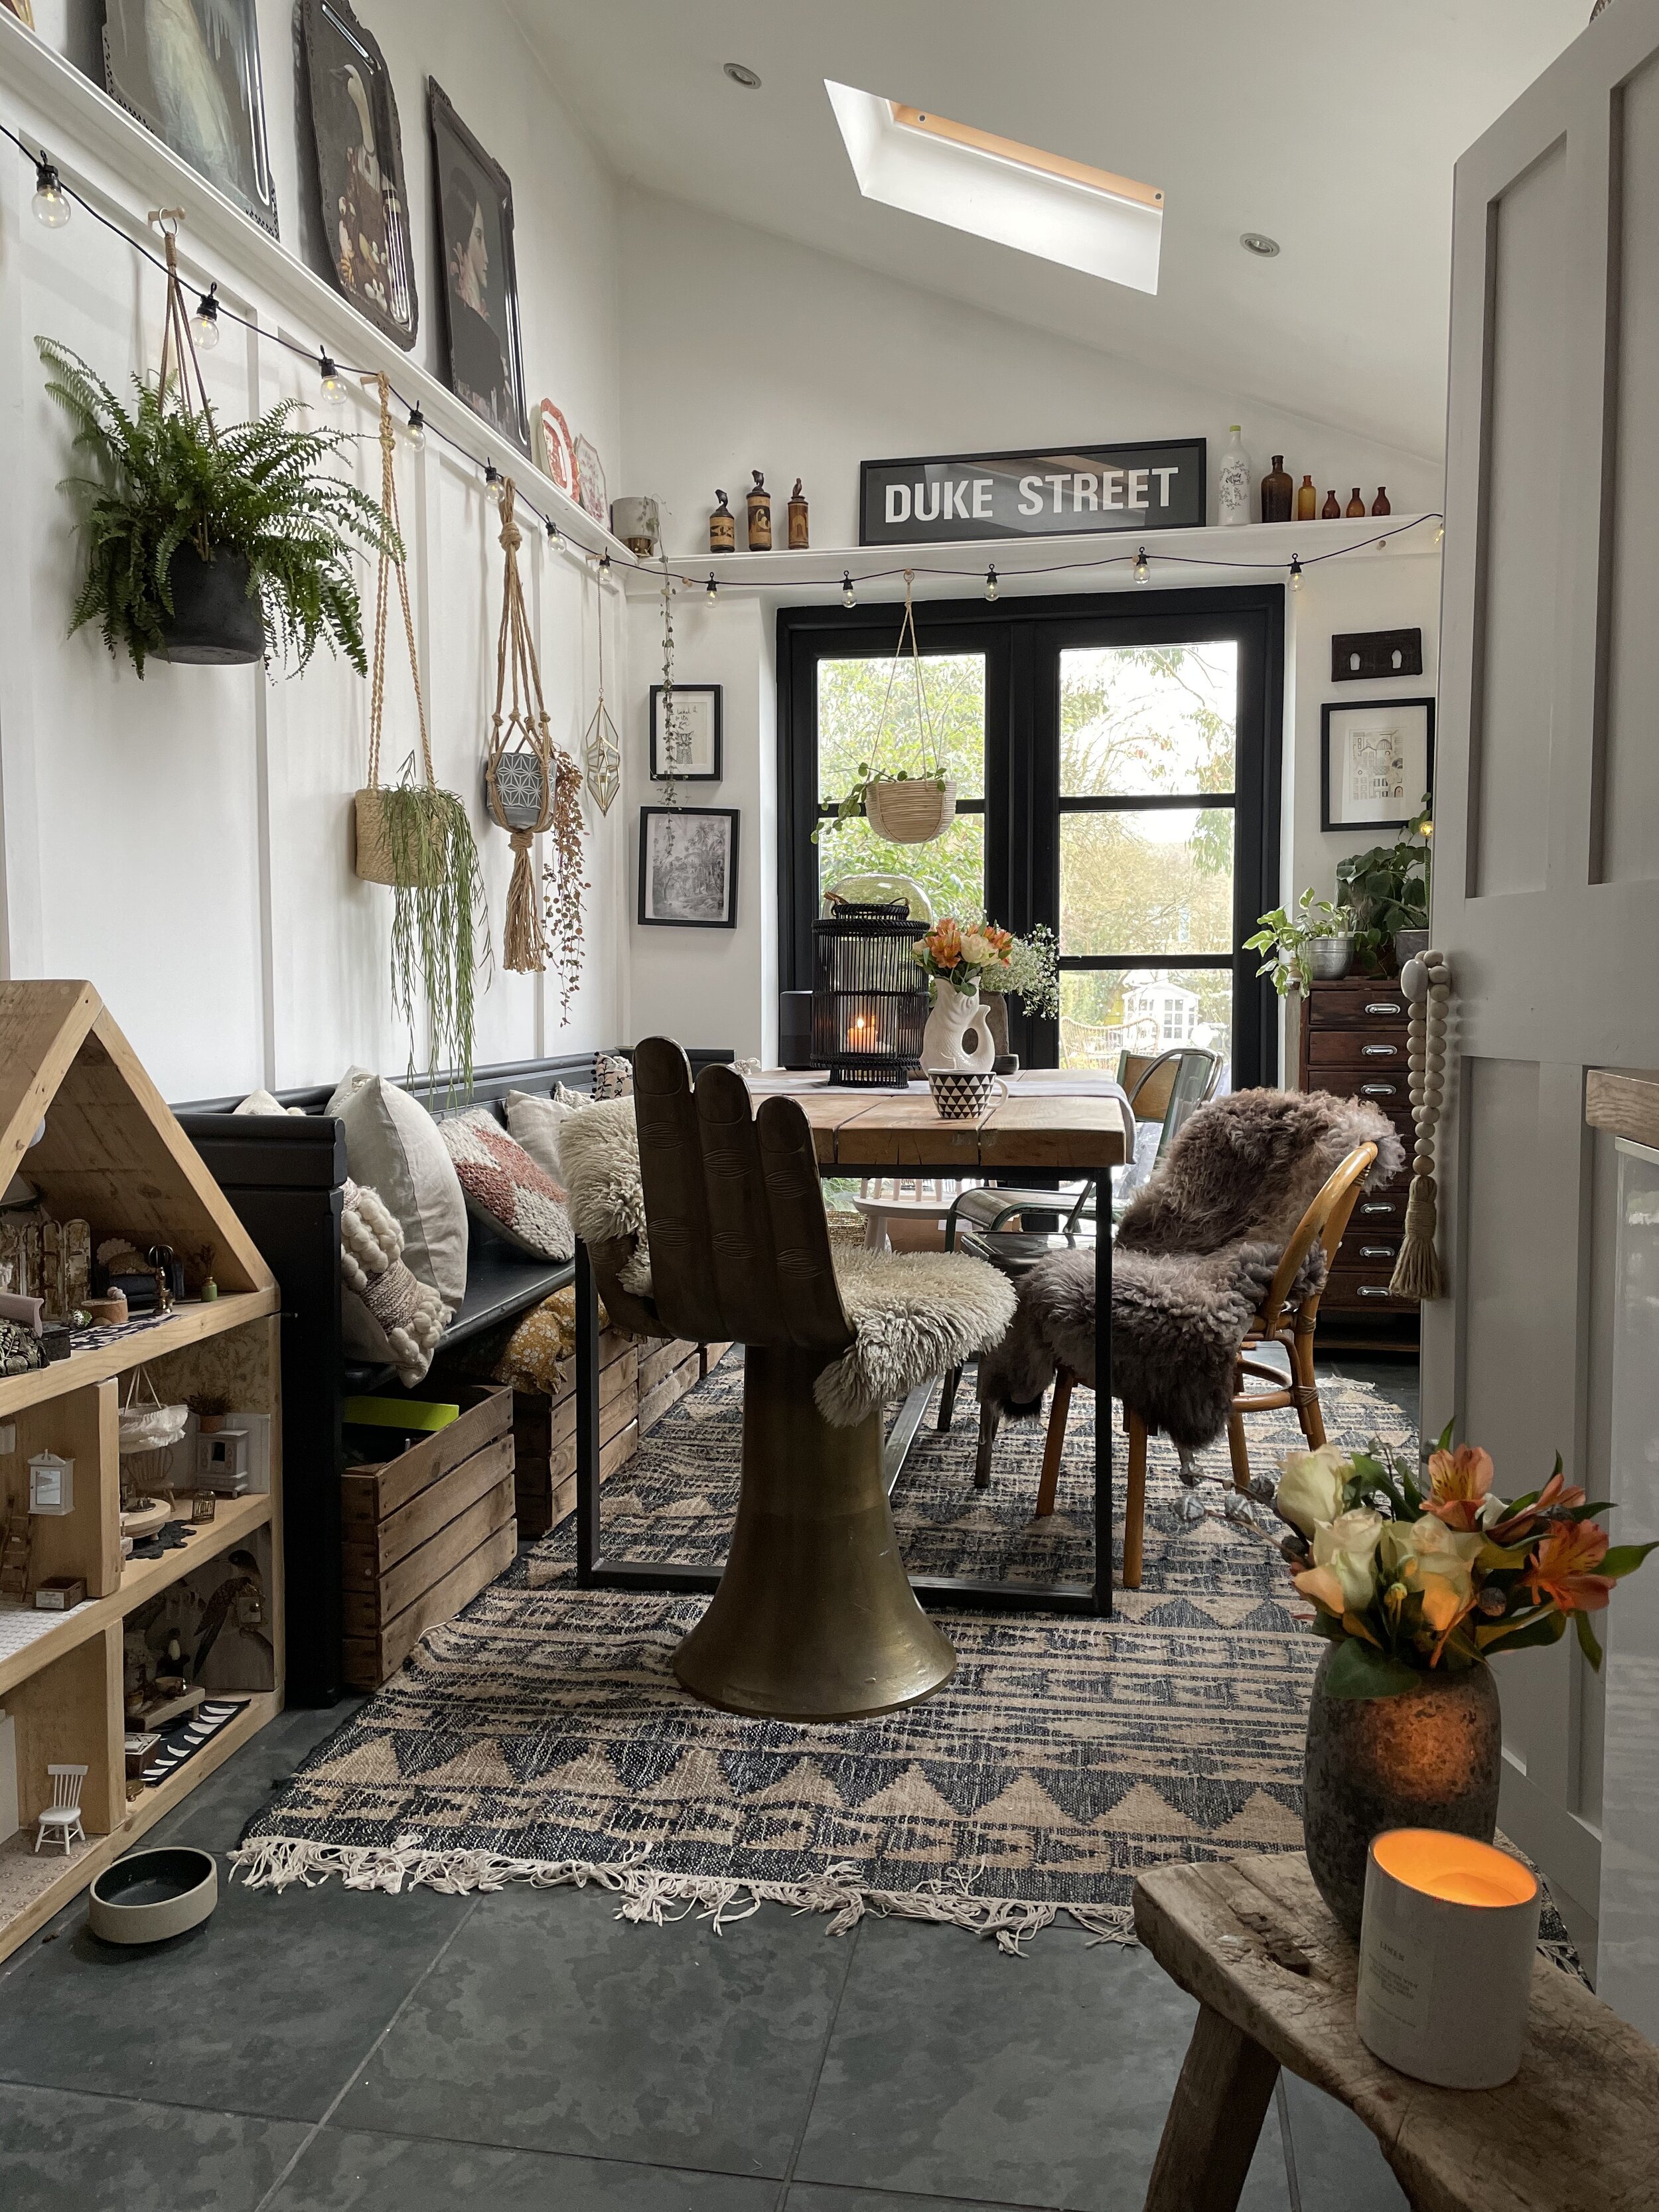
I brought in vintage furniture, a rustic scaffold board table, a vintage filing cabinet I found in my mum’s shed decades before, and a collection of mismatched vintage chairs. An old church pew I bought from eBay for £200 became part of my dining table seating. It’s been painted a few colours over the years and is now my go to colour black! Homemade cushions line the bench and sheepskins drape on the chairs to soften the space and make a comfy spot for a coffee. Lamps are dotted about to add cosy ambient lighting when I don’t want to sit under harsh task lighting.
The floor we’ve decided not to change although I would love to! We’d have to take the kitchen units out to get the existing flooring up and so seems like it’s sensible to leave the present tiles. I’ve considered painting them with floor paint and stencilling them but I won’t lie the huge scale of the job put me off! As a cosmetic solution I’ve used kitchen rugs to cover them up and to add pattern and also to soften the space and just give it a cosier feeling. If you’re worried about using rugs in a kitchen never fear there are lots of practical rugs you can use. I have a vinyl rug from Beija Flor you can find lots of beautiful rugs from them here (the one I have is discontinued I believe) and they can be mopped down easily enough .I’ve also got a woven jute style rug from La Redoute under the kitchen table, find something similar here which is another option, its pretty easy to sweep away crumbs and sponge down if disaster strikes and your kids go crazy with the ketchup!

Kitchen rugs, an ideal solution to zone areas in a large open space kitchen or simply to hide floors that your not keen on like me!
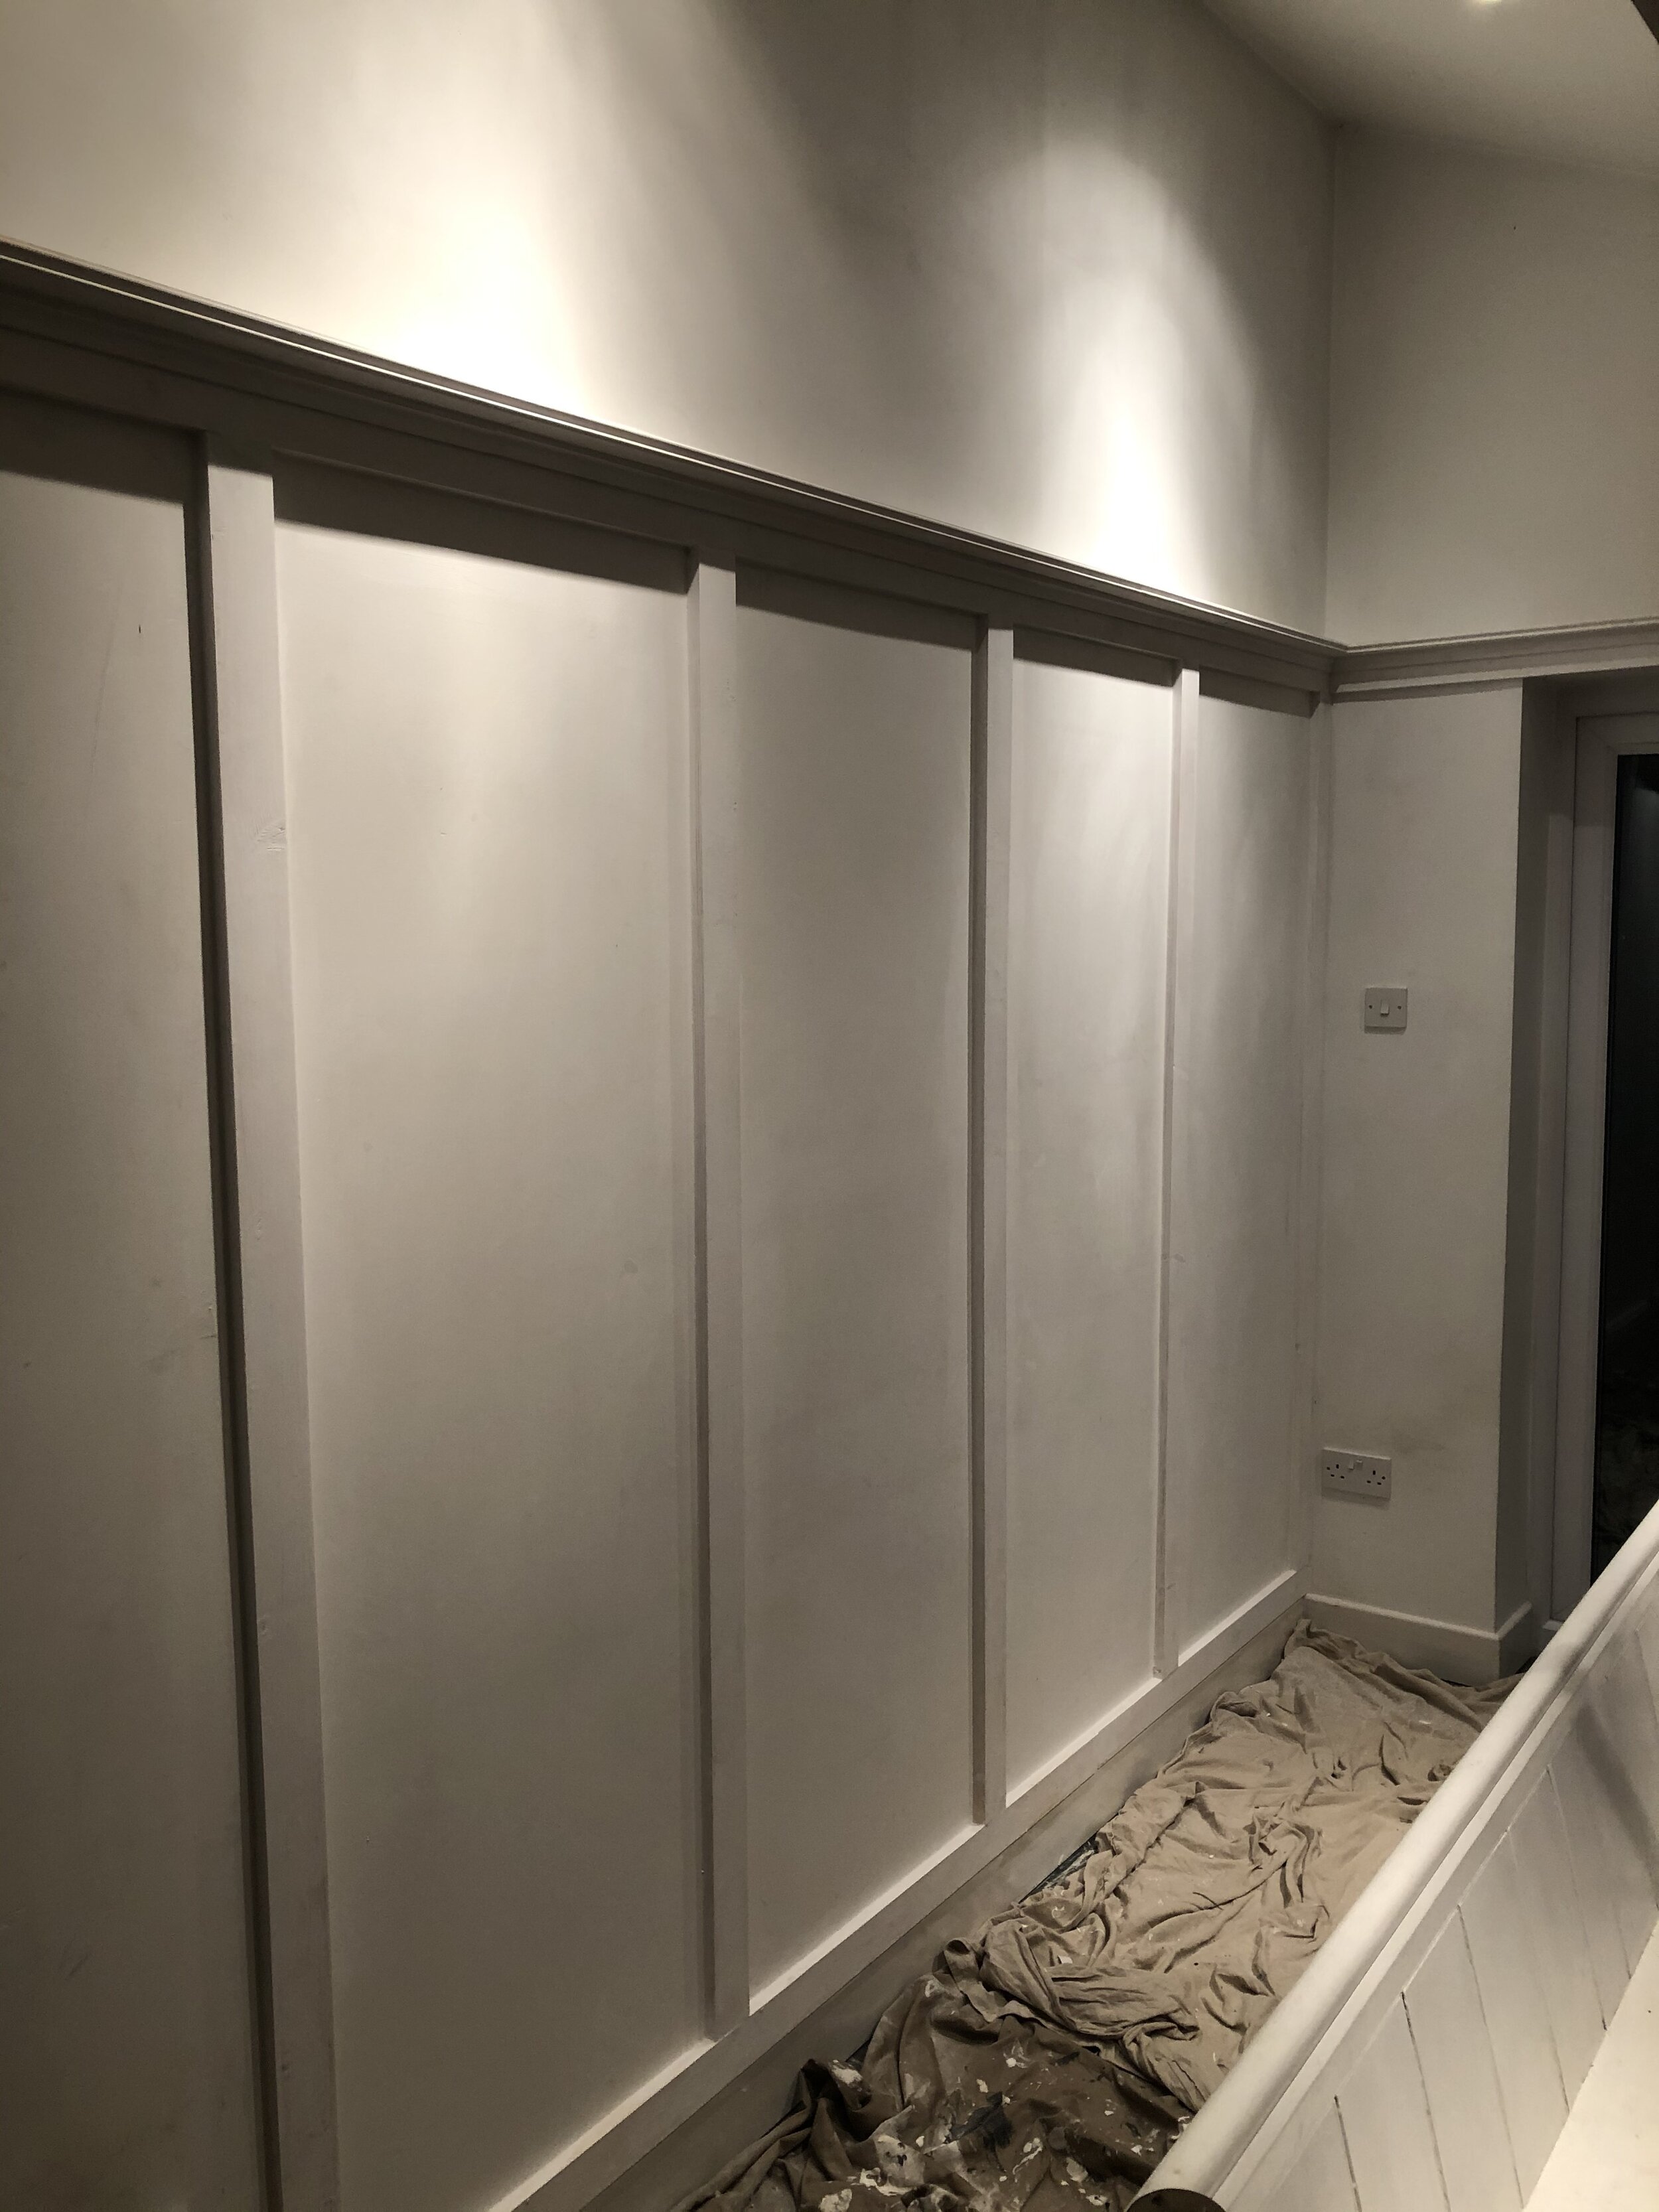
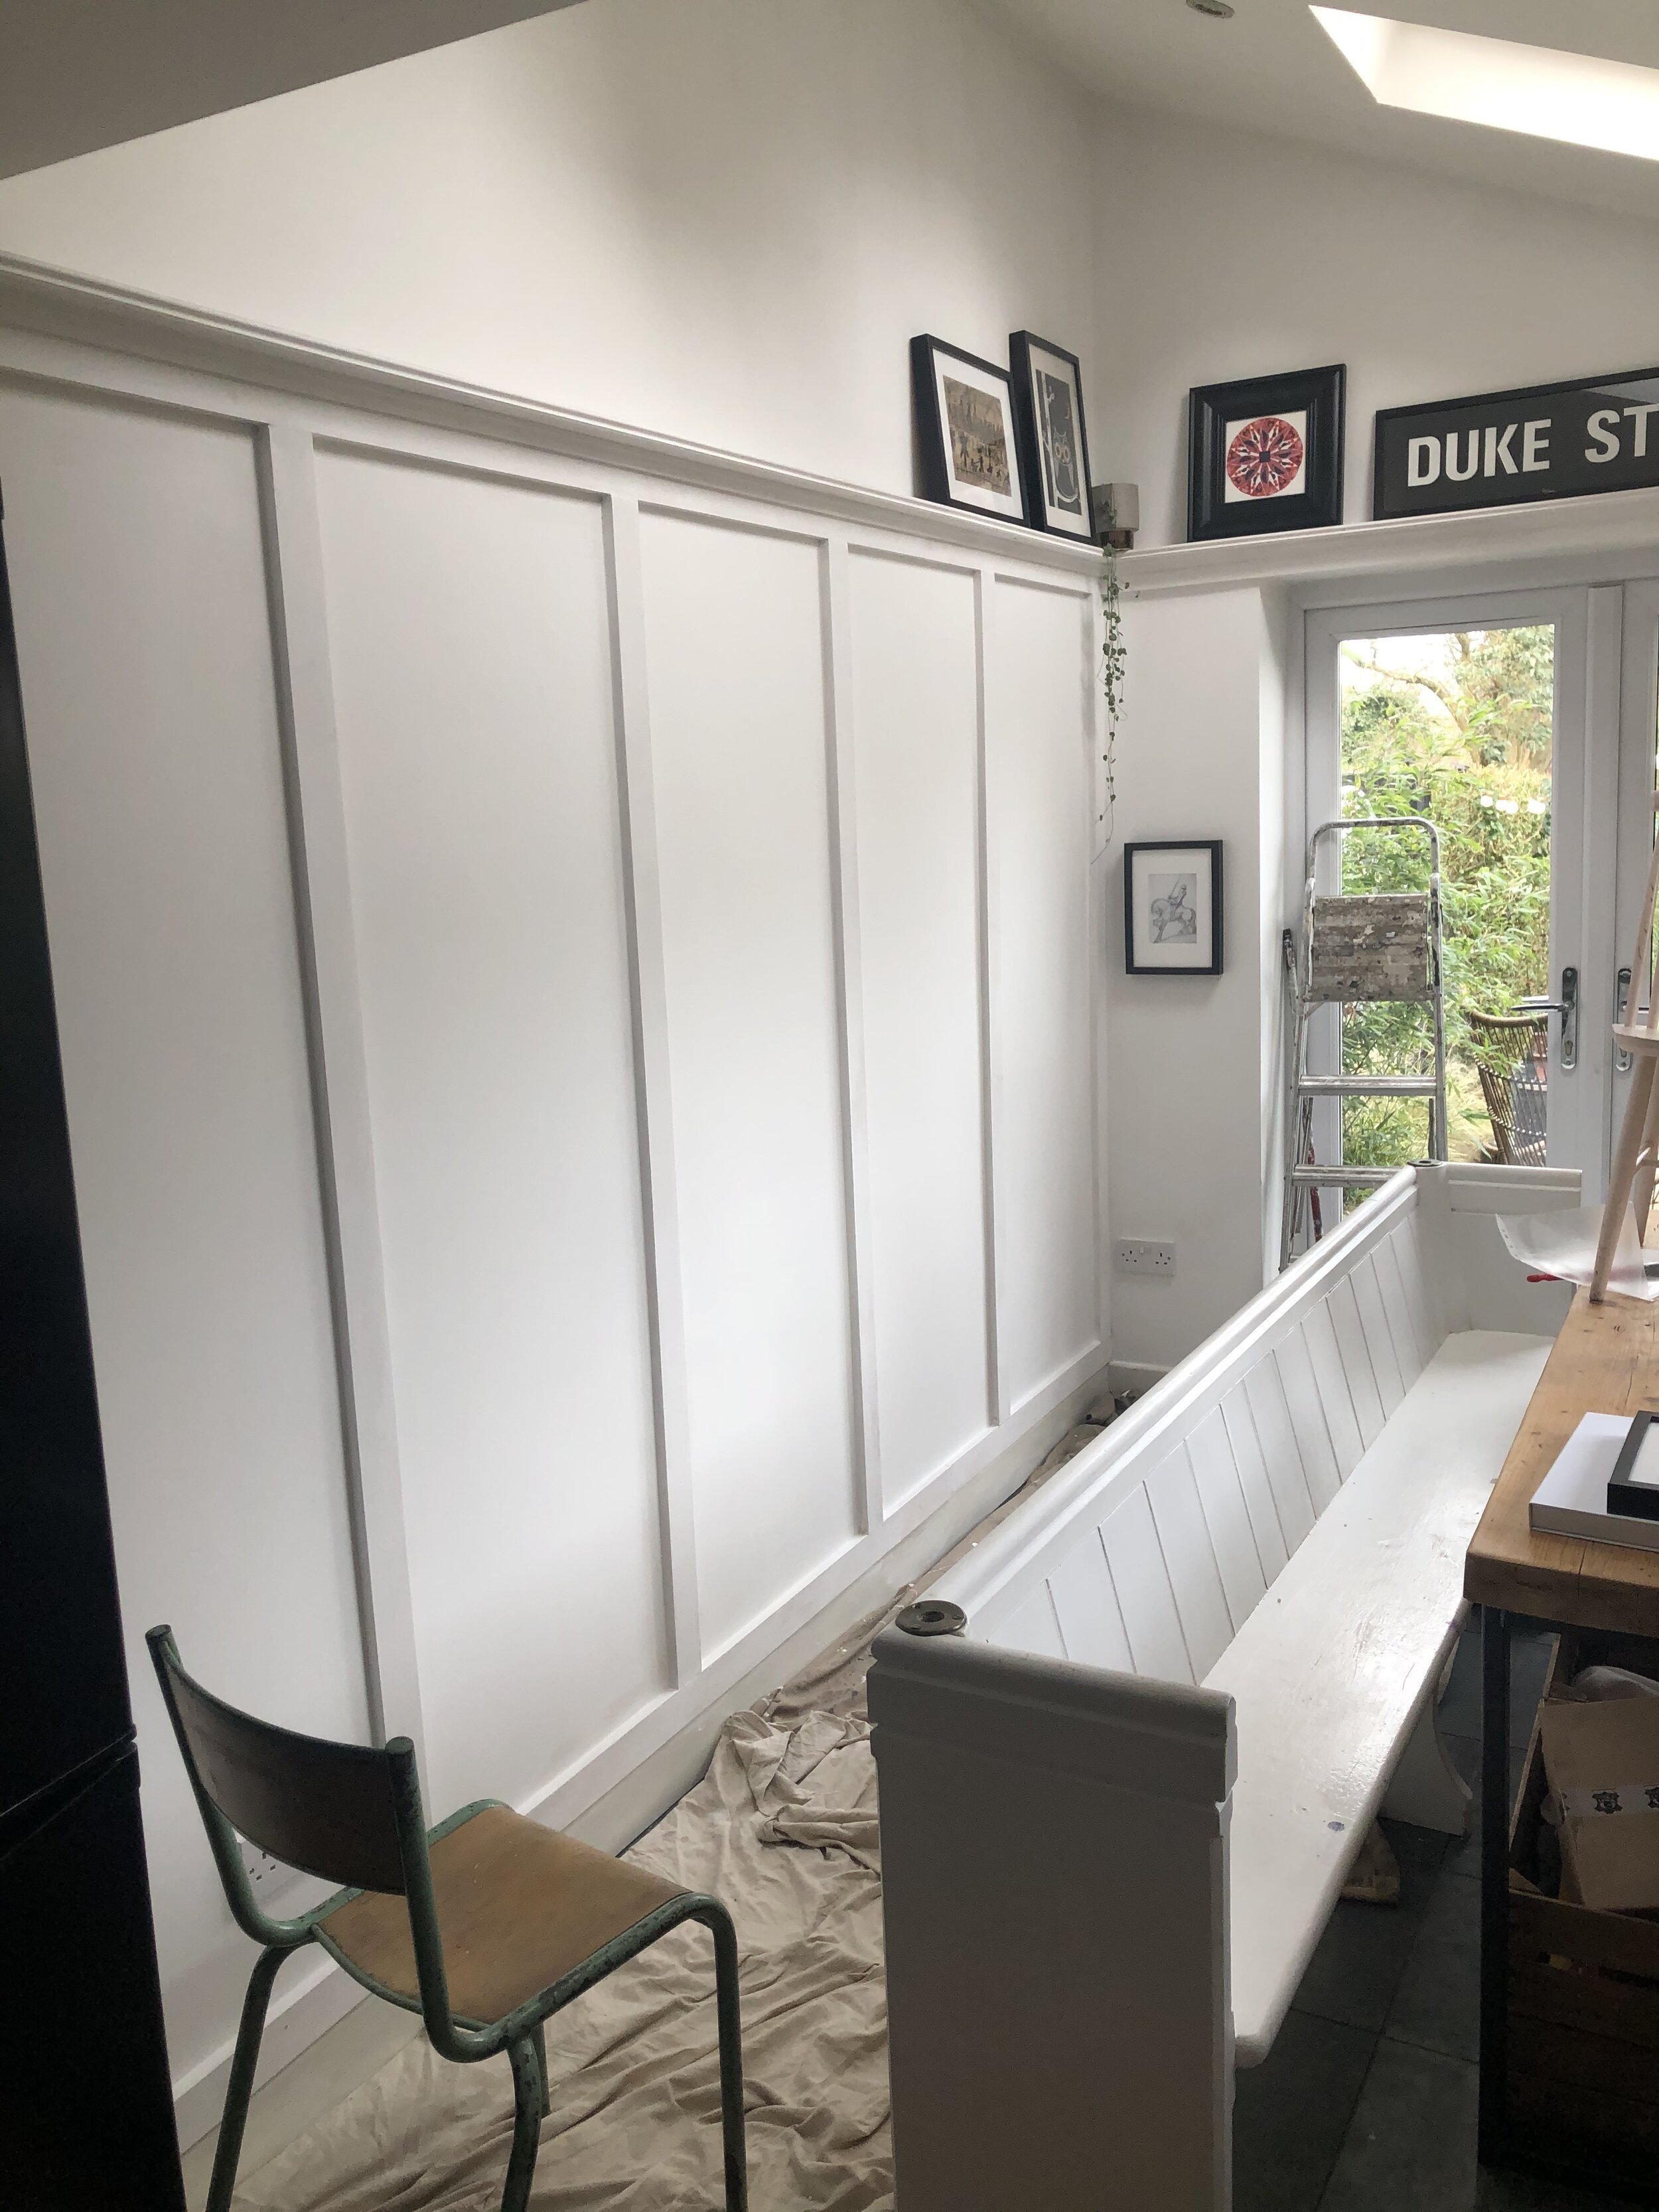
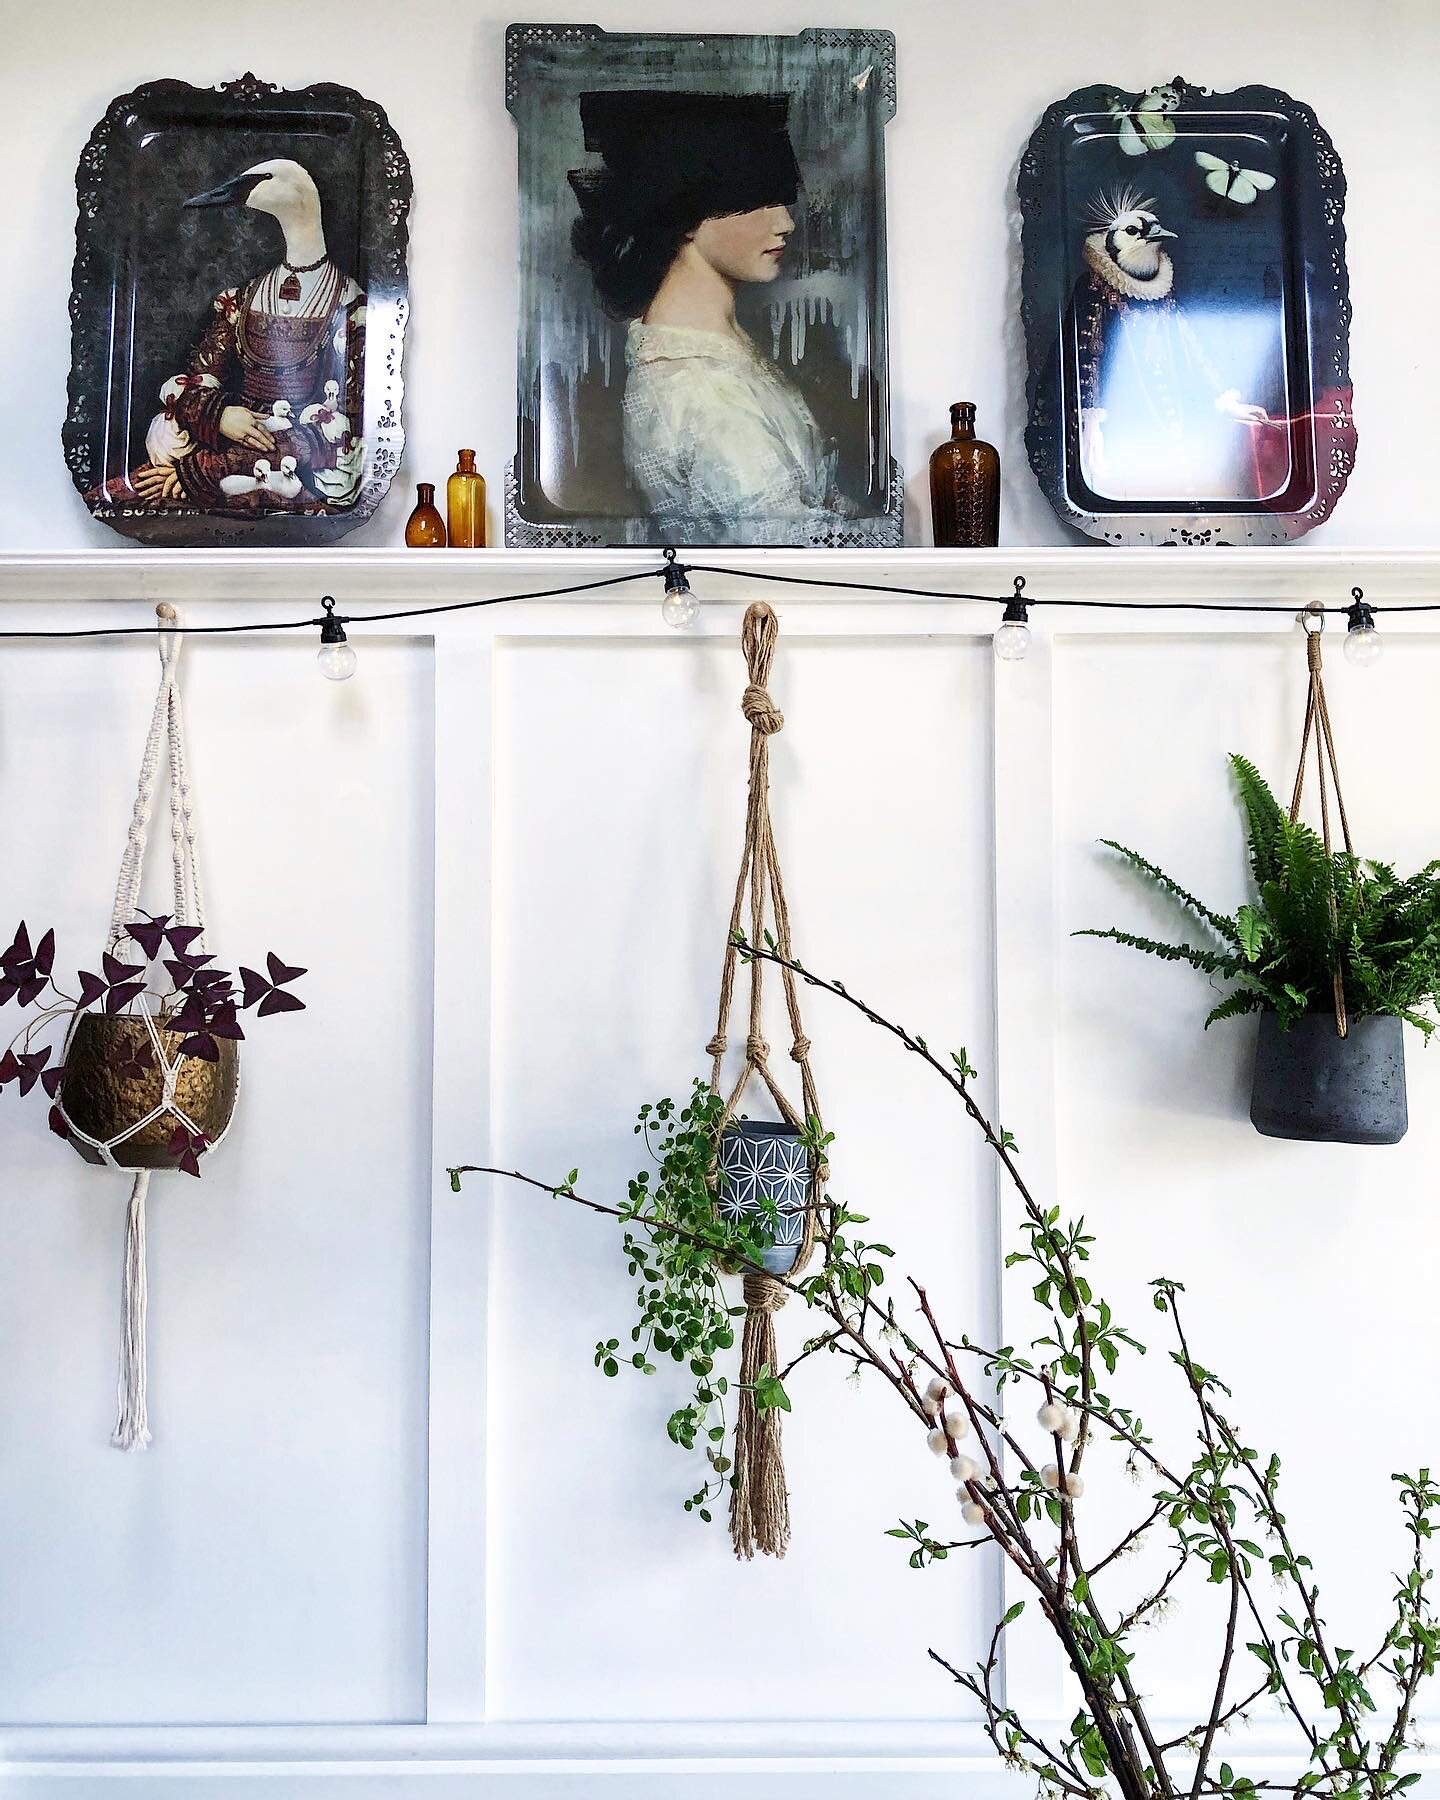
I gradually put up a huge gallery wall in the dining room, an eclectic mix of neon, my own paintings and illustrations and a selection of friends’ artwork and prints gathered on trips abroad. This has since been replaced with a panelled wall with a display shelf and peg hooks attached to enable me to still display pictures and plants but in a more simple understated way. I love how the panelling adds a period touch to our Edwardian house, so is totally in keeping with the style of the property.
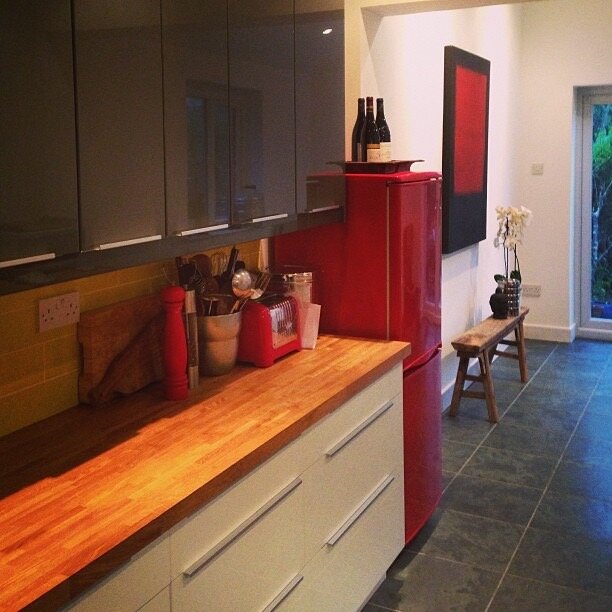
The lime tiles were replaced by ourselves (a very fraught weekend I seem to remember, lets just say this I think next time we may get a tiler in!) We replaced them with plain grey metro tiles and a patterned tile for the cooker splash back. You can find similar tiles here. The patterned tile breaks up the plain tiles and adds a lovely vintage touch amid the shiny modern kitchenware. The large mixer tap was replaced with a simpler more classic vintage style ta and we replaced the cheap white switches and sockeys with dark grey steel and black ones.
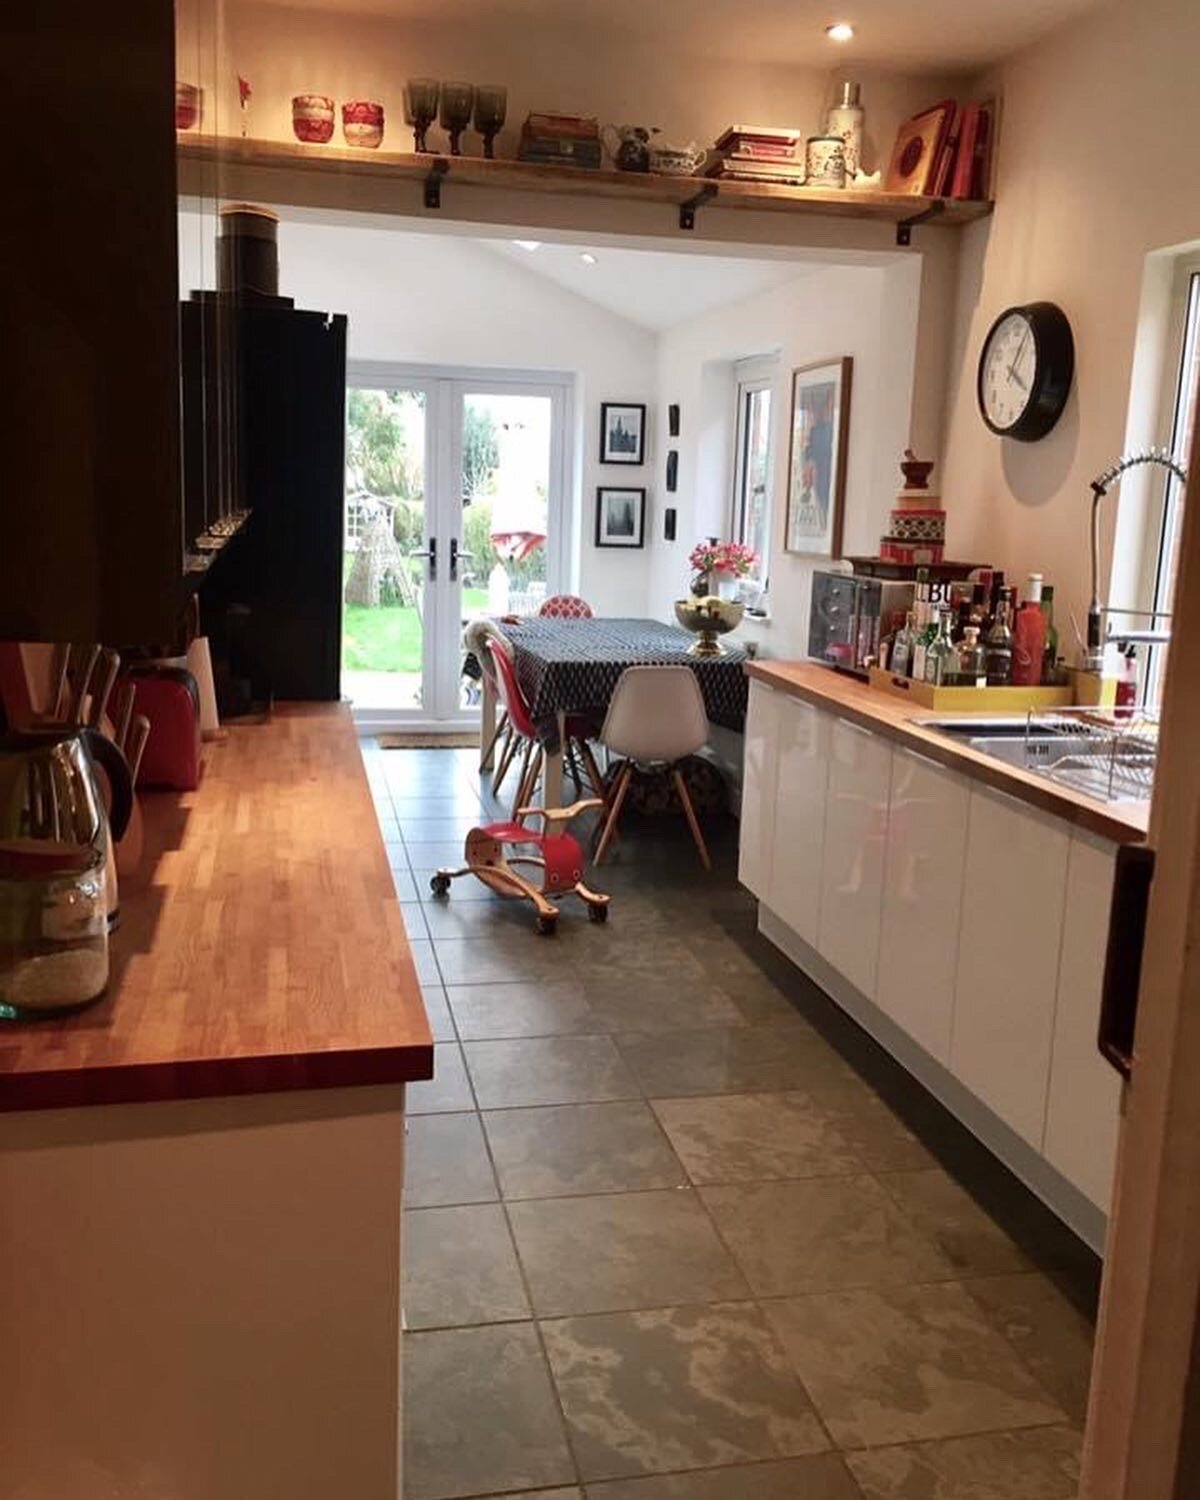
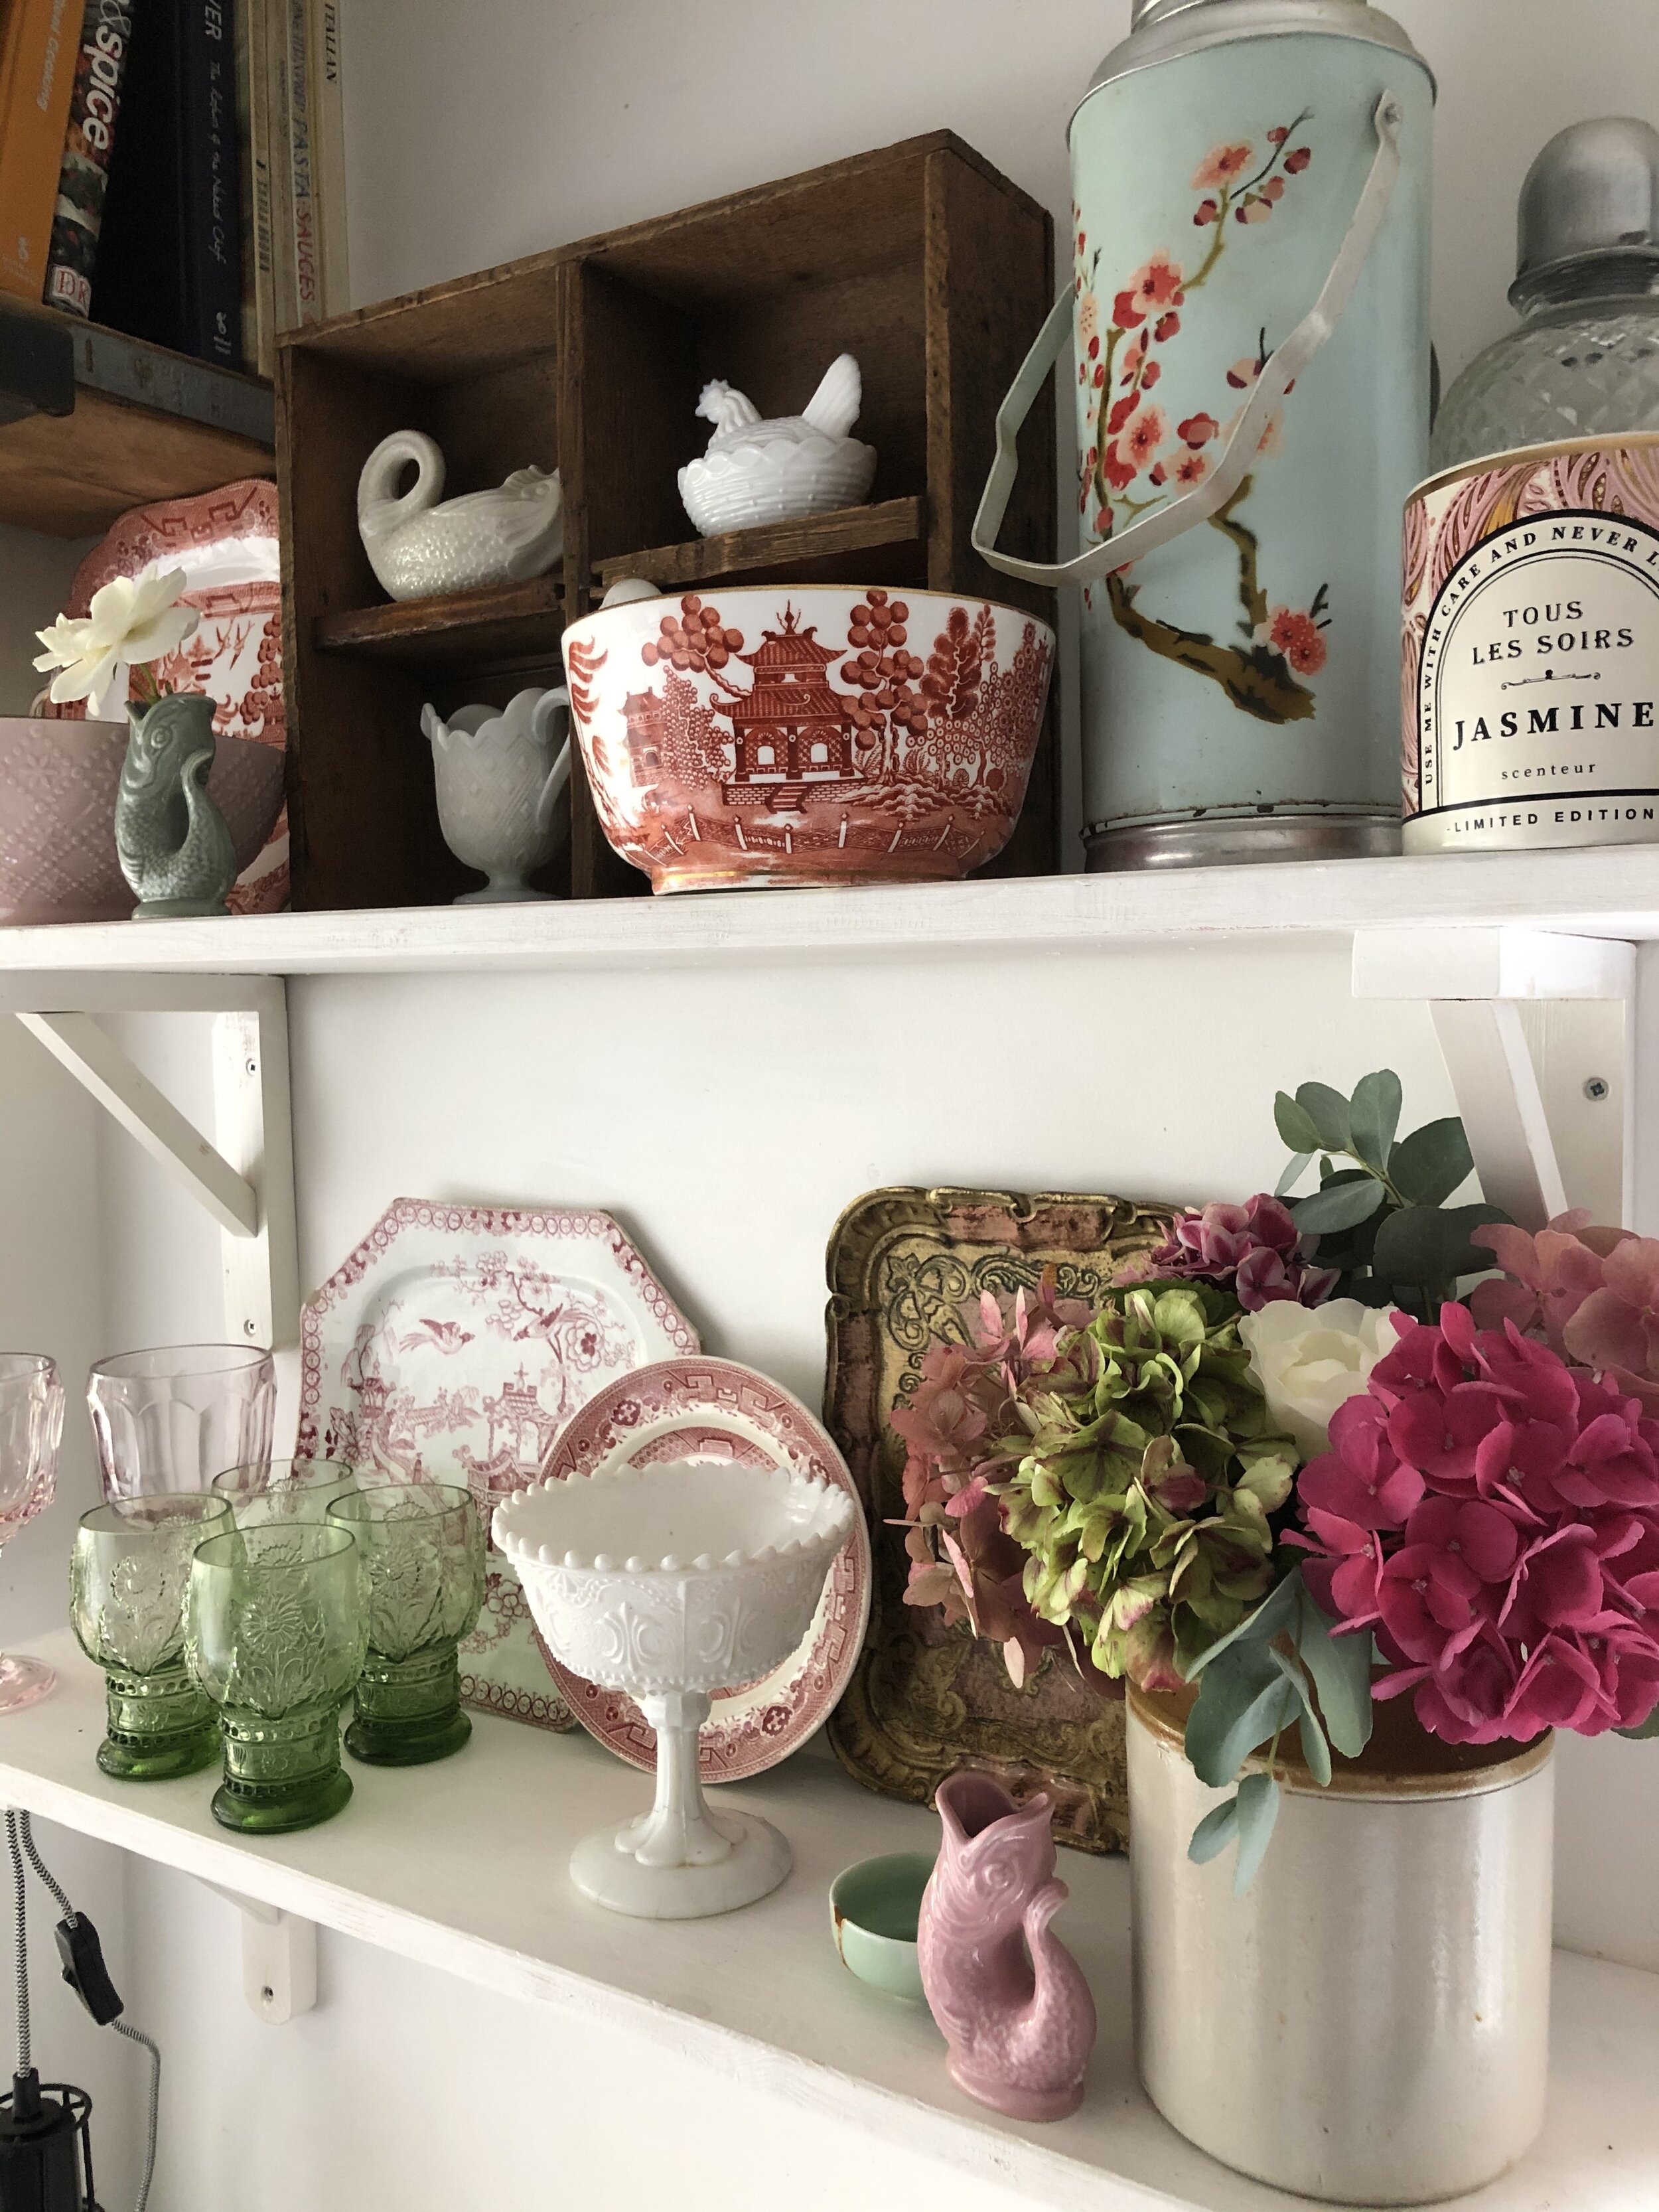
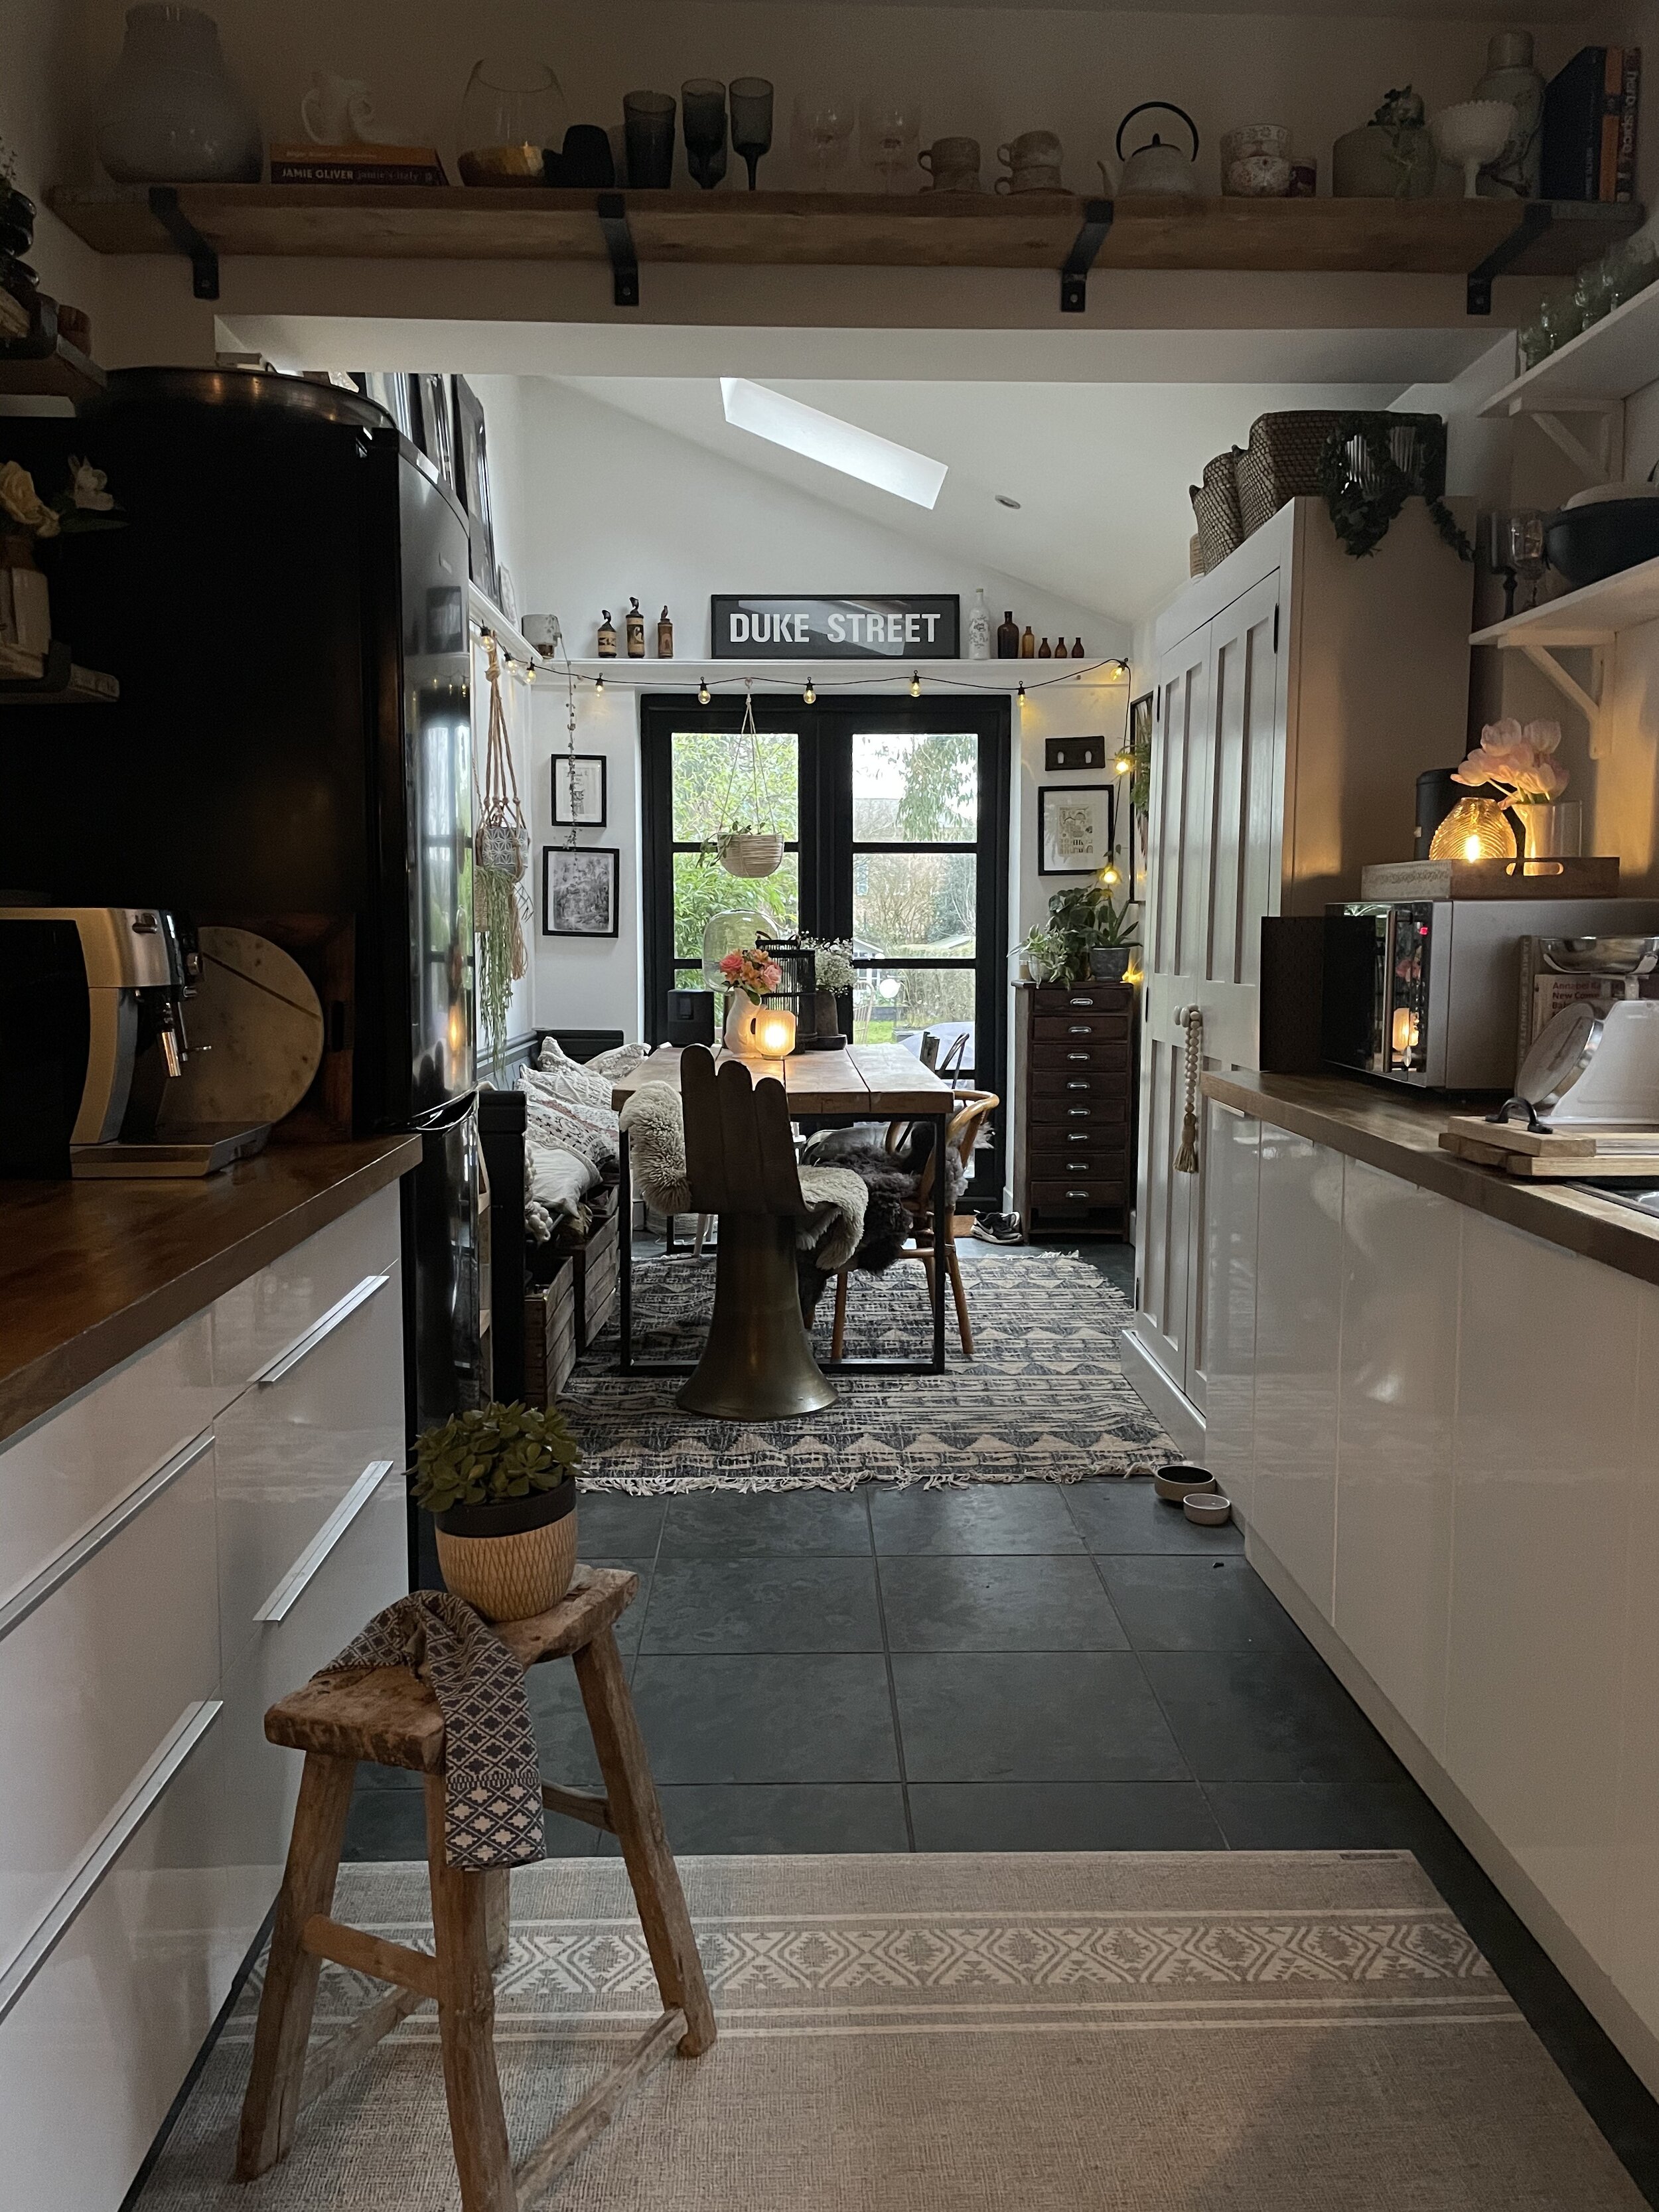
We then added our first open shelves. A large scaffold board shelf runs across the width of the kitchen in the section where the kitchen was extended. We also added some really simple white painted scandi style wooden shelves to display my prettiest kitchen bits and pieces.
Then more recently and I think this really was the game changer in the kitchen and totally transformed the space, I painted the UPVC doors black and added wooden bars to create crittall style doors. They provide a fantastic focal point now when you enter the room. I love too how you can see them right through the house when you enter the front door and how they frame the greenery and the patio view in the kitchen. You can read more about how I painted them here. I also painted the windows black to match and added a vintage style anthracite grey column radiator from Best Heating which you can find here.
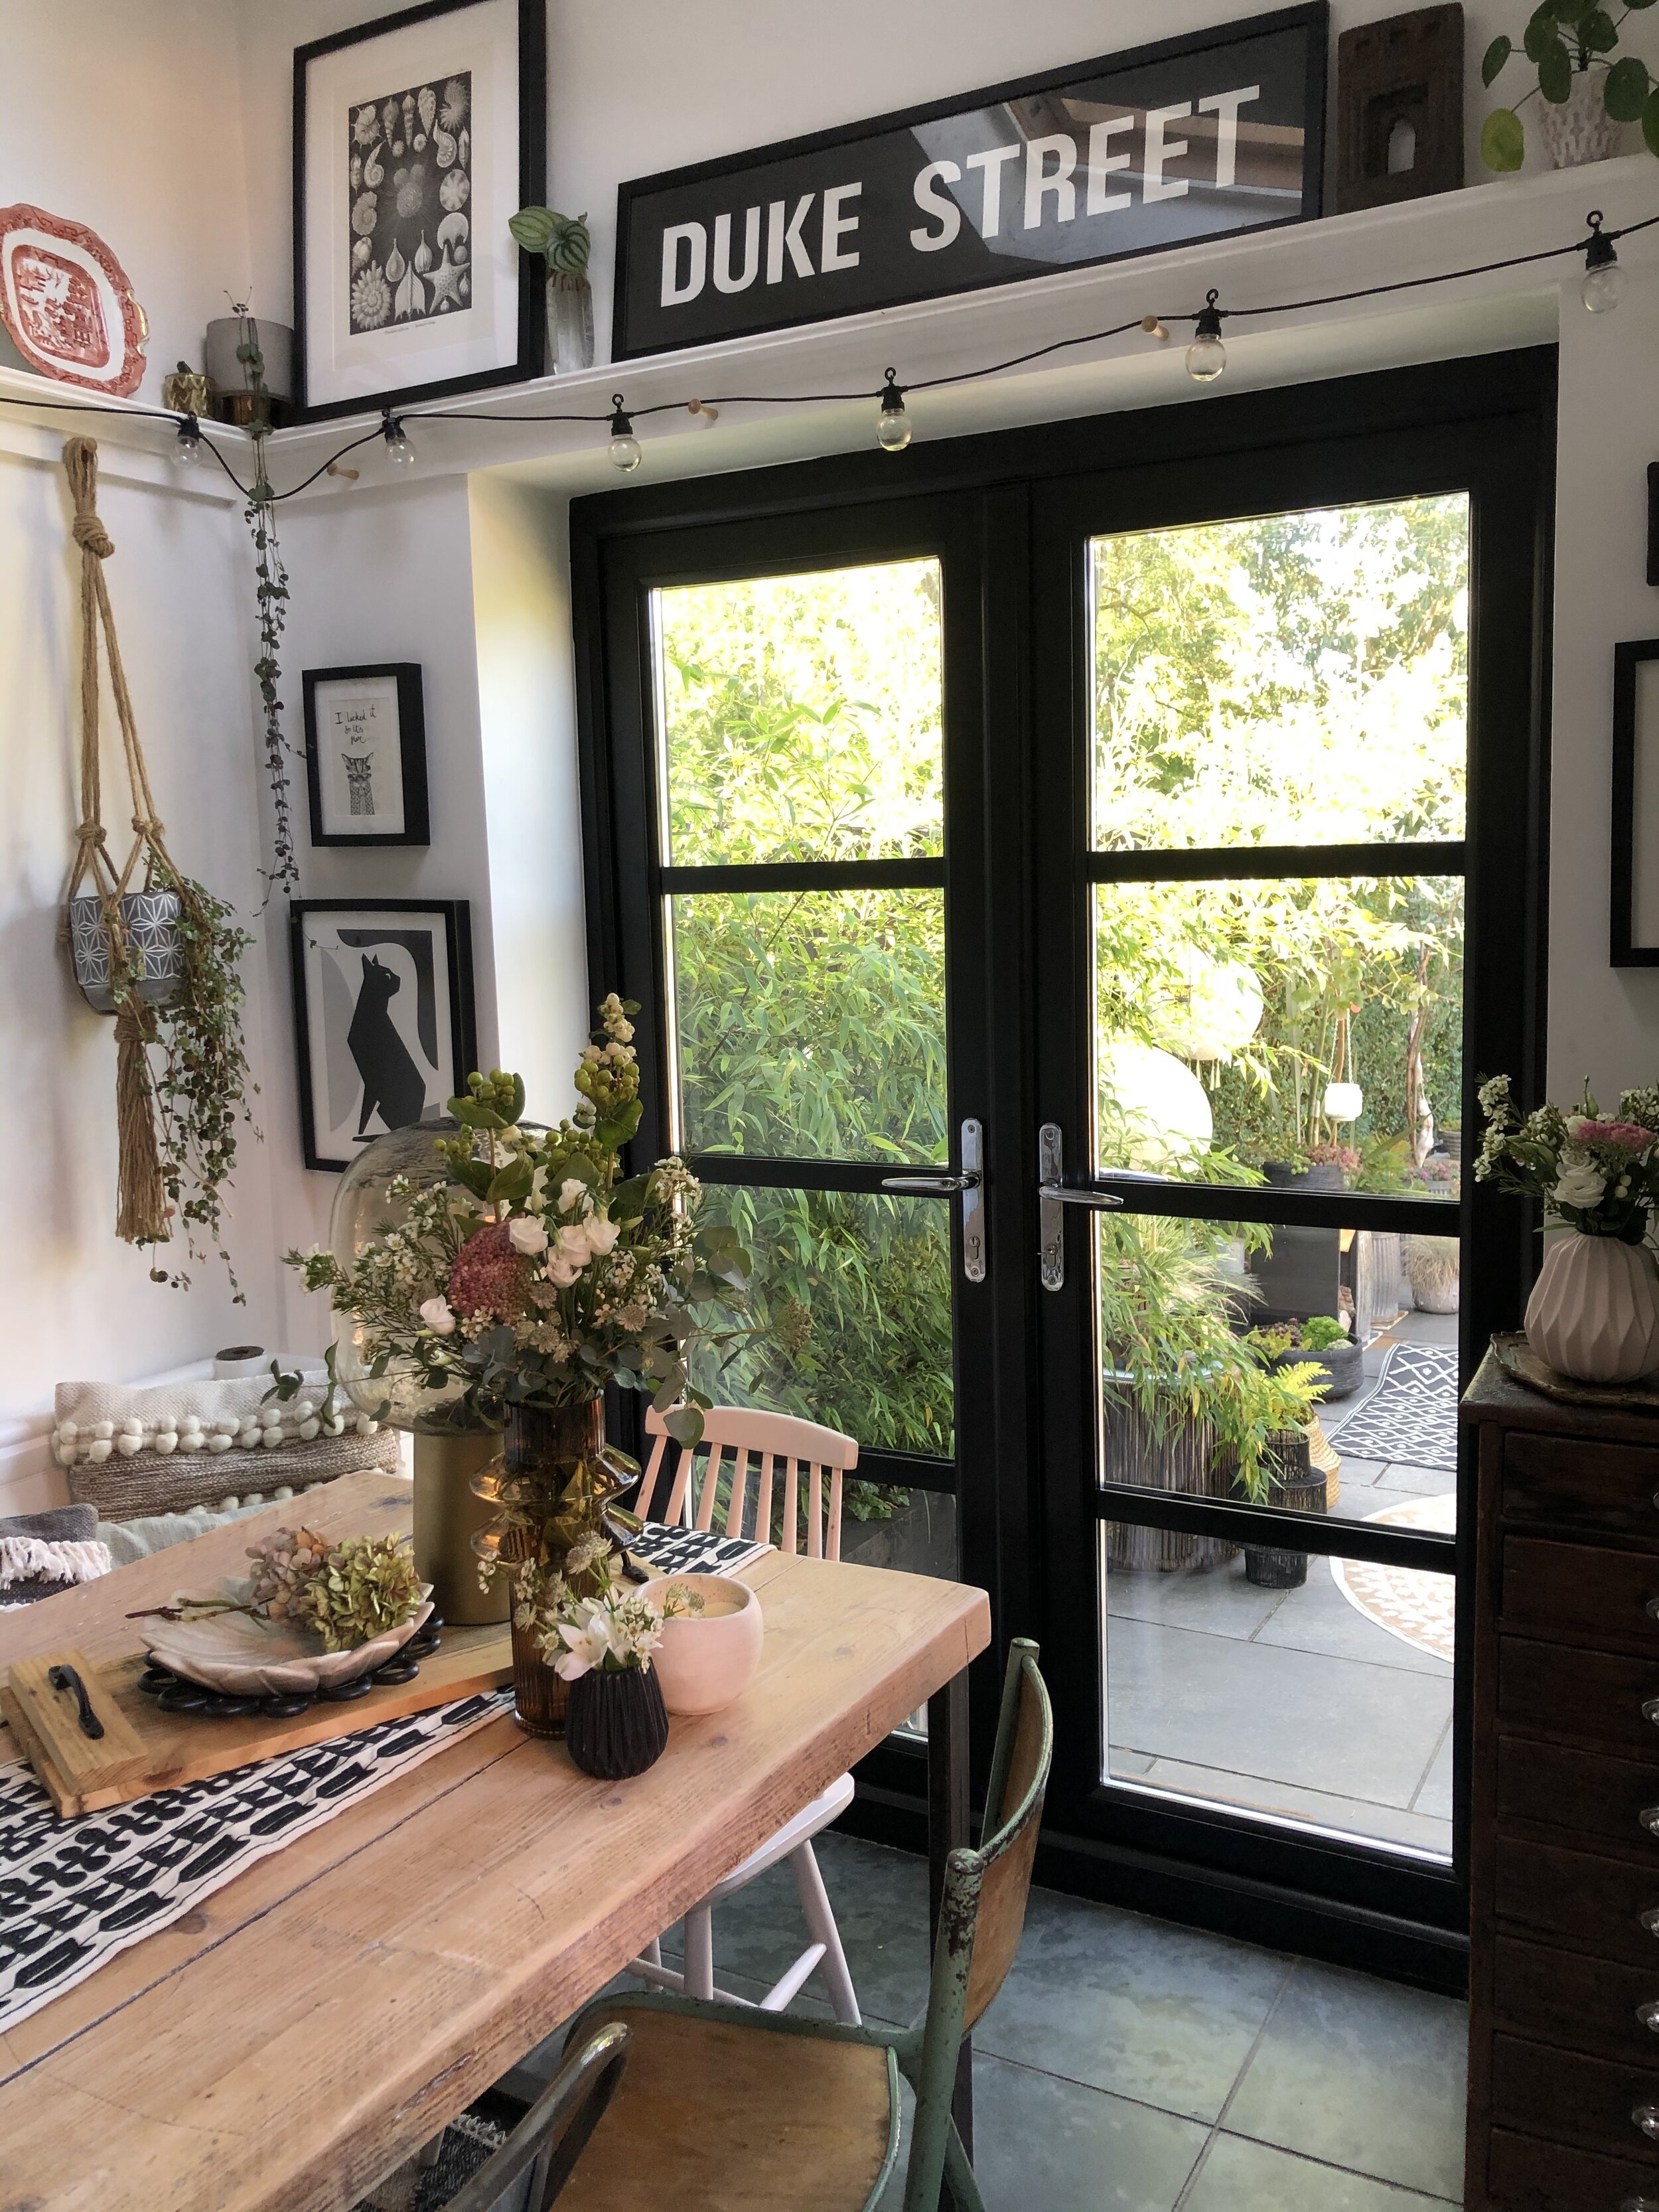
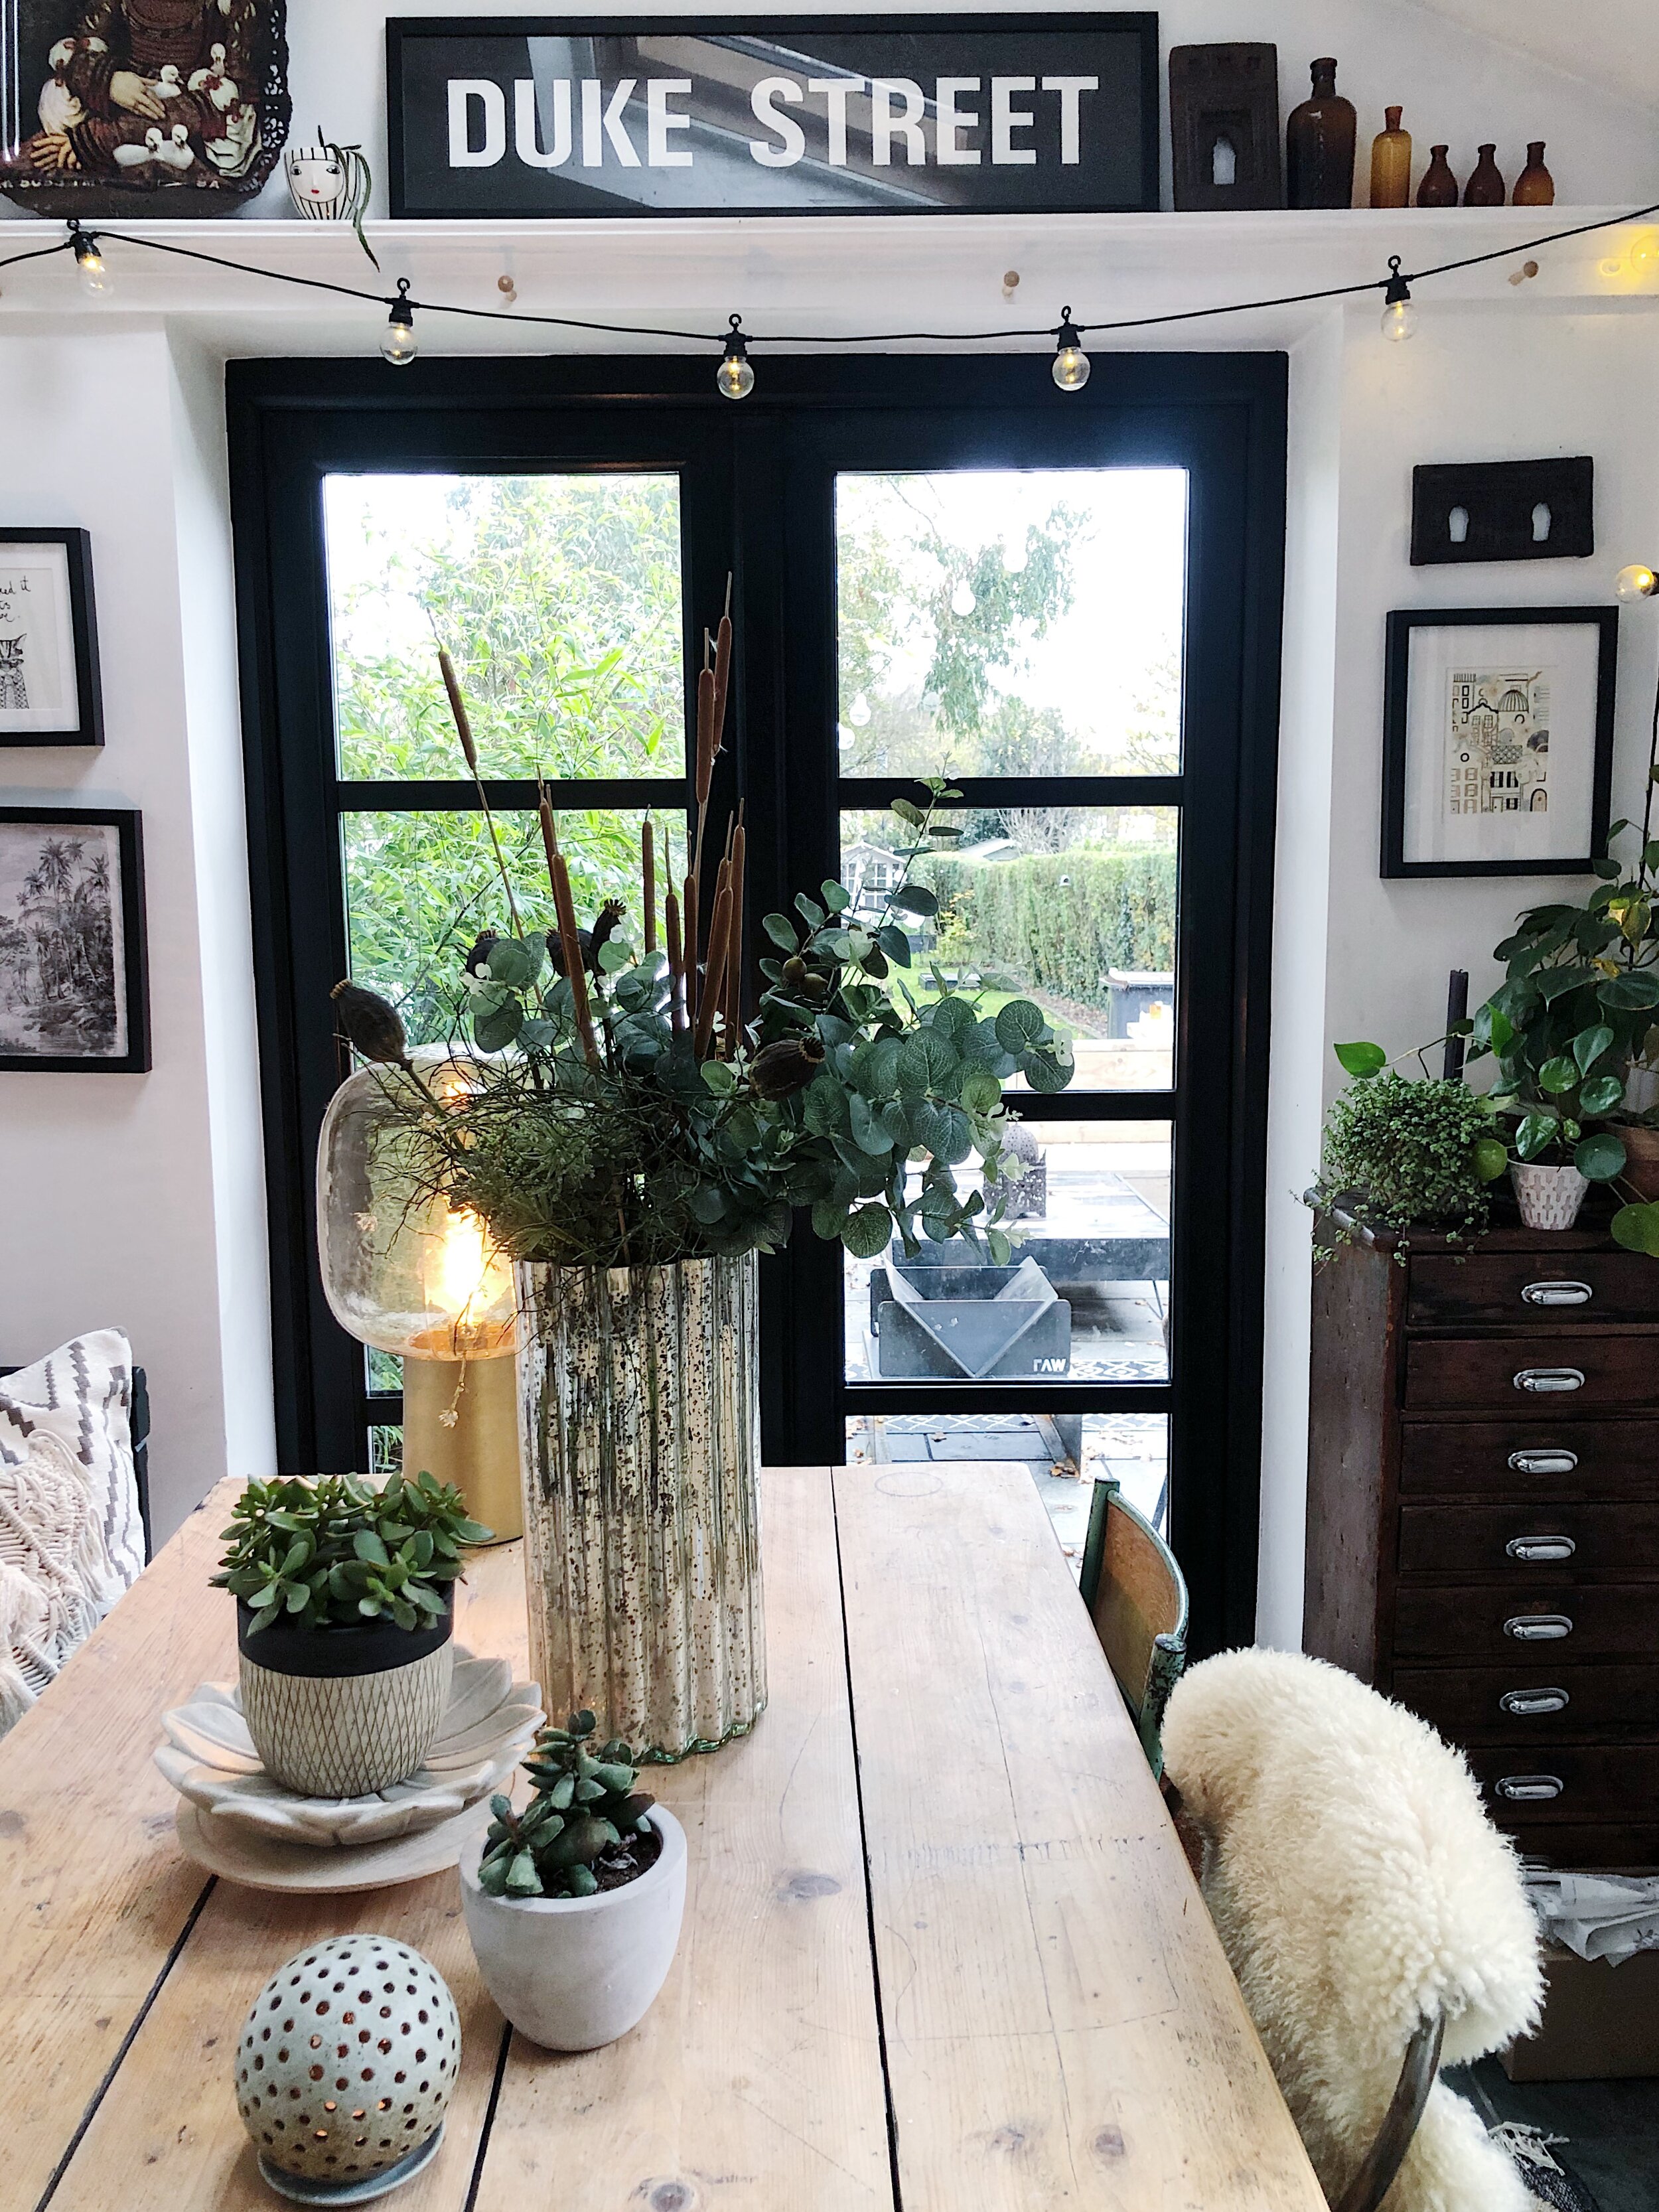
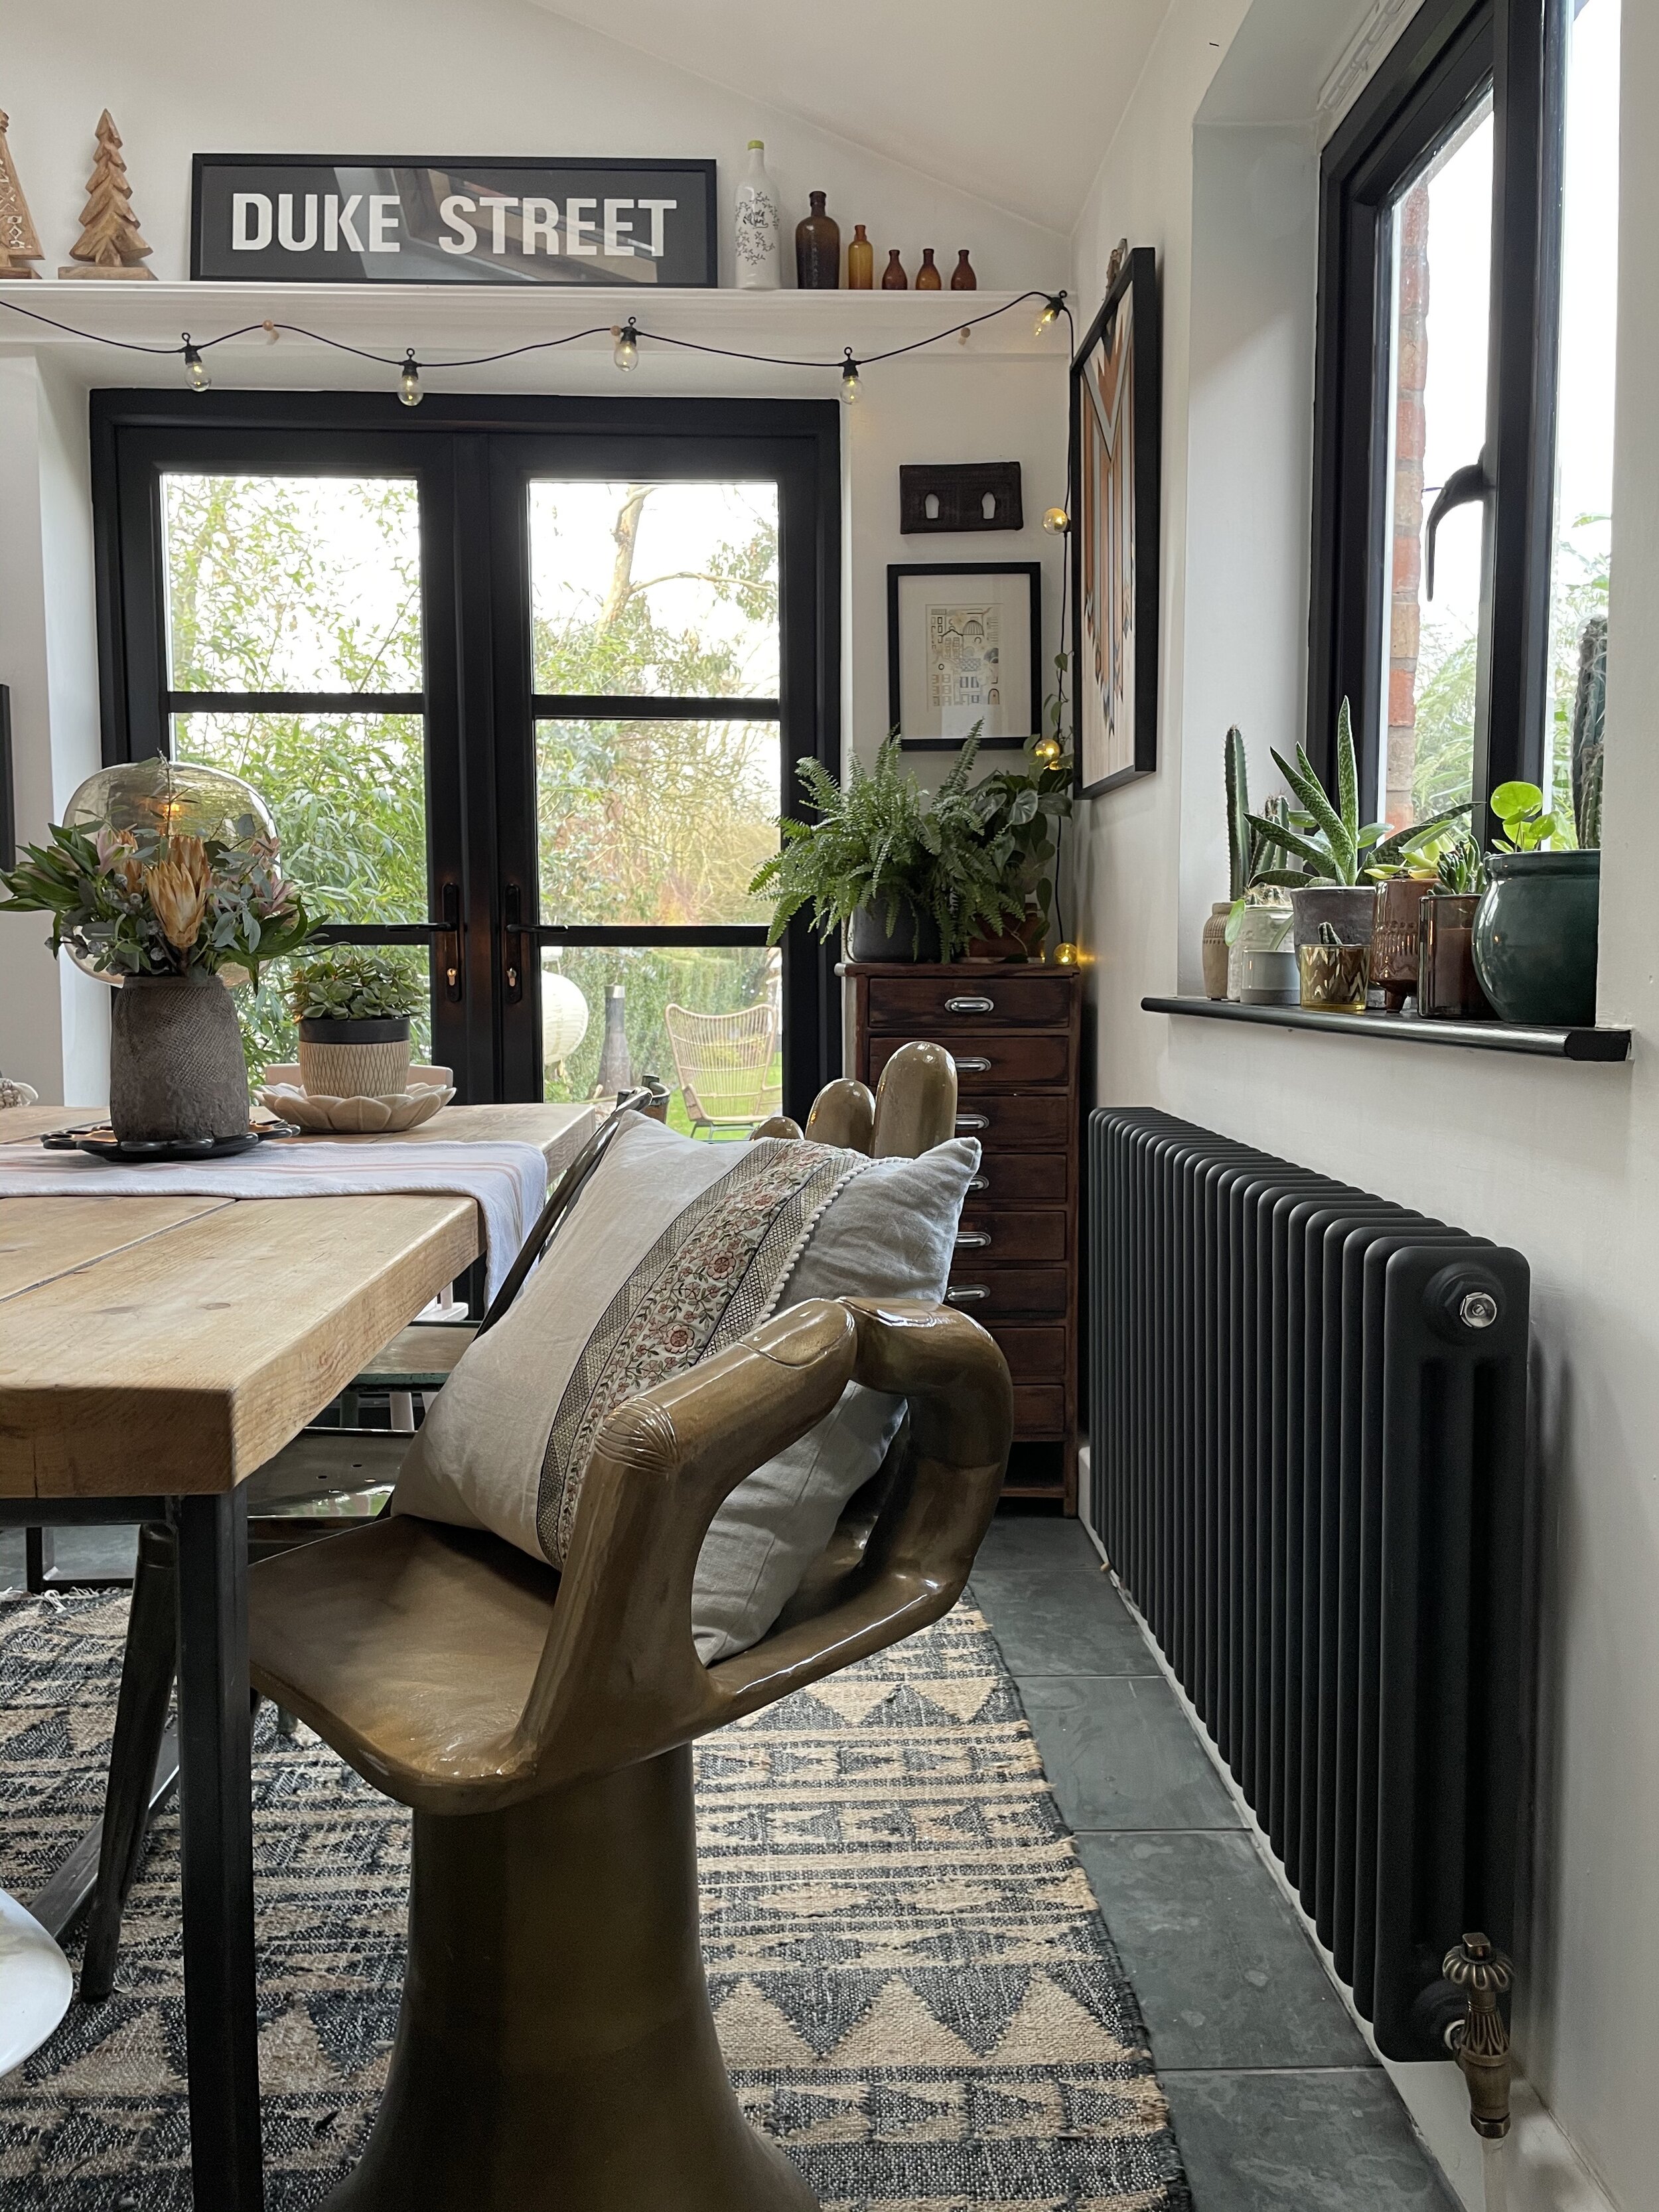
Then most recently and something I’ve been dying to do since I moved in was to take down the wall cabinets. We sold these on eBay (nothing gets wasted!) and used reclaimed scaffold boards from Bostin Boards and industrial style iron wall brackets from eBay, try here for similar, to attach them to the walls.
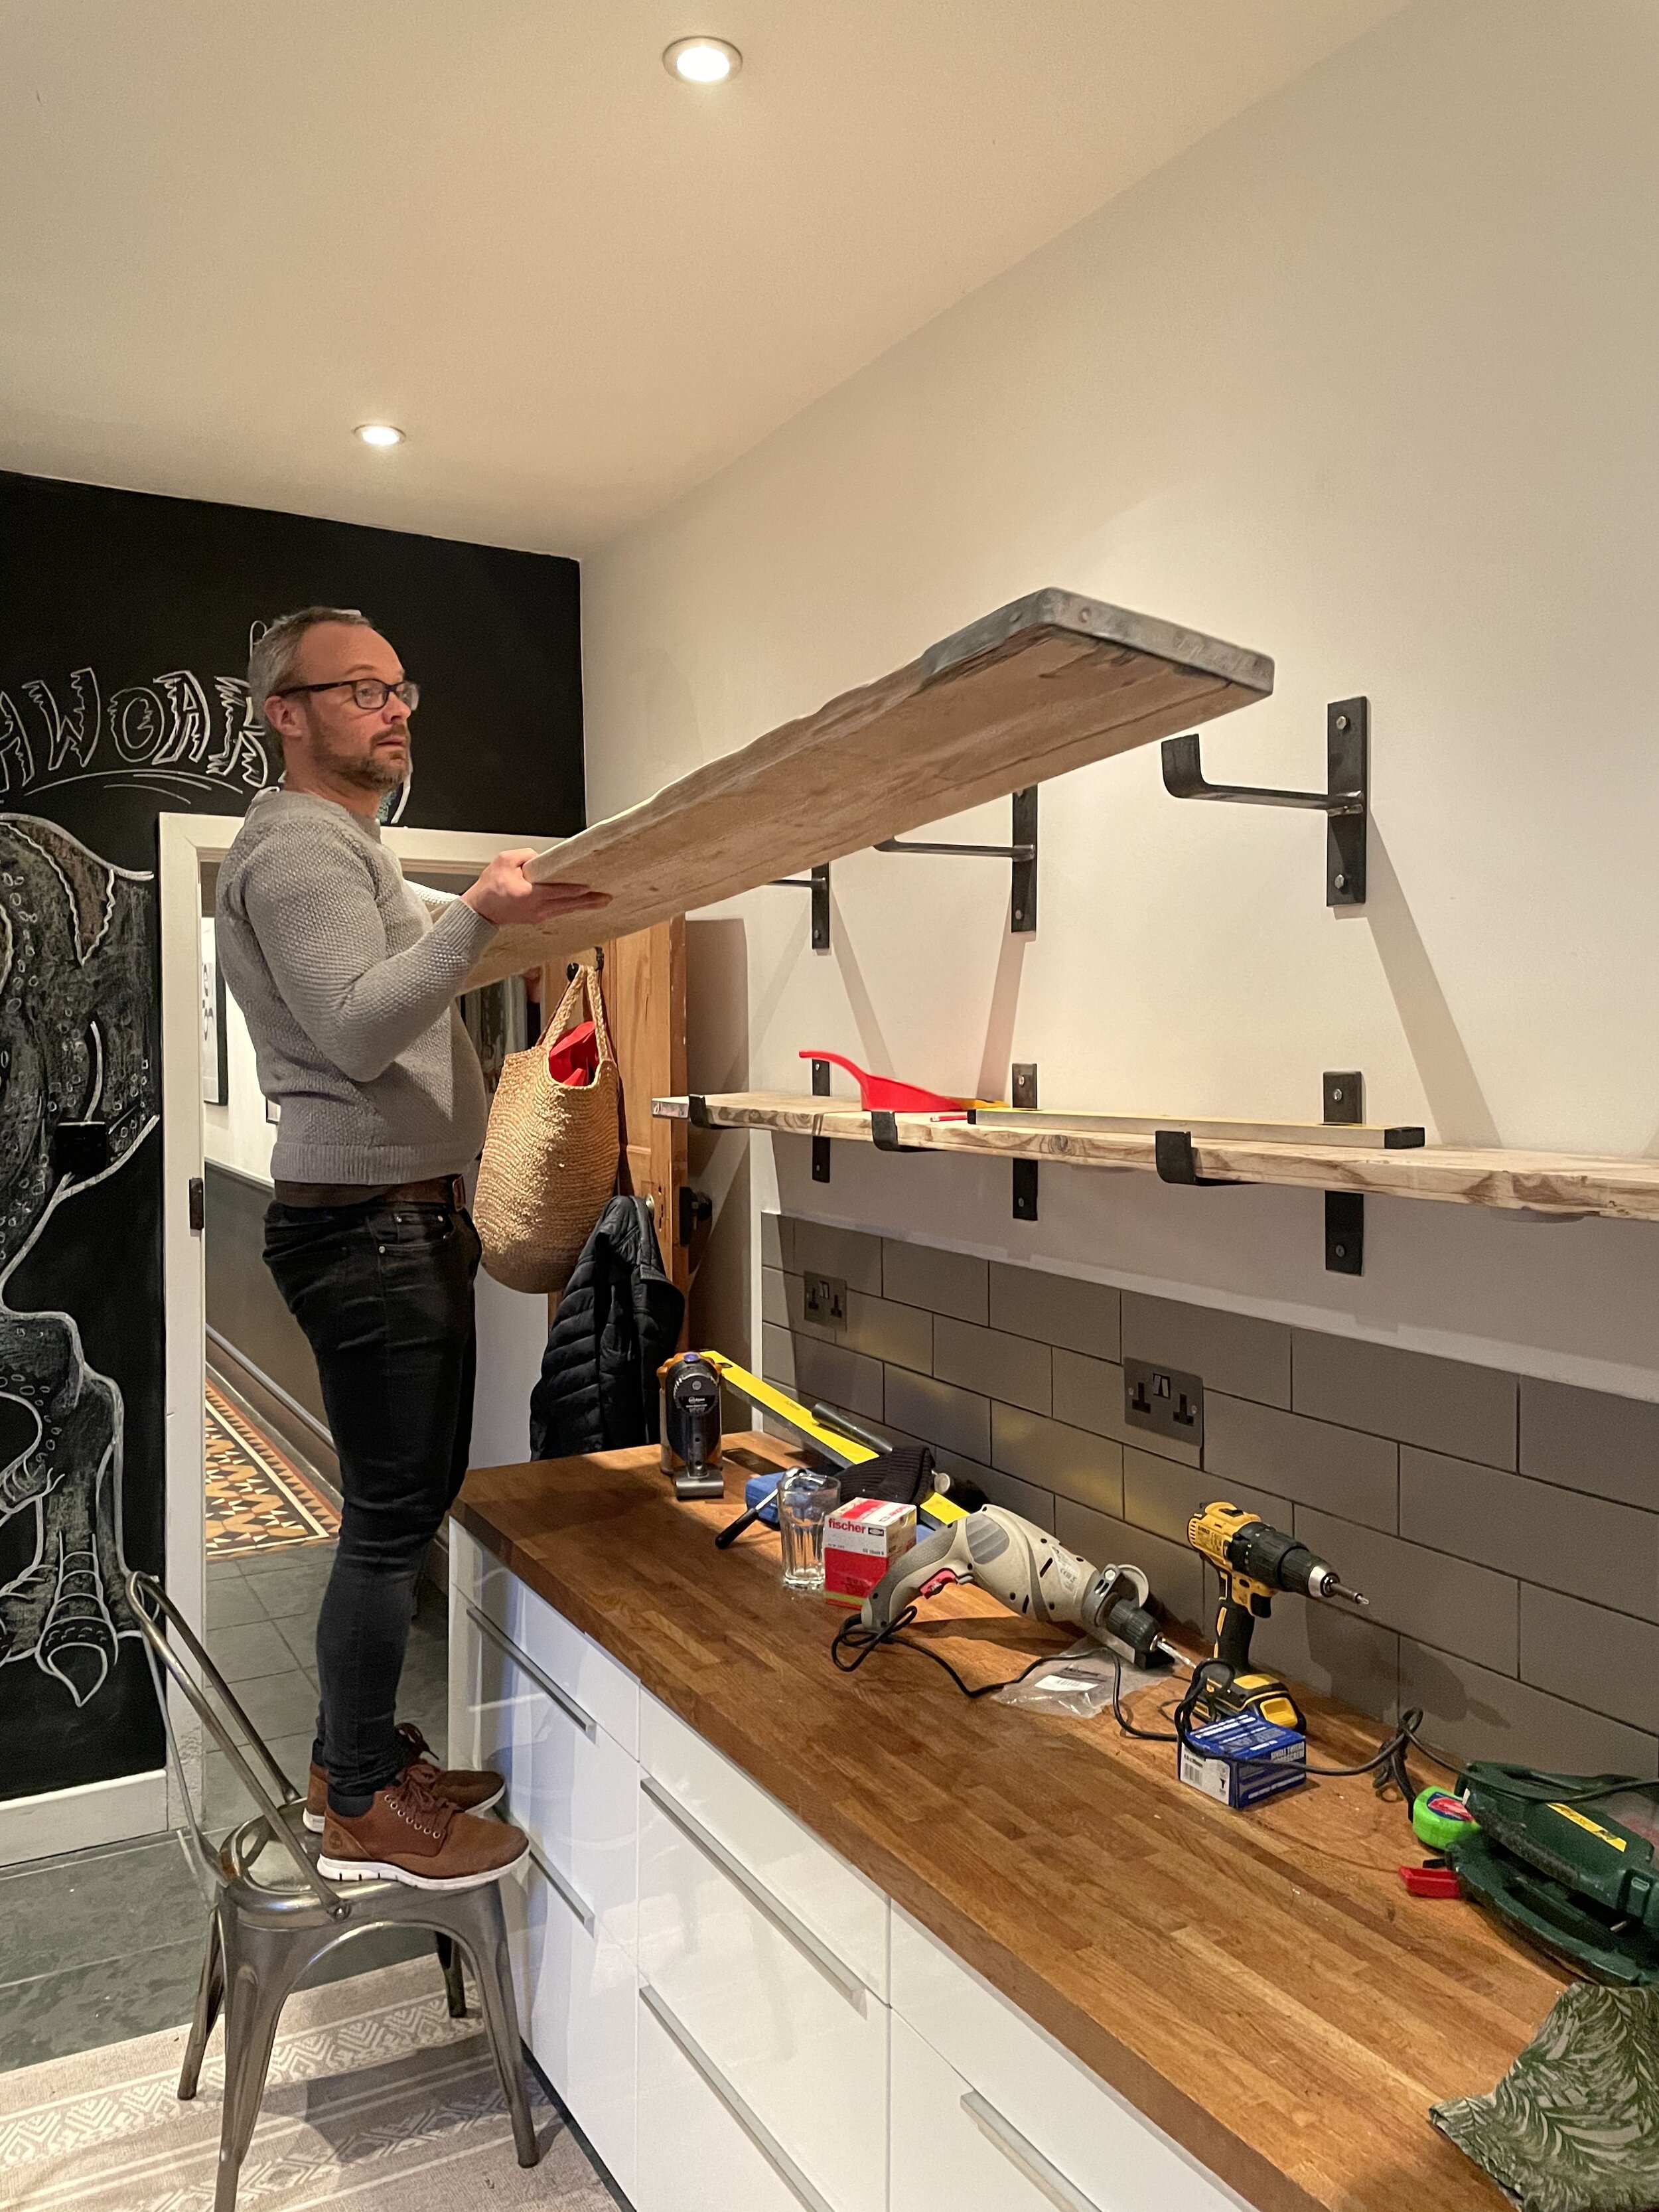
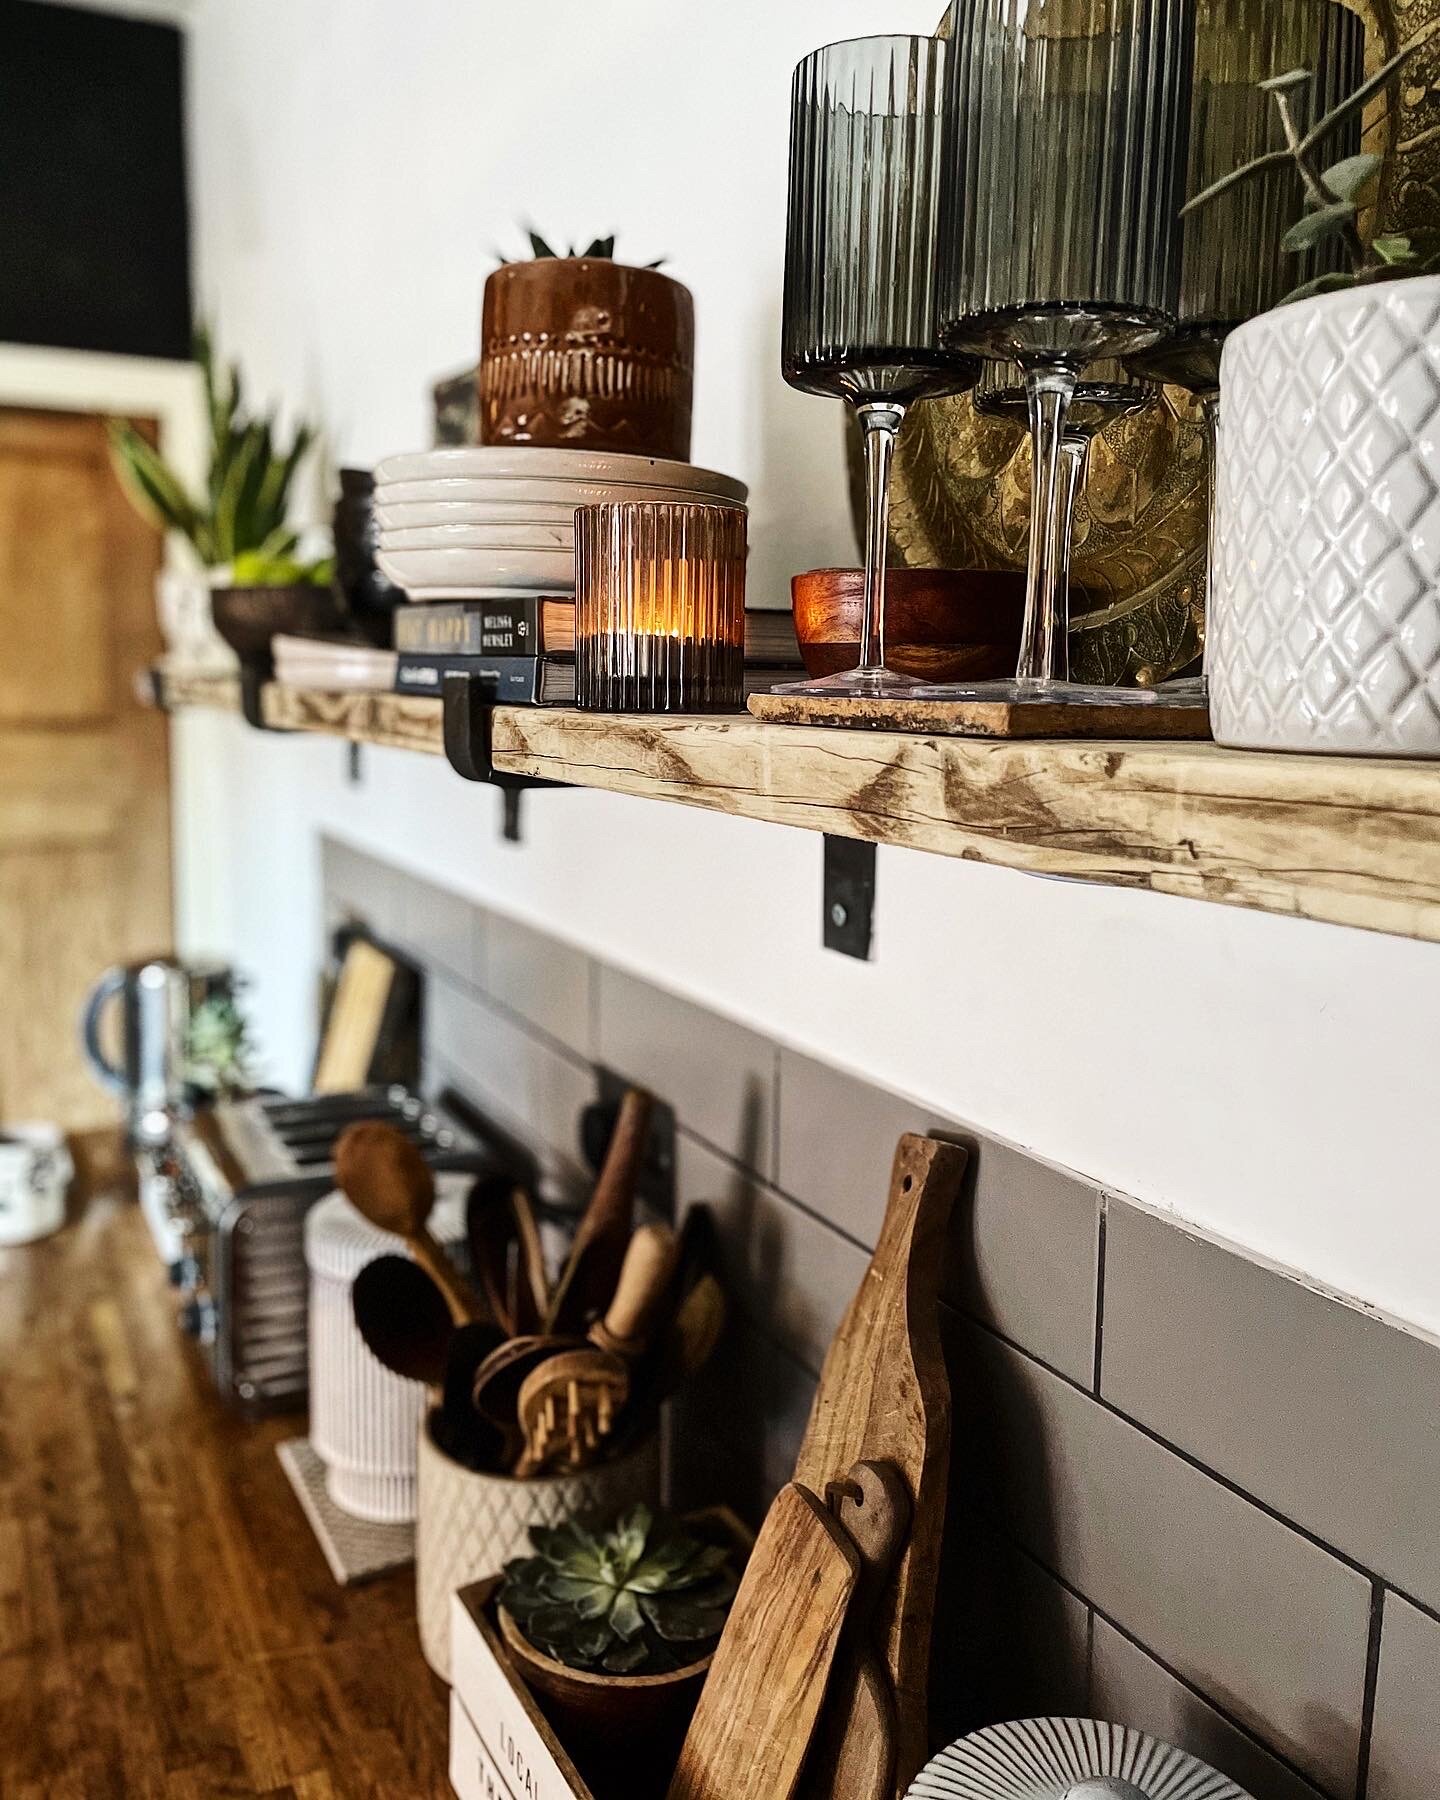
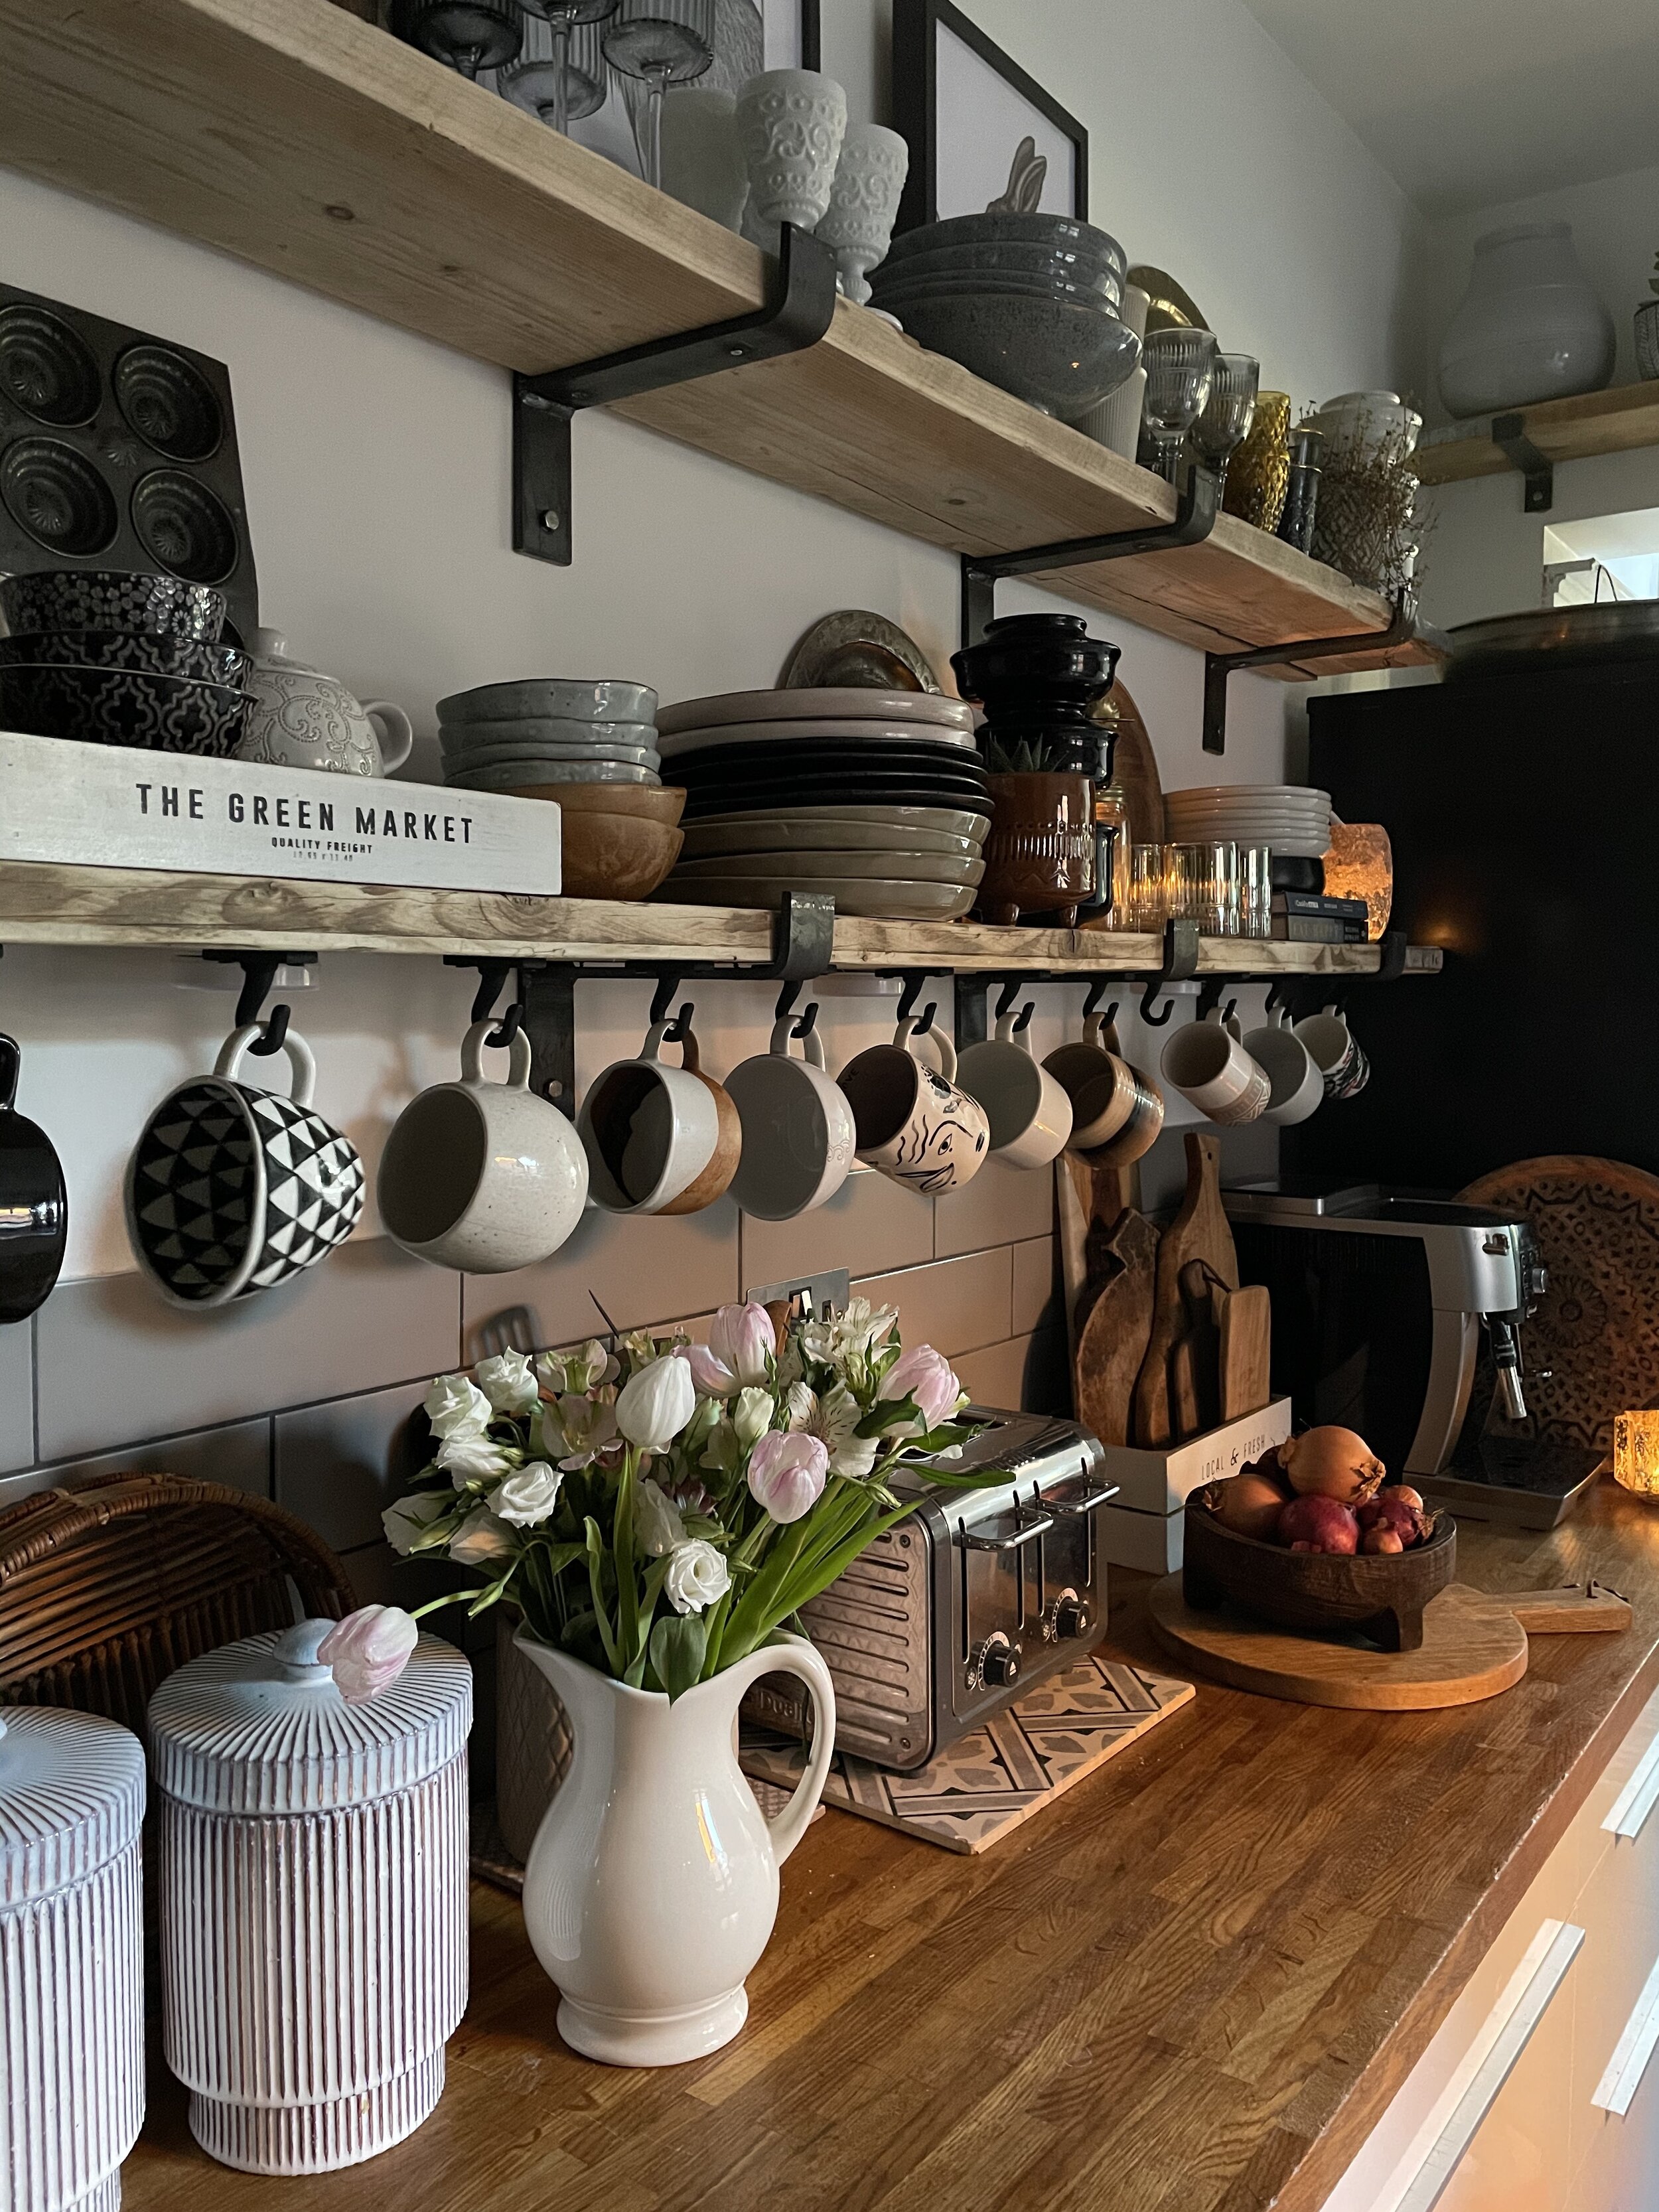
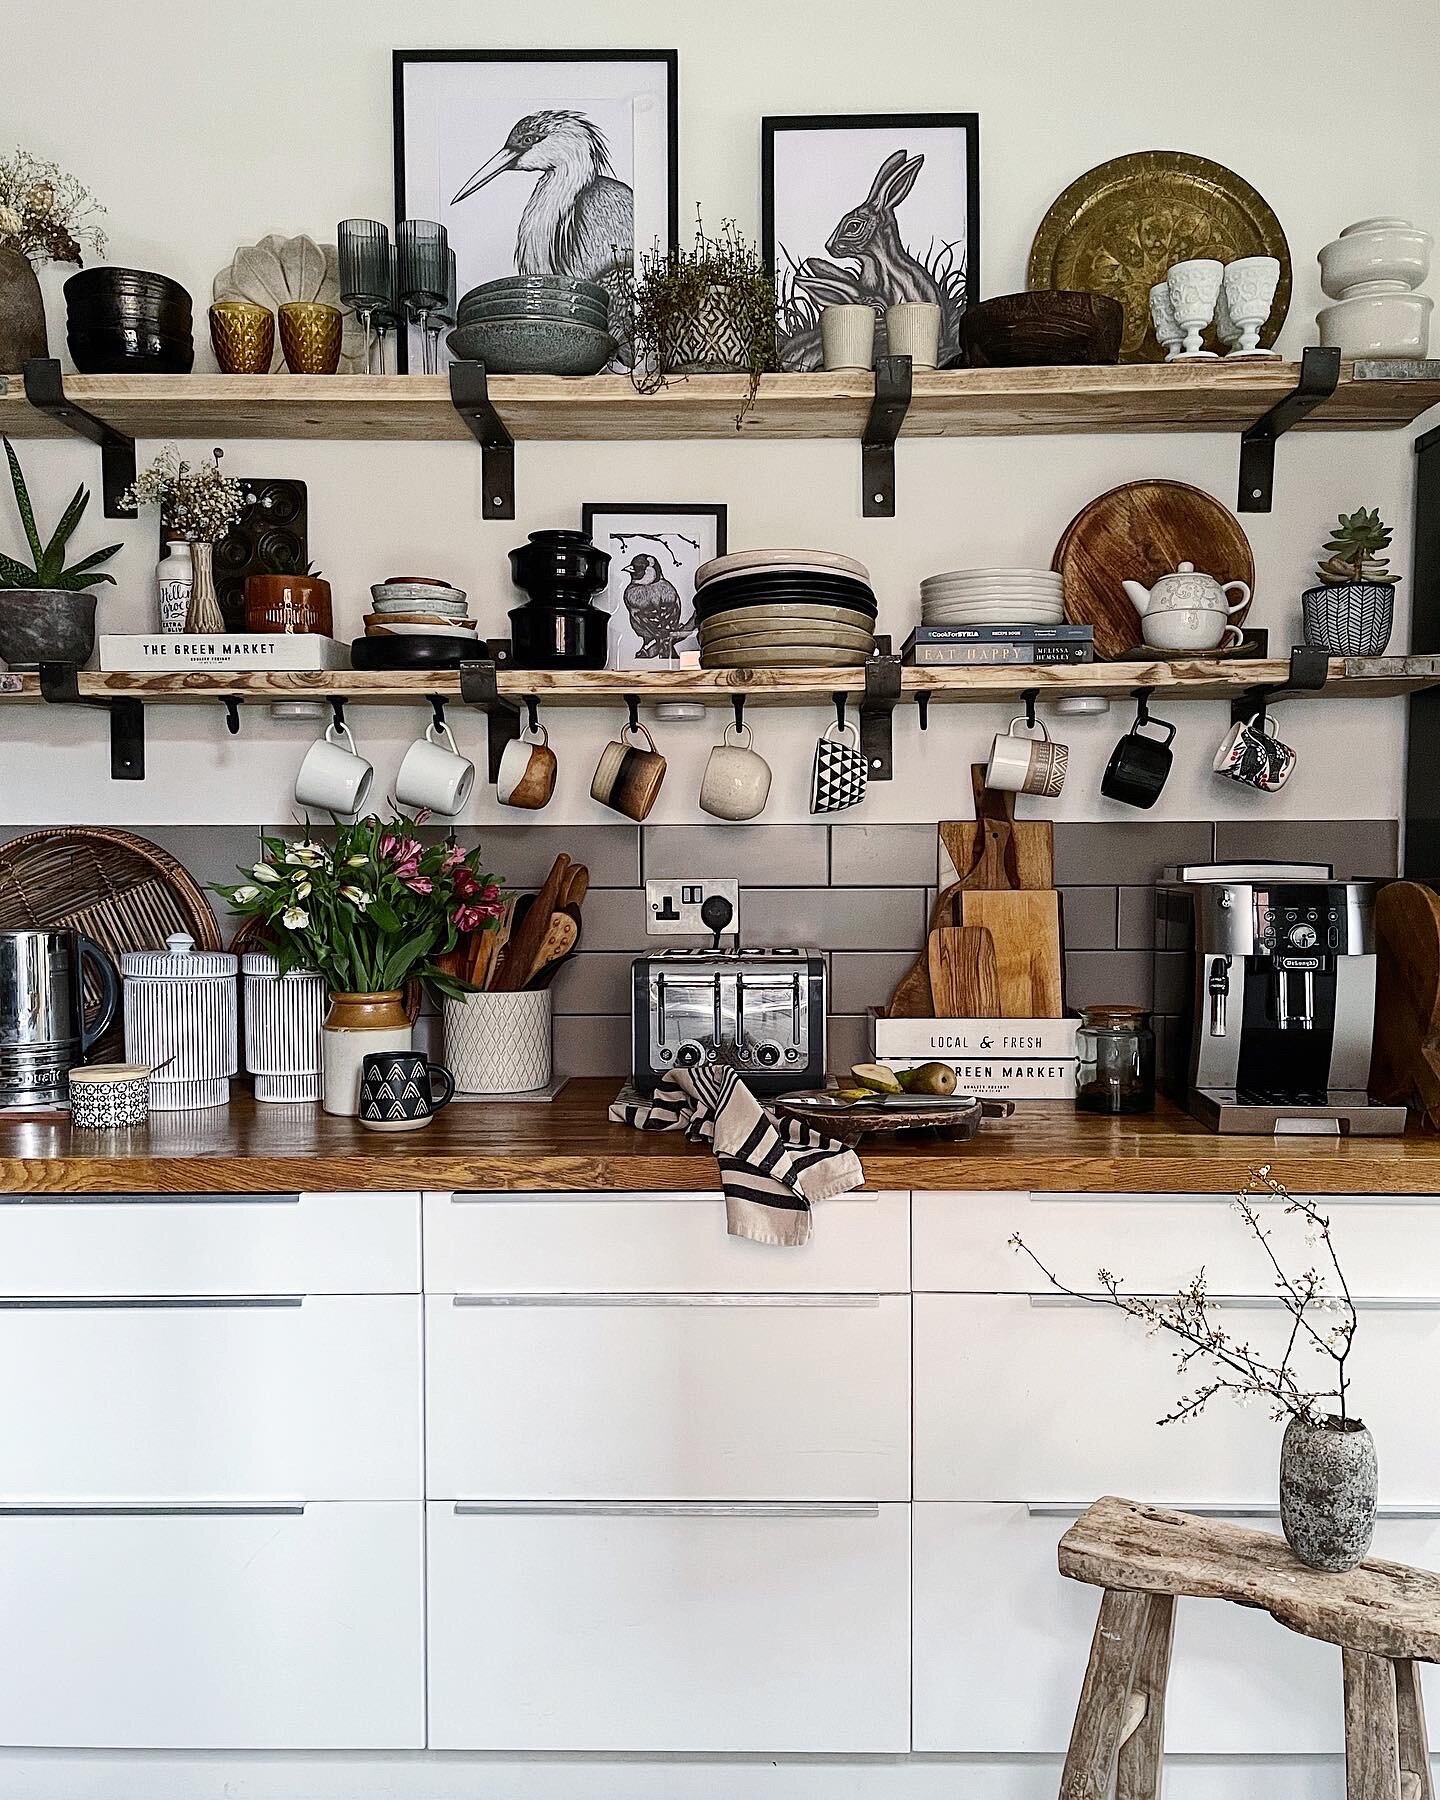
I had open shelves in my last place and have always loved them. It’s amazing how they open up a space. How easy it is to get what you need when cooking (why else do restaurant kitchens have open shelves!) and as a self confessed magpie I love how they allow me to display all my favourite kitchen paraphernalia. For those wondering they don’t need constant cleaning and dusting unless you’re a fan of a LOT of fried food! And if you place items on there that you use regularly then it’s not an issue. I love how they’ve allowed my personality to show with my collection of precious pieces on display. And of course are perfect for endless faffing and rearranging! So what if it takes a bit more effort to dust, it looks SO much better.
And thats it really. So far! Its not done, there’s more to come. The kitchen cabinets are obviously crying out to be changed in some way. I’ll leave the carcasses but we want to either paint them or clad them in wood and then will of course change the handles. Then the worktops are to change as the wood is rotting around the sink area and the sink too which is a pretty blah ikea stainless steel one. But that’s all for another day, so stay tuned and hope you’ve found this useful! And that it goes to show you don’t necessarily need to spend a lot of money to get a beautiful kitchen. Please leave any quesions you have in the comments.
Theresa x